Getting Started: depui un plan de zbor, de la un capăt la altul
Un exemplu complet — de la crearea contului până la zborul pe rută și confirmarea aterizării.
Parcurgerea aceasta urmărește un singur zbor: un drum planificat ca rută de la Vadeni la Tulcea, cu două puncte intermediare pe traseu, zburat în VFR. Urmează cei nouă pași în ordine. Fiecare pas trimite la pagina detaliată a acelui ecran, dacă vrei mai multe amănunte.
Preferi video?
Același drum este acoperit de tutorialul video complet — un singur videoclip cu capitole, de aproximativ 27 de minute, de la pregătirea profilurilor până la închiderea planului după aterizare. Capitolele care se potrivesc cu pașii de mai jos: Pilotul, aeronava și conturile pe portaluri, Depunerea planului de zbor și Anularea planului și anunțarea aterizării.
Pasul 1 — Îți faci contul Ro Flight (pe acest site)
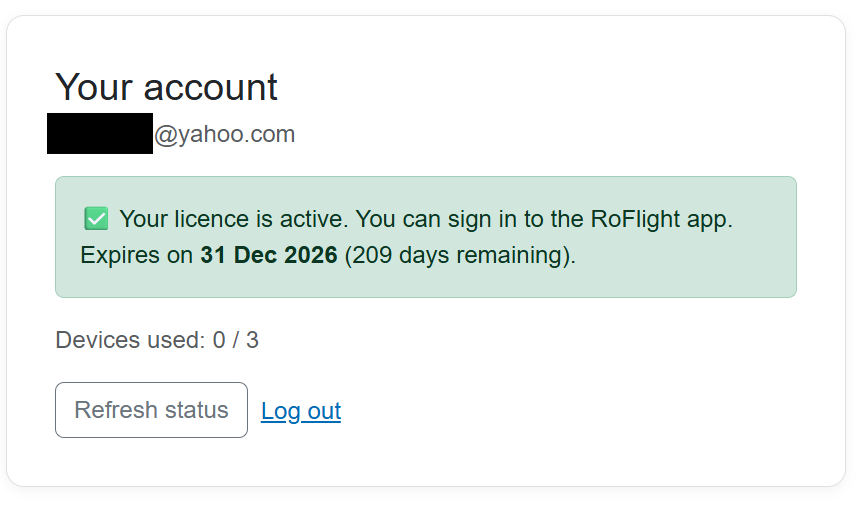
Ro Flight are nevoie de o licență, legată de un cont pe care ți-l faci aici, pe site. În perioada Early Access poți lua licența gratuită care ține până la sfârșitul acestui an: 31/12/2026.
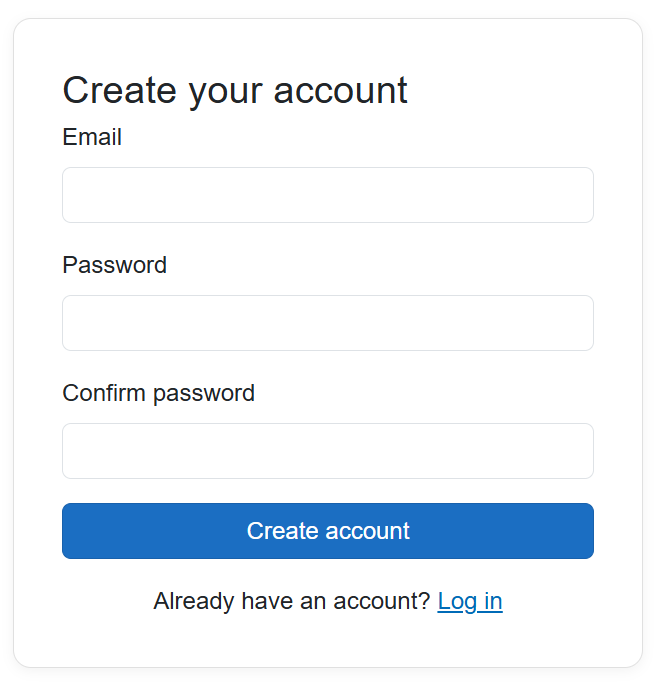
- Deschide pagina Cont nou.
- Scrie-ți adresa de e-mail, o parolă, confirmă parola, apoi apasă Creează contul.
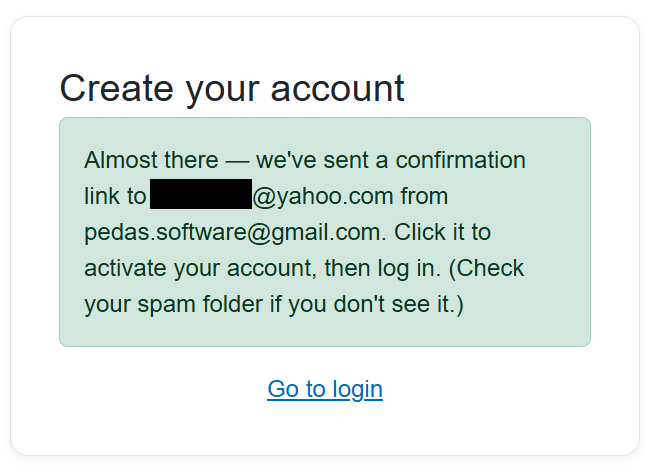
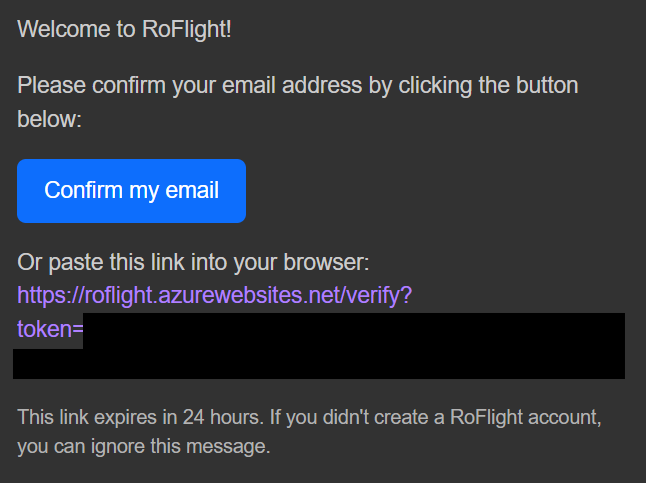
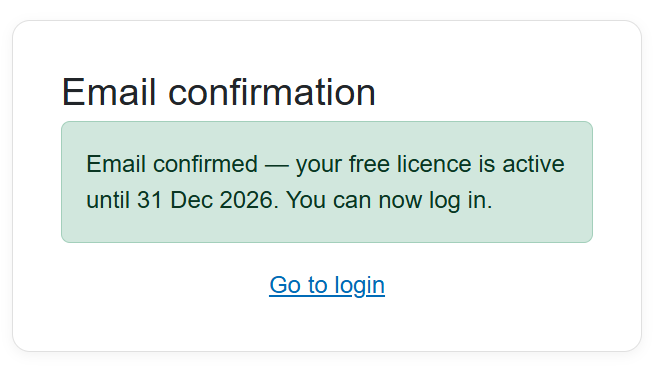
- Îți trimitem un link de confirmare de la pedas.software@gmail.com (dacă nu ajunge, caută și în folderul spam). Apasă linkul — deschide pagina de confirmare a adresei și îți activează licența gratuită.
- Întoarce-te la pagina de autentificare și intră o dată în cont, ca să vezi că funcționează.
Pasul 2 — Instalezi aplicația și te autentifici
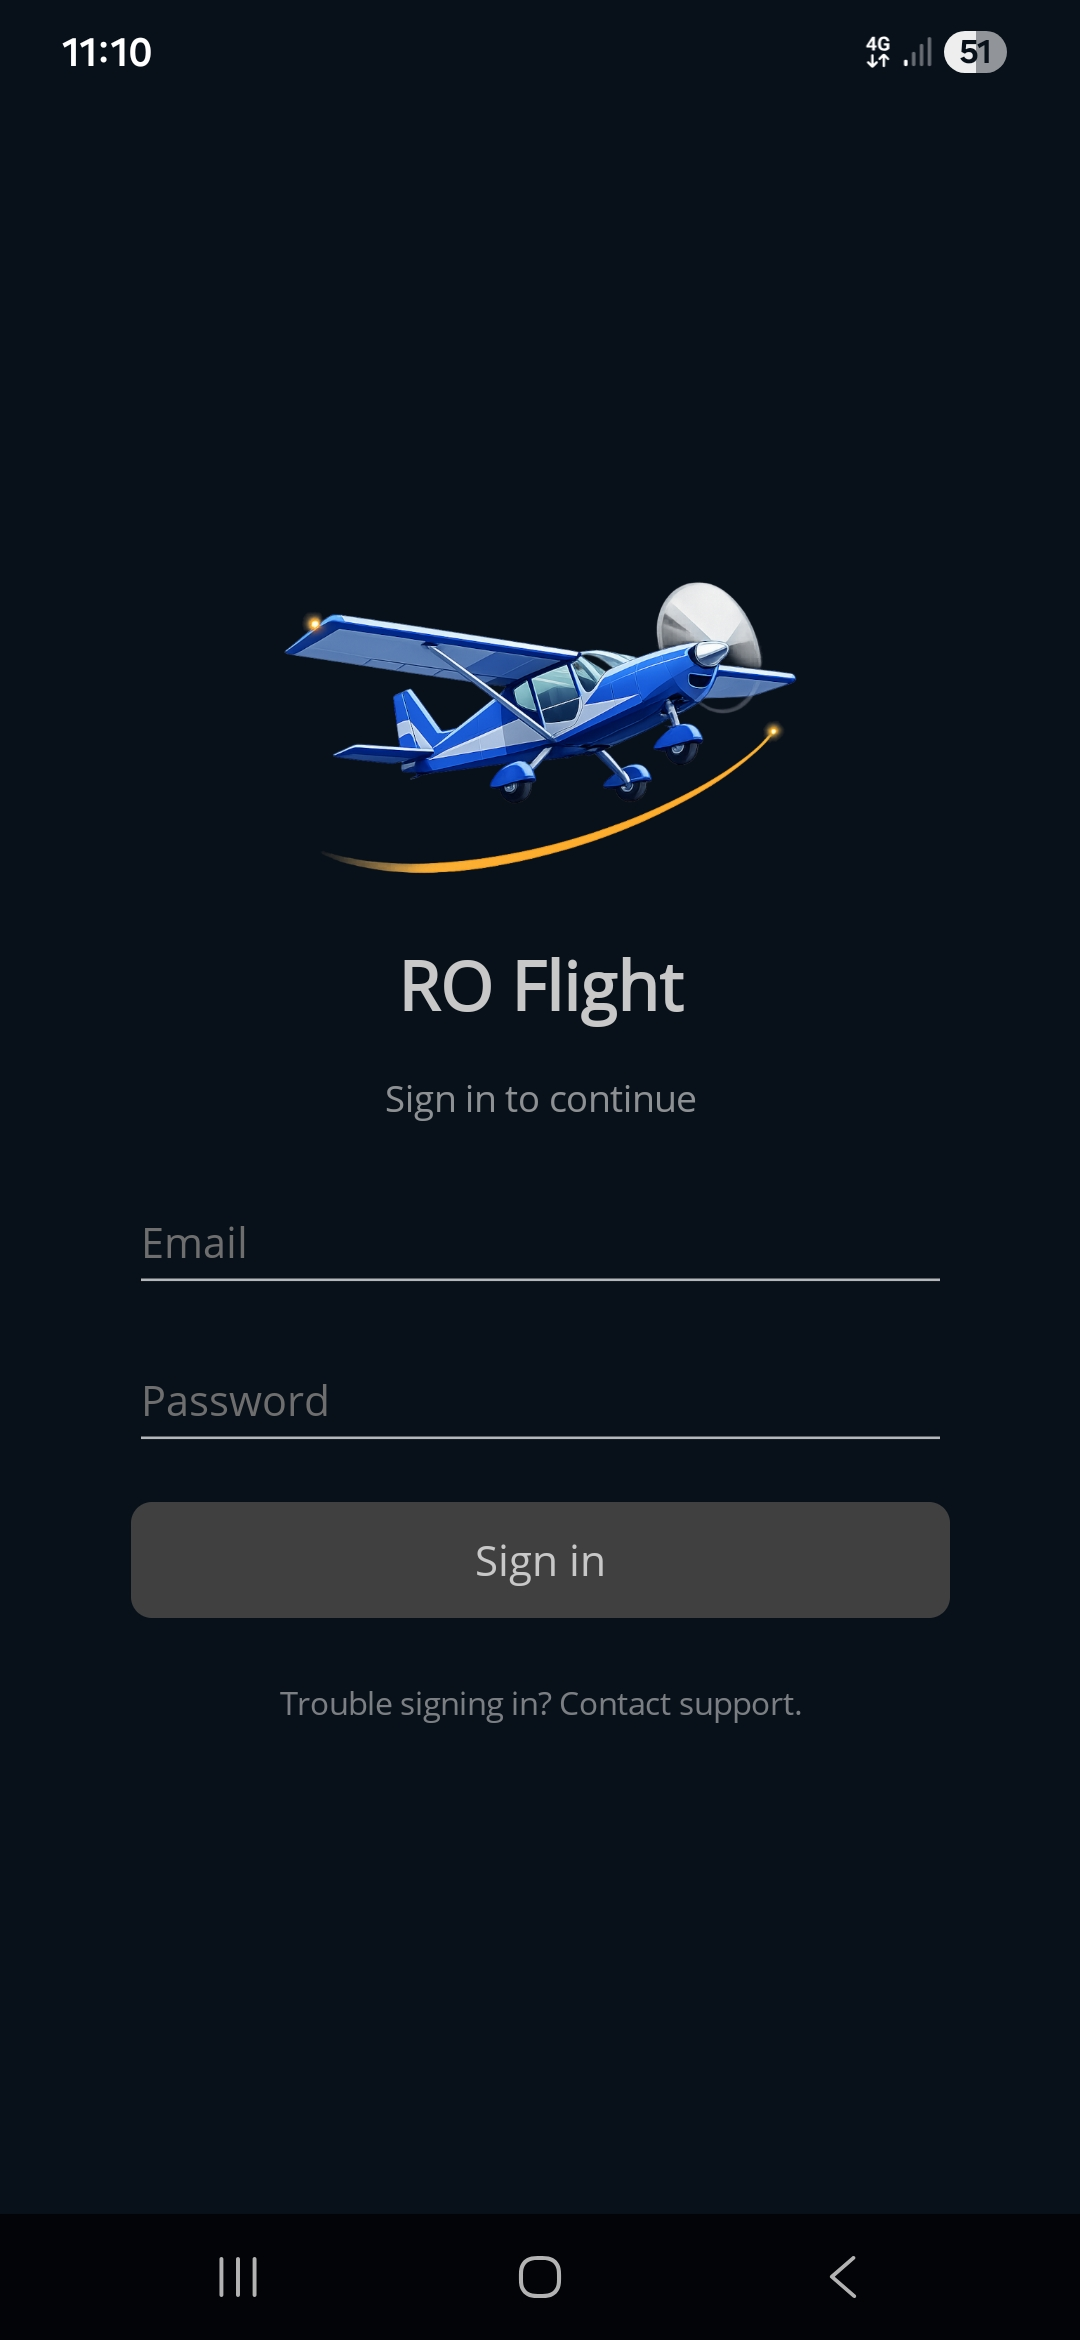
Instalează Ro Flight pe telefon și deschide-o. În ecranul Sign In, scrie aceeași adresă de e-mail și aceeași parolă pe care le-ai folosit pe site, apoi apasă Sign in. După ce licența îți este verificată, aplicația se deschide la planurile tale de zbor.
Vezi pagina Sign In pentru detalii.
Pasul 3 — Completezi Pilot Profile și îți verifici contul la autoritate
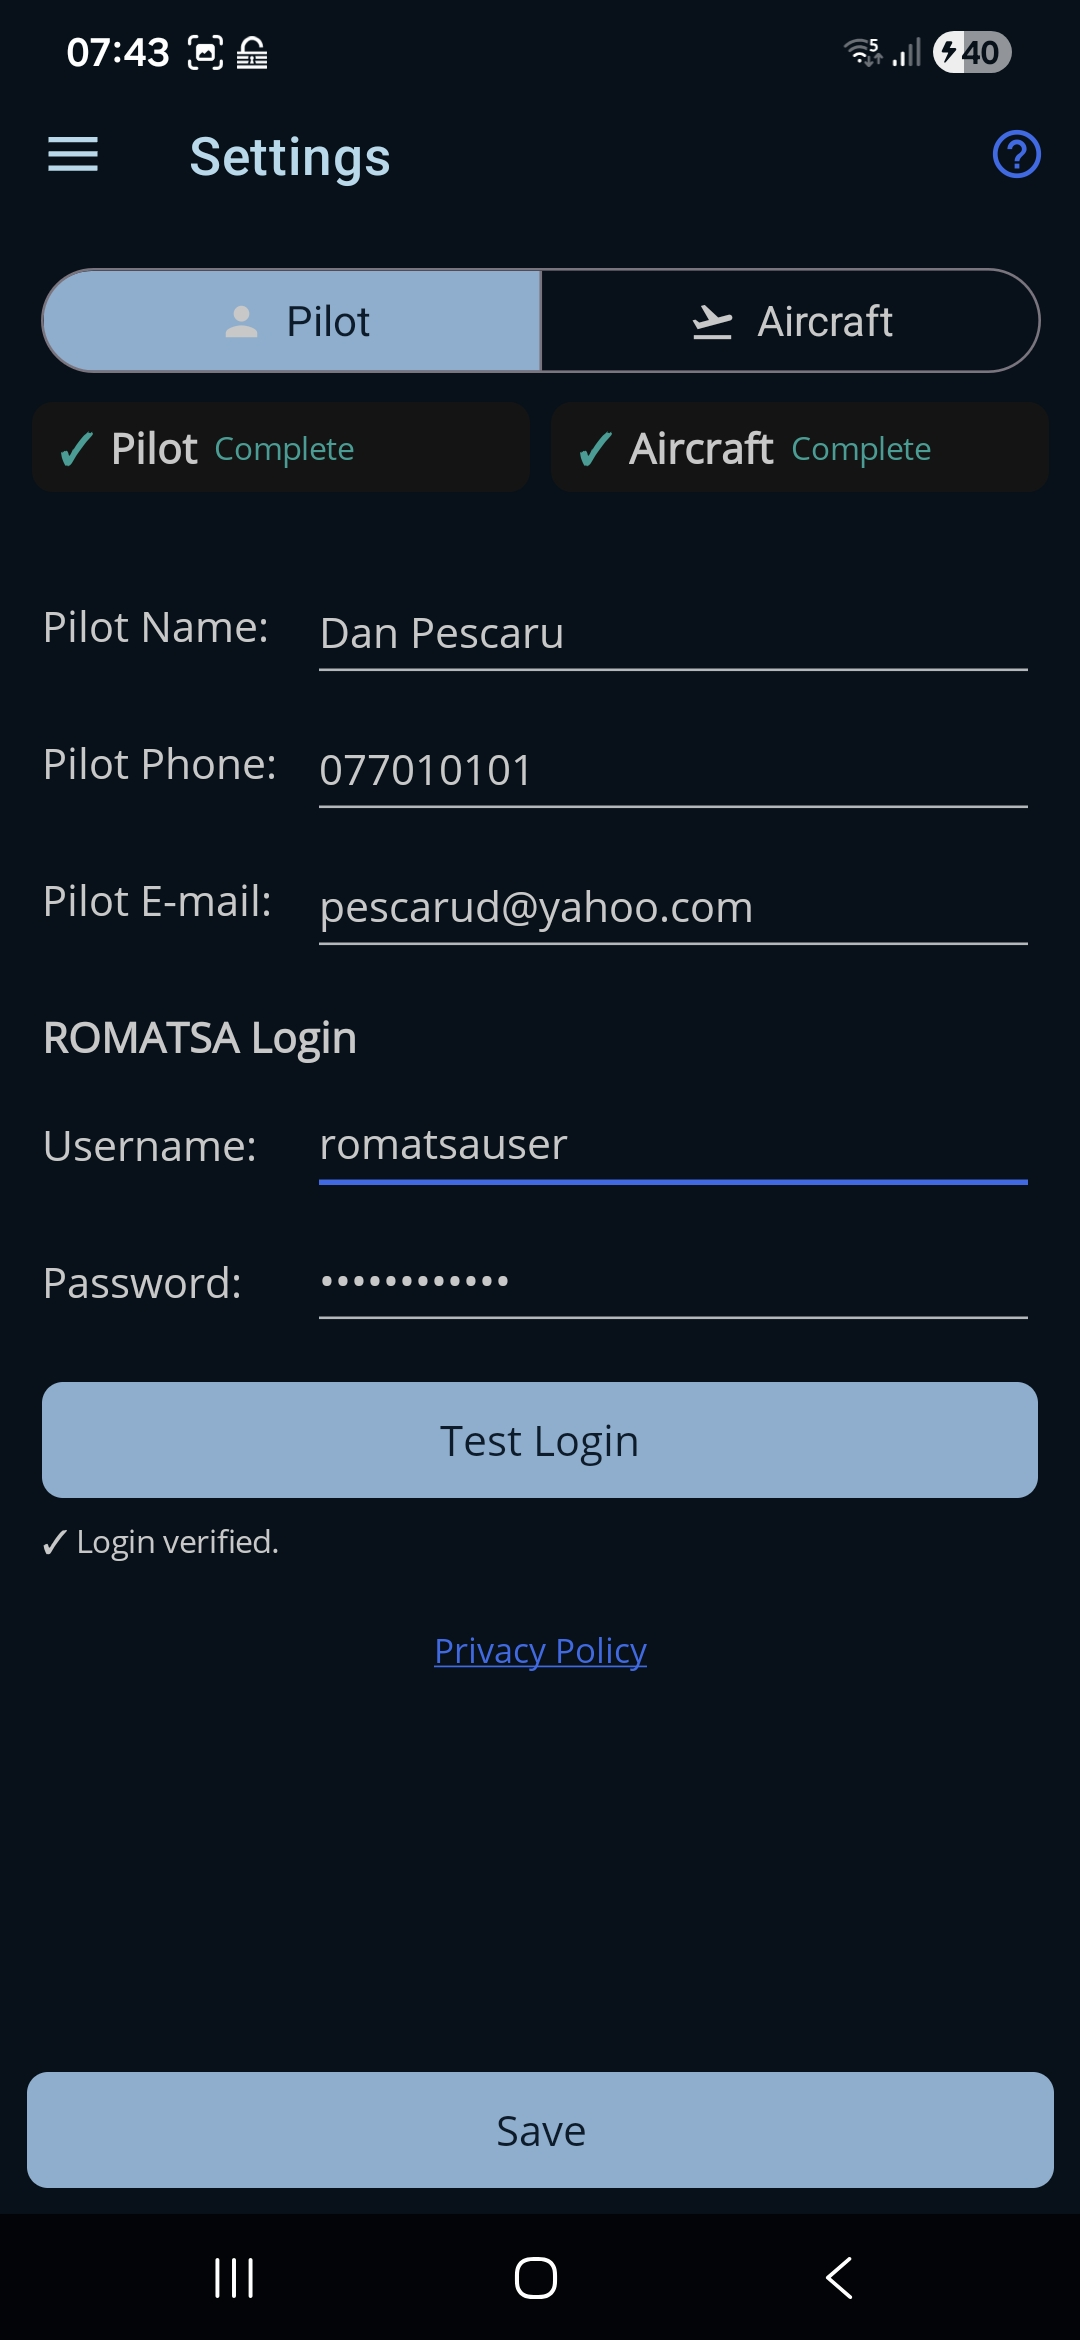
Deschide Settings → Pilot. Tot aici stau și conturile tale la autoritățile aeronautice — sunt două, iar tu ai nevoie doar de cel la care ai de gând să depui.
- Scrie Pilot Name, Pilot Phone și Pilot E-mail.
- La ROMATSA Login, scrie Username și Password de la ROMATSA.
- Apasă Test Login din acea secțiune și așteaptă ✓ verde. Fiecare autoritate are nevoie de propriul Test Login înainte să poți depune la ea.
- Dacă depui și notificări VFR în clasa G, completează AACR Login — vfr.caa.ro (adresă de e-mail și parolă) și apasă și acolo Test Login. Sari peste pasul acesta dacă nu folosești canalul respectiv — pastila ✓ Complete nu îl așteaptă.
- Apasă Save (un singur buton, care salvează și secțiunea Aircraft).
Vezi pagina Pilot Profile pentru detalii.
Pasul 4 — Îți configurezi Aircraft Profile
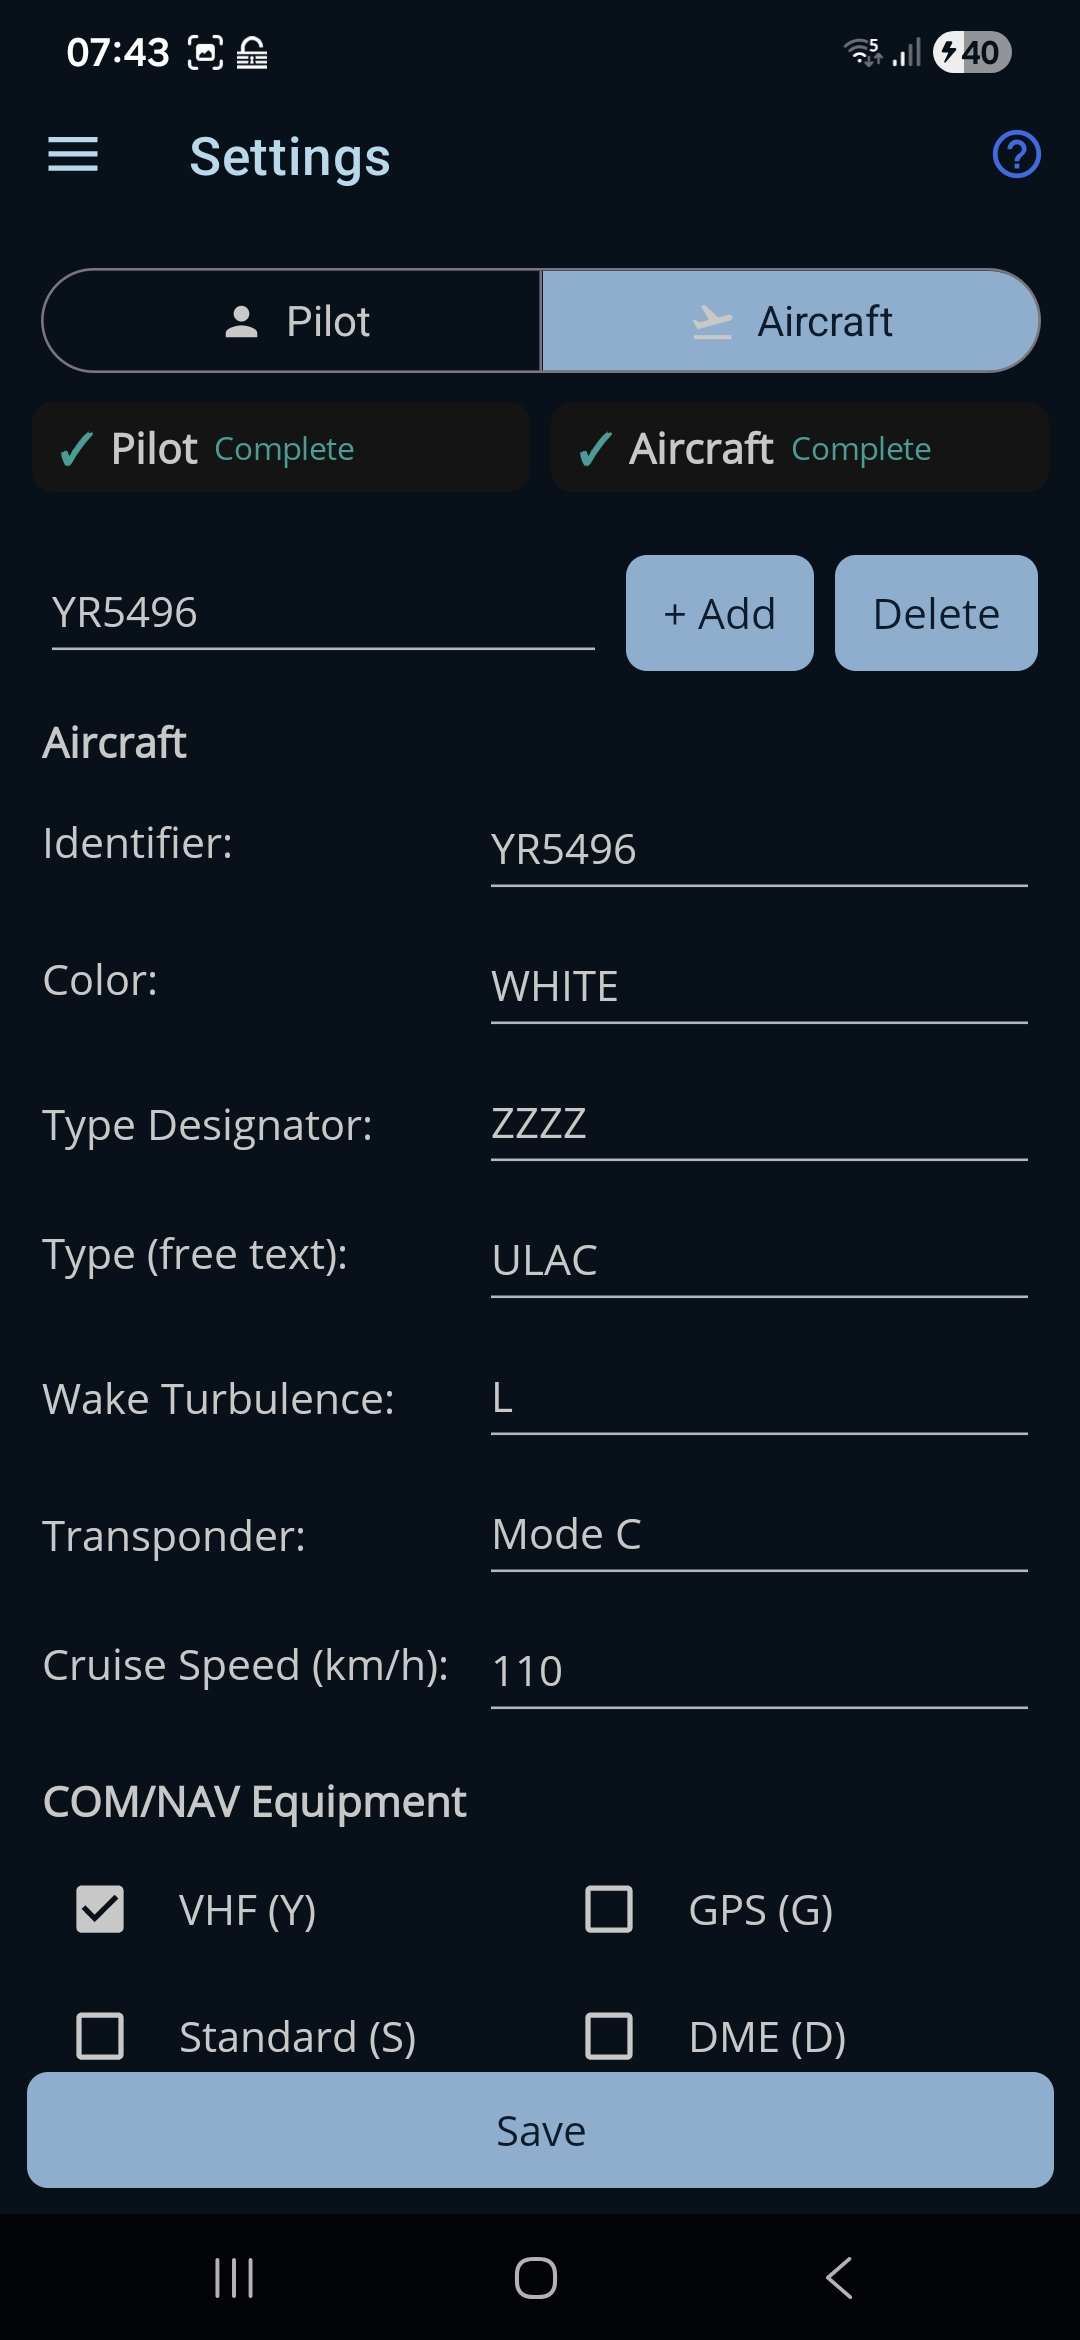
Deschide Settings → Aircraft Profile. Aeronava selectată este folosită la fiecare plan de zbor pe care îl depui.
- Apasă + Add ca să creezi un profil.
- Completează Aircraft Identifier (numărul de înmatriculare, de exemplu YR5496), Color, Type și Cruise Speed.
- La Type Designator, scrie ZZZZ, apoi scrie ULAC (Ultra Light Aircraft) în Type (text liber).
- În câmpul Transponder, spune ce fel de transponder ai la bord.
- Bifează, la COM/NAV Equipment, radiourile și echipamentele de navigație pe care le ai cu adevărat (cel puțin unul este obligatoriu), plus dotările de urgență și de supraviețuire care se aplică.
- Apasă Save. Aeronava pe care o ai selectată sus devine aeronava activă.
Dacă aeronava ta are un cod ICAO de tip, conform ICAO Doc 8643, îl poți scrie la Type Designator, în loc de ZZZZ, caz în care Type (text liber) nu mai este nevoie. Dacă nu ai transponder, lasă câmpul Transponder pe none.
Vezi pagina Aircraft Profile pentru detalii.
Pasul 5 — Creezi un plan de zbor (ex: Vadeni → Tulcea)
Du-te la Flight Plans (ecranul principal) și apasă butonul + din colțul din dreapta-jos. Se deschide formularul planului de zbor.
- Sus, alege modul Waypoint.
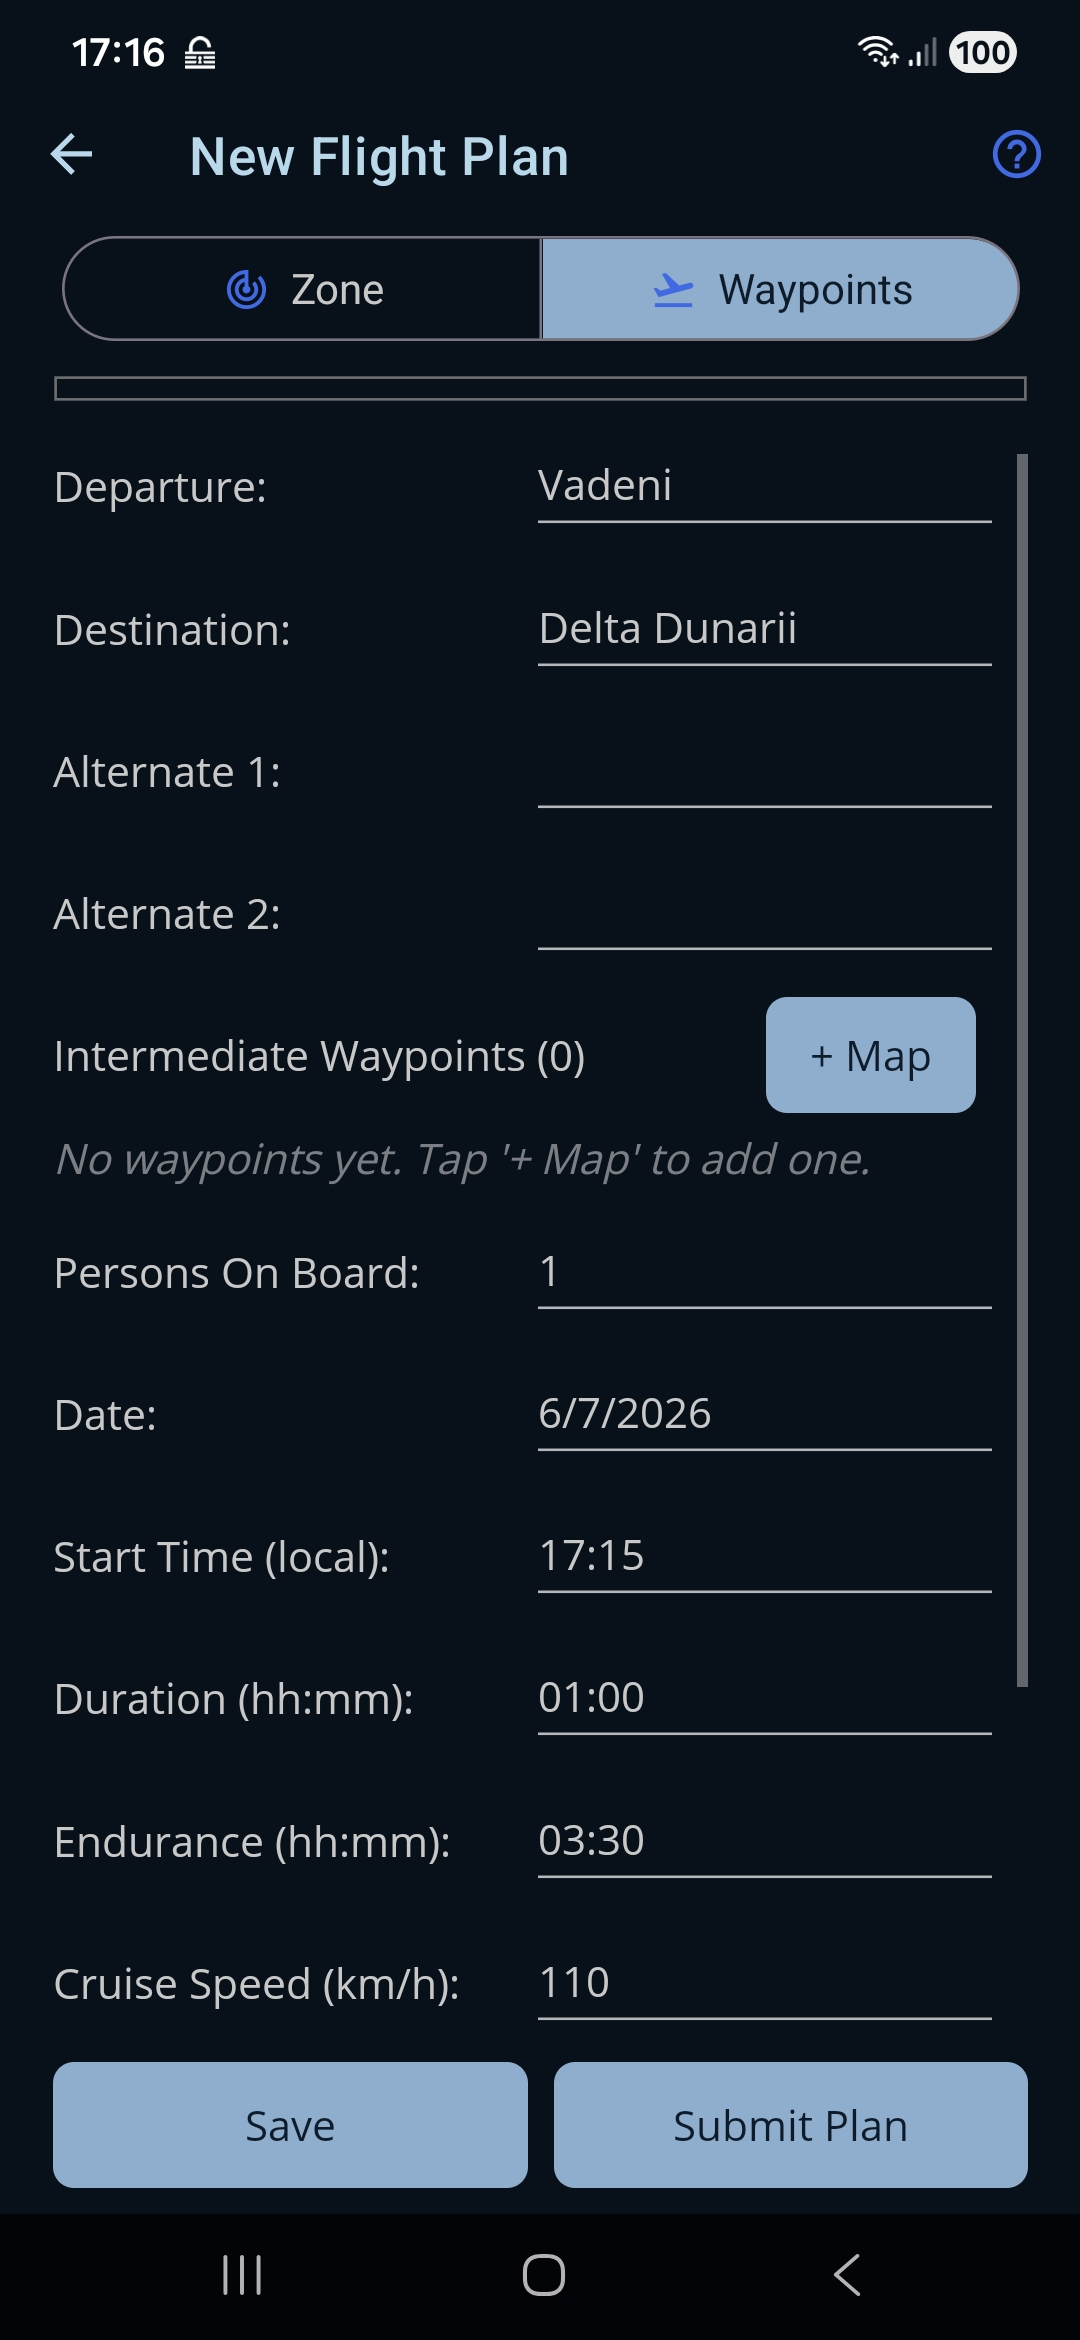
- Pune Departure pe Vadeni. La Destination, aerodromul care deservește Tulcea este trecut sub numele lui — alege Delta Dunării.
- Completează Persons On Board, Date, Start Time, Duration planificată, Endurance și Cruise Speed.
- Lasă VFR pornit și scrie Altitude la care ai de gând să zbori. Sunt setări separate: VFR hotărăște cum apare nivelul într-un plan de zbor ICAO, iar altitudinea este ce cere o notificare pe vfr.caa.ro — așa că a o completa nu costă nimic și îți lasă deschise ambele canale.
Dacă un aerodrom nu este în listă, alege Choose On Map și îl vei pune tu pe hartă. Dacă dezactivezi opțiunea VFR, în planul de zbor ICAO se depune un nivel anume și fiecare punct de rută își poate purta propriul nivel și propria viteză.
Zbori în formație? Pornește Formation flight și spune câte aeronave sunt și de ce tipuri — vezi pagina Flight Plan Form.
Vezi pagina Flight Plan Form pentru fiecare câmp.
Pasul 6 — Adaugi cele două puncte intermediare, pe hartă
În secțiunea Intermediate Waypoints, apasă + Map. Asta deschide harta de construit rute (nu o fereastră), unde pui punctele rutei. Pentru zborul acesta vei adăuga cele două puncte cu nume, RIPGA și REBDI.
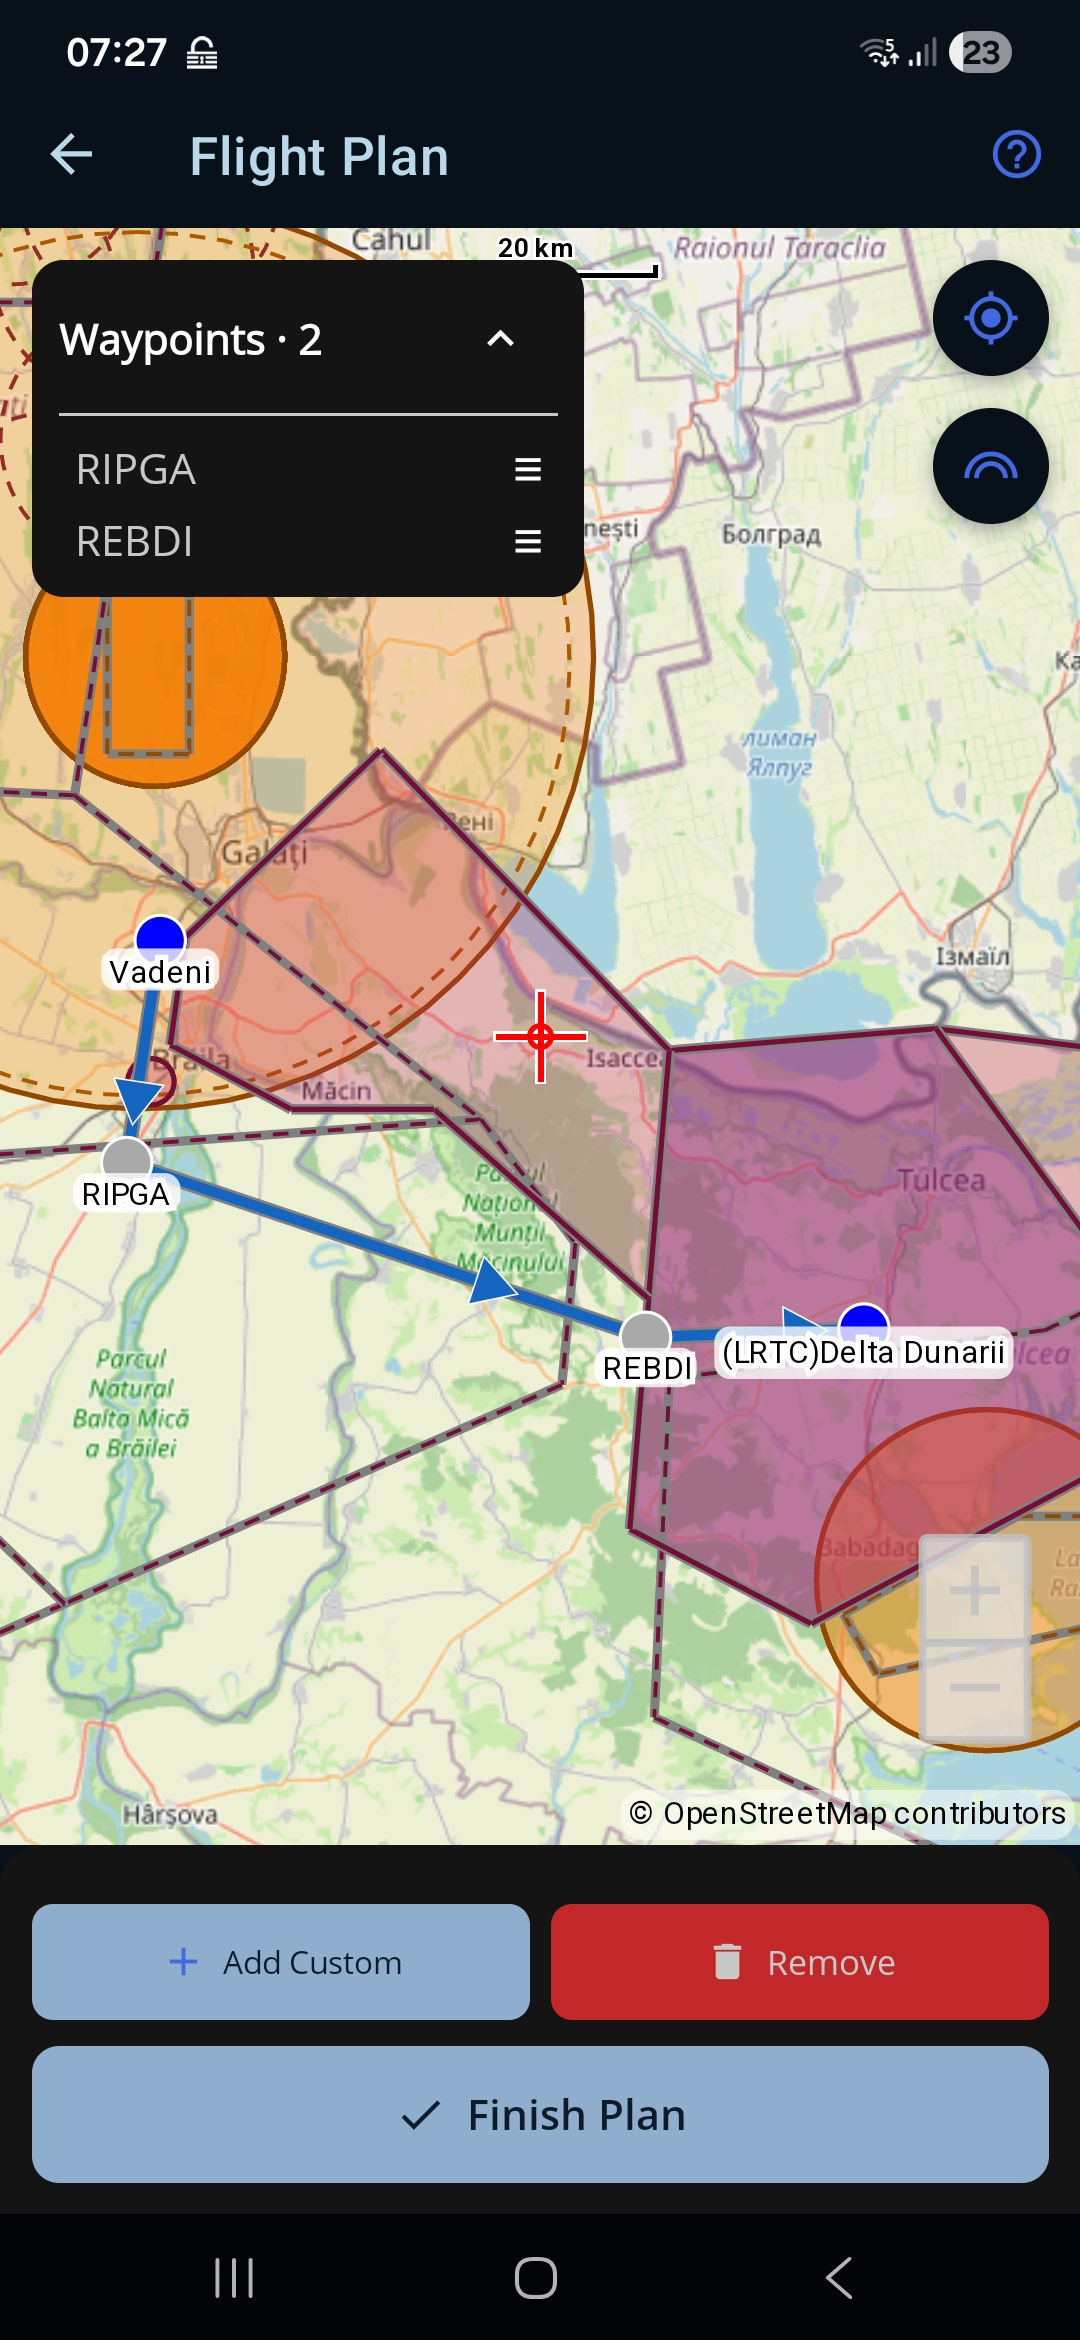
- Apasă punctul RIPGA de pe hartă ca să îl selectezi, apoi apasă Add Waypoint.
- Apasă punctul REBDI de pe hartă ca să îl selectezi, apoi apasă Add Waypoint.
- Apasă Finish Plan ca să te întorci în formular, cu cele două puncte completate.
Ambele puncte se văd acum în lista din stânga sus, în ordinea în care le-ai adăugat. Dacă ai greșit, trage de mâner (≡) ca să le schimbi ordinea sau apasă Remove ca să îl ștergi pe ultimul adăugat și încearcă din nou.
Ca să pui un punct undeva unde nu există un punct cu nume, asigură-te că nu ai niciun punct selectat (apasă într-un loc gol de pe hartă ca să deselectezi), potrivește ținta din centru acolo unde vrei și apasă Add Custom în loc de Add Waypoint.
Înapoi în formular, cele două puncte apar acum în listă, în ordinea în care le vei zbura. Poți face Edit sau Remove pe oricare dintre ele înainte de depunere.
Pasul 7 — Salvezi și depui planul
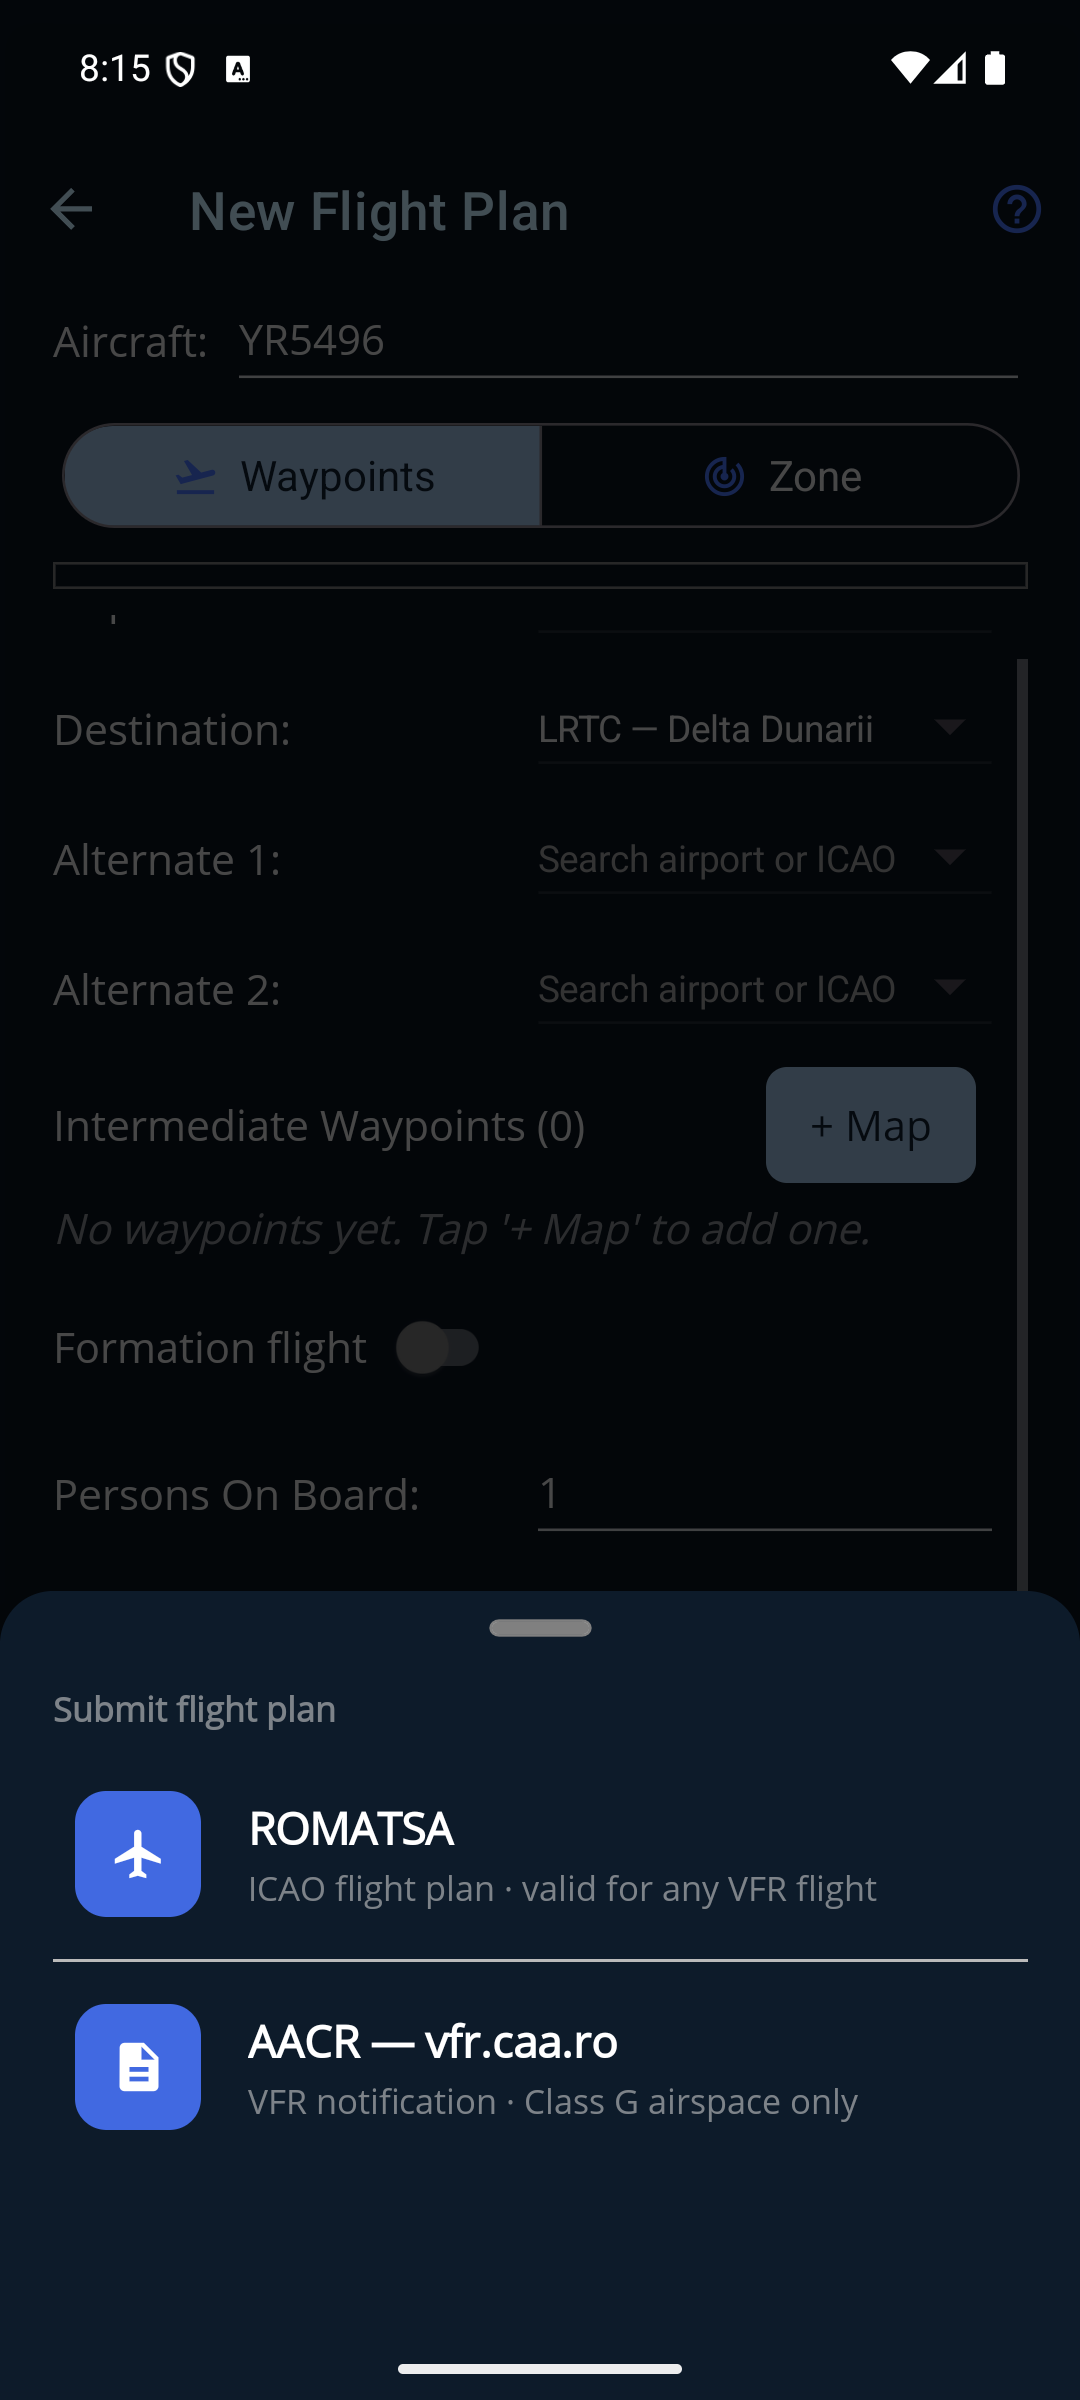
Când formularul este complet, apasă Submit Plan, în josul paginii. Urcă o fereastră „Submit flight plan”, care te întreabă unde depui:
- Alege ROMATSA pentru un plan de zbor ICAO, valabil pentru orice zbor VFR — asta folosește parcurgerea de față. Alege AACR — vfr.caa.ro doar dacă tot zborul rămâne în spațiu aerian clasa G.
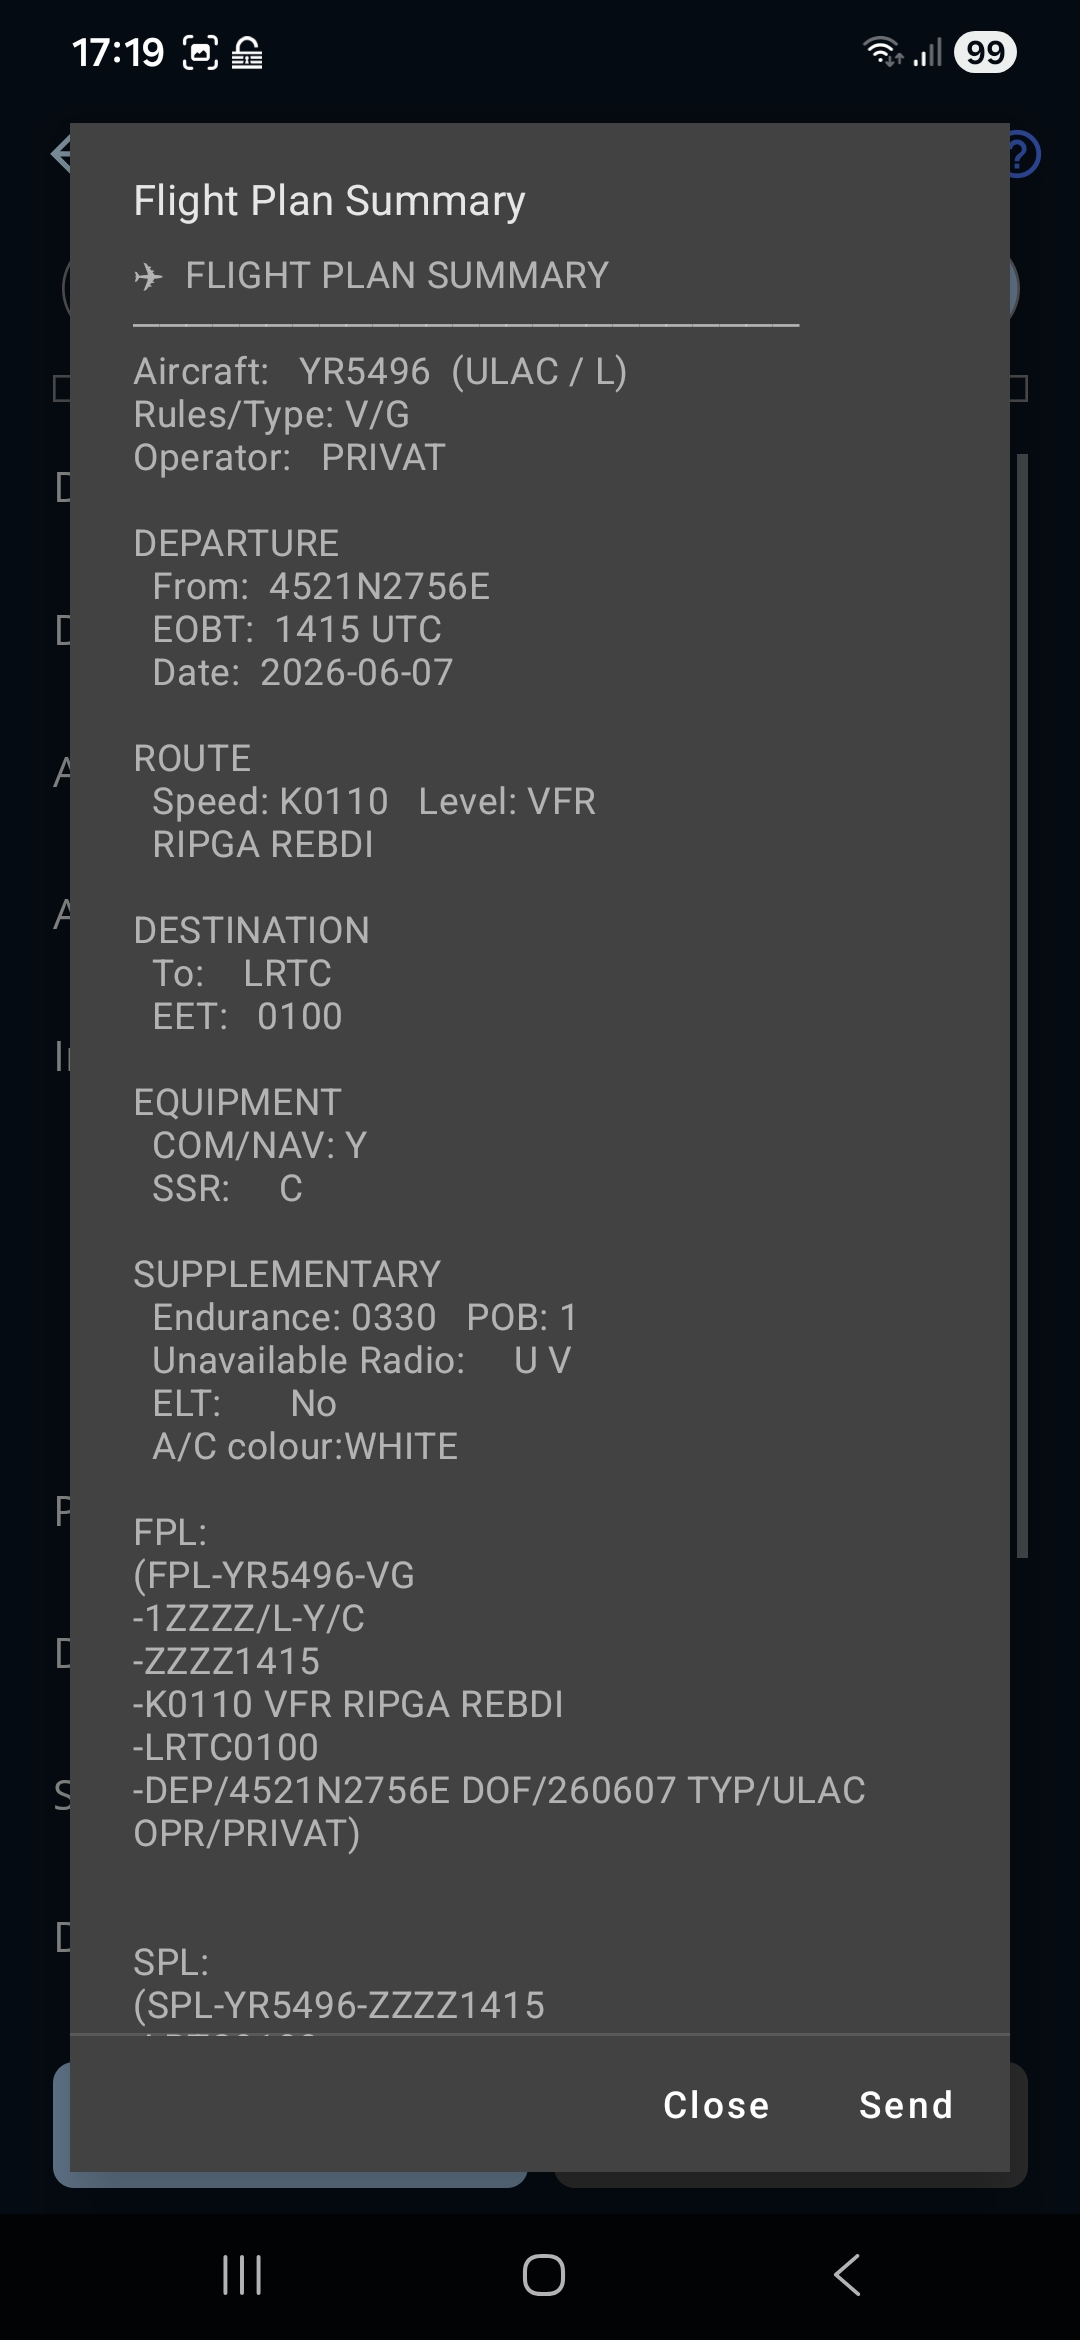
- Uită-te peste rezumatul pe care ți-l arată acea autoritate și apasă Send.
- Citește notificarea care vine înapoi. ✓ CONFIRMED BY … înseamnă că aplicația a găsit planul în sistemul autorității; orice altceva înseamnă că trebuie să confirmi tu, înainte să zbori. ROMATSA îți cere mereu să confirmi, fiindcă nu publică nicio stare pe care aplicația să o poată citi.
Dacă a mers, starea planului trece în Submitted.
Nu ești gata să depui? Apasă Save în schimb, ca să păstrezi planul ca ciornă, la care te poți întoarce mai târziu.
Un canal pentru care nu ai rulat Test Login apare estompat în fereastră și îți spune de ce — întoarce-te la Pasul 3 ca să îl pregătești.
Dacă ai folosit Choose On Map pentru vreun aerodrom și încă nu l-ai poziționat, butonul scrie întâi Go To Map — pune punctul, apasă Finish Plan și devine Submit Plan.
Vezi paginile Flight Plan Form și Flight Plan Detail pentru detalii.
Pasul 8 — Îl zbori cu Go Fly
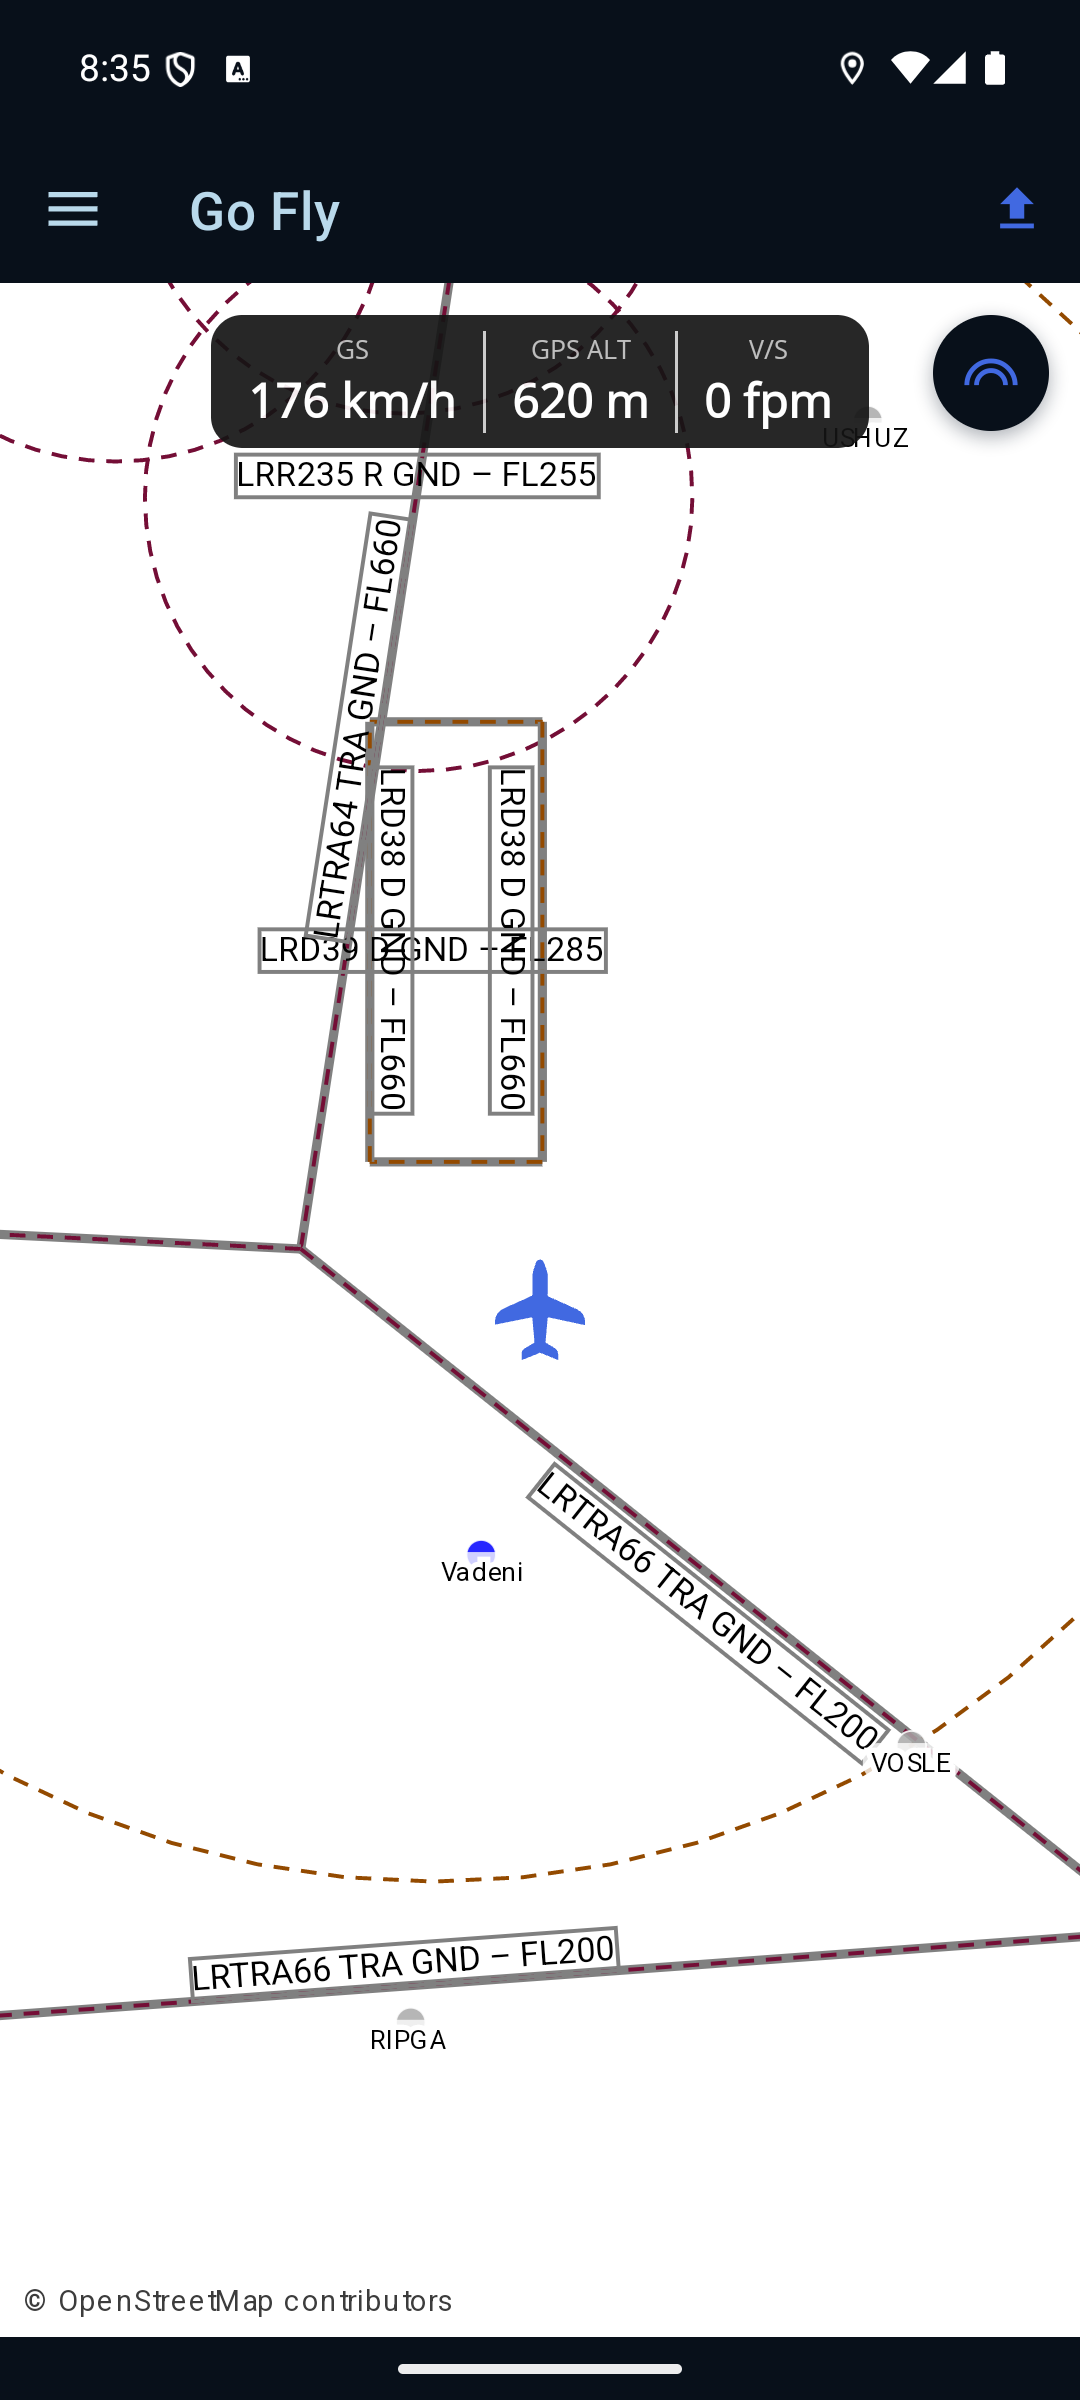
Deschide Go Fly din meniul lateral — sau apasă butonul Go Fly din capul paginii de detalii a planului — ca să urmărești zborul pe harta care se mișcă. Aeronava ta apare ca un simbol îndreptat în direcția în care mergi, harta te urmează, iar banda de sus arată GS (viteza la sol), GPS ALT și V/S (rata de urcare sau de coborâre), în unitățile alese de tine.
Prima dată, permite locația cât timp folosești aplicația. GPS-ul merge doar cât timp acest ecran este deschis, iar ecranul este ținut aprins, așa că așteaptă-te ca bateria să scadă mai repede decât de obicei. GPS ALT este o înălțime GNSS, nu o indicație de altimetru — zboară aeronava după instrumentele tale certificate și folosește harta pentru conștientizarea situației.
Vezi pagina Go Fly pentru detalii.
Pasul 9 — După ce aterizezi, confirmi aterizarea
Fă pasul acesta numai după ce zborul s-a încheiat și ești înapoi la sol. O confirmare de aterizare îi spune autorității la care ai depus că zborul s-a încheiat. Se întoarce la acea autoritate de la sine — nu ai ce alege.
- Deschide planul din lista Flight Plans, ca să ajungi la pagina lui de detalii, apoi apasă Inform Landing.
- Scrie data și ora reale ale aterizării, apoi apasă Confirm.
- Fereastra Landing Details îți arată destinația planificată (Delta Dunării / LRTC). Las-o așa cum este și apasă Ok.
- Uită-te peste mesajul ARR (de sosire) asamblat și apasă Send. Starea planului trece în Landed.
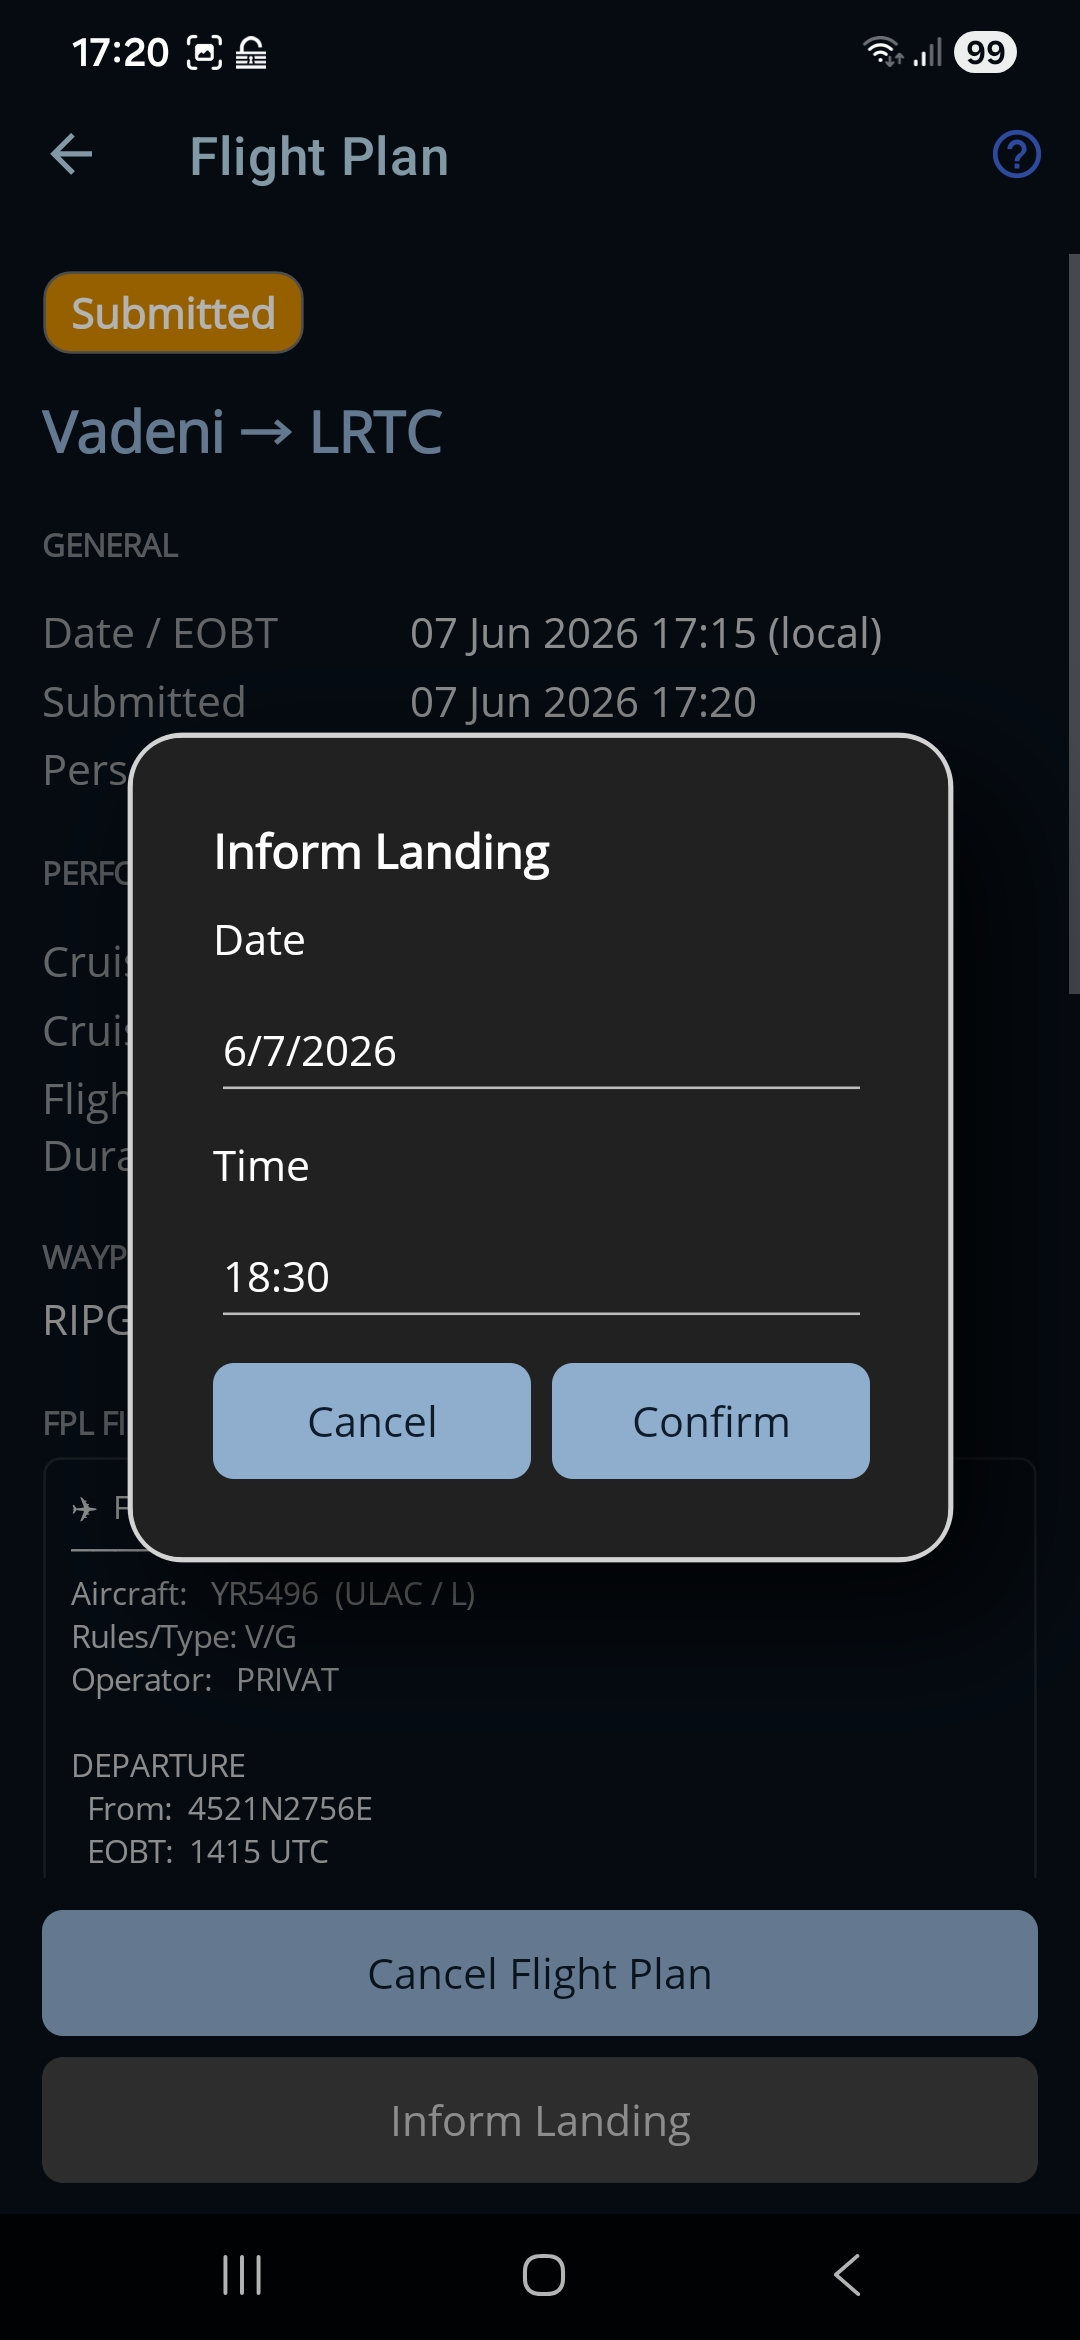
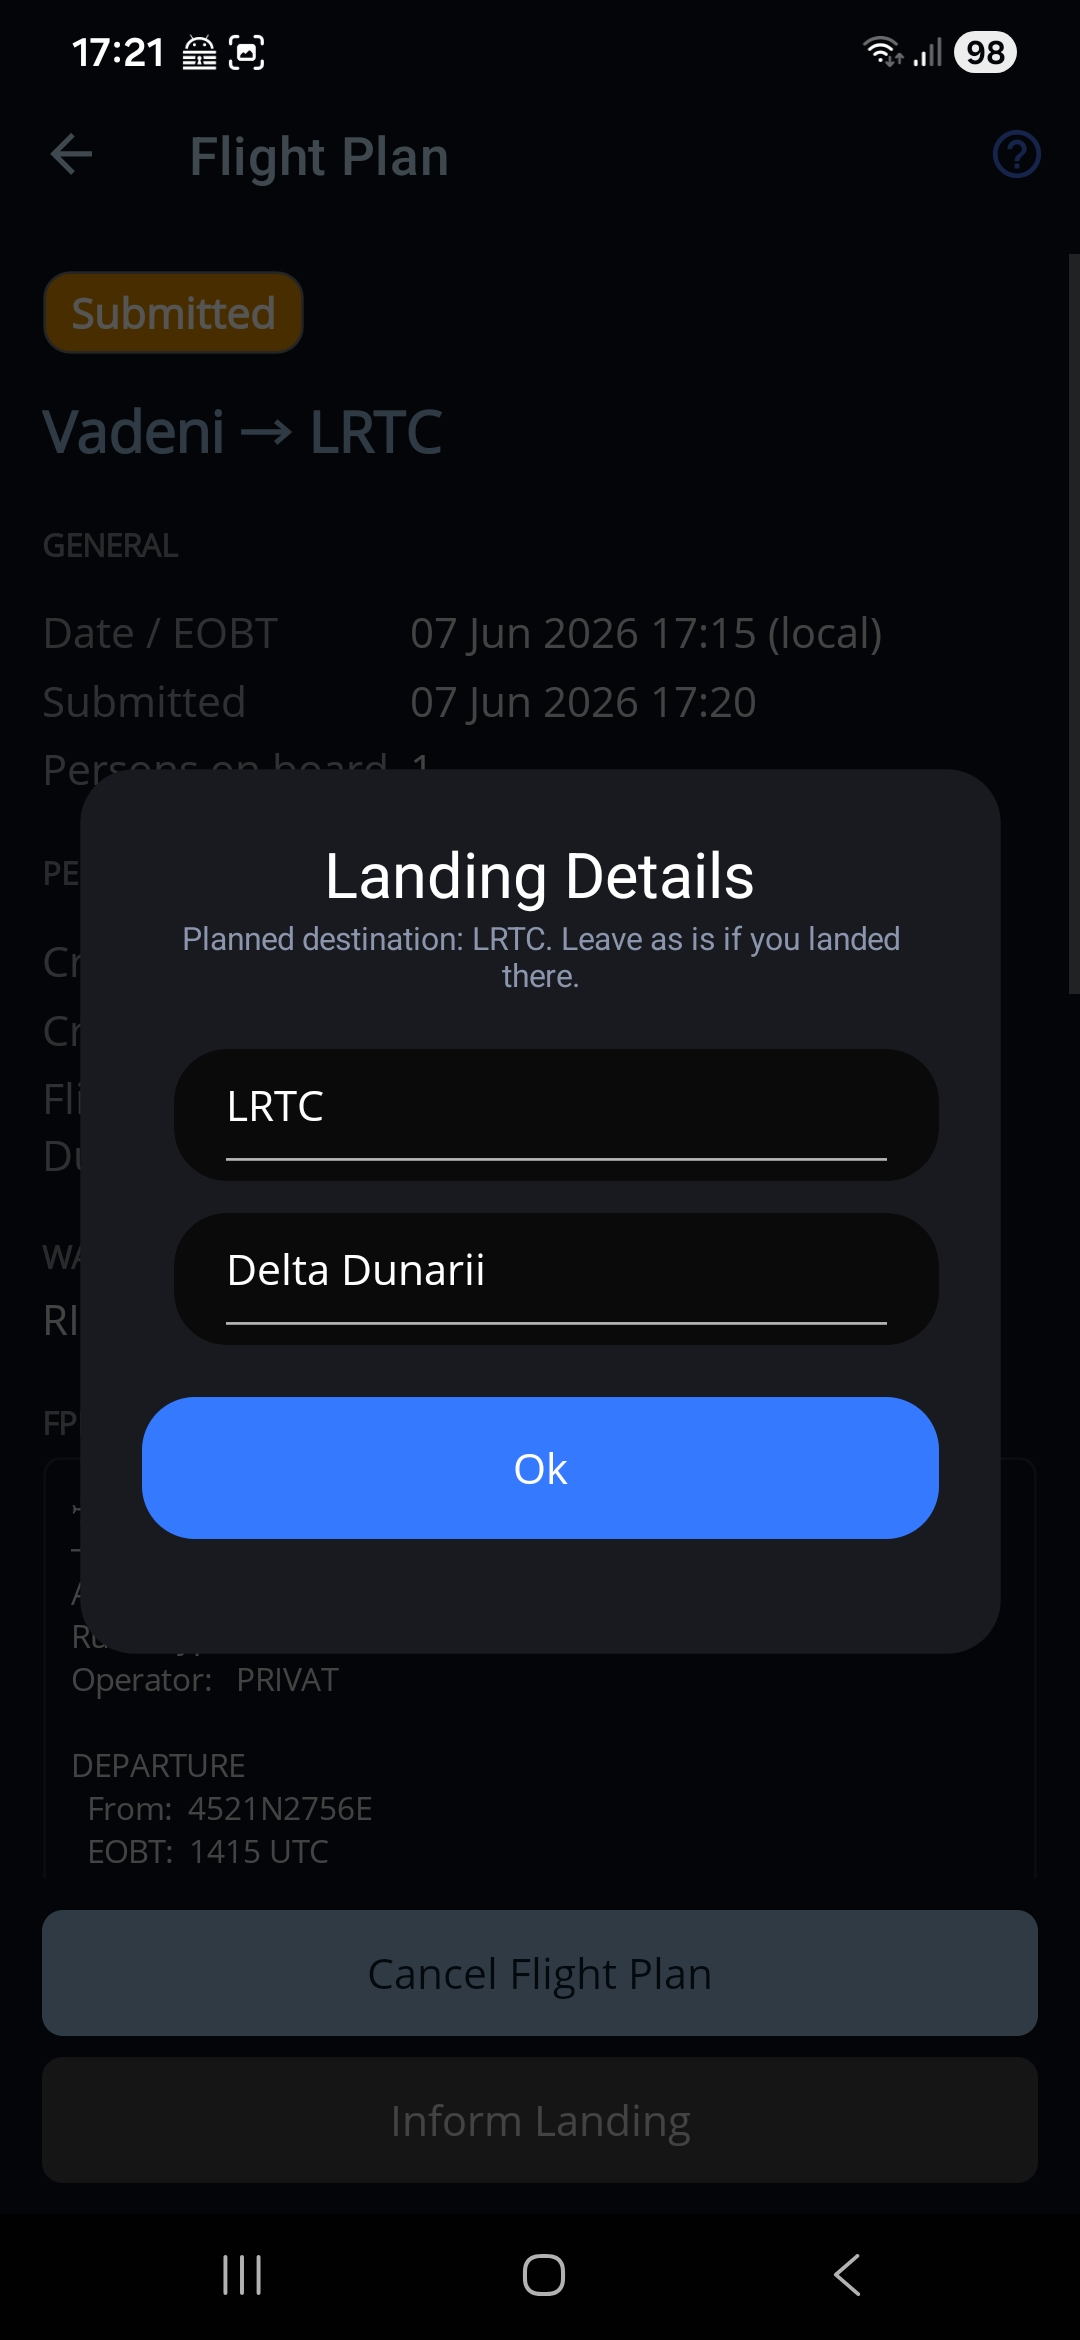
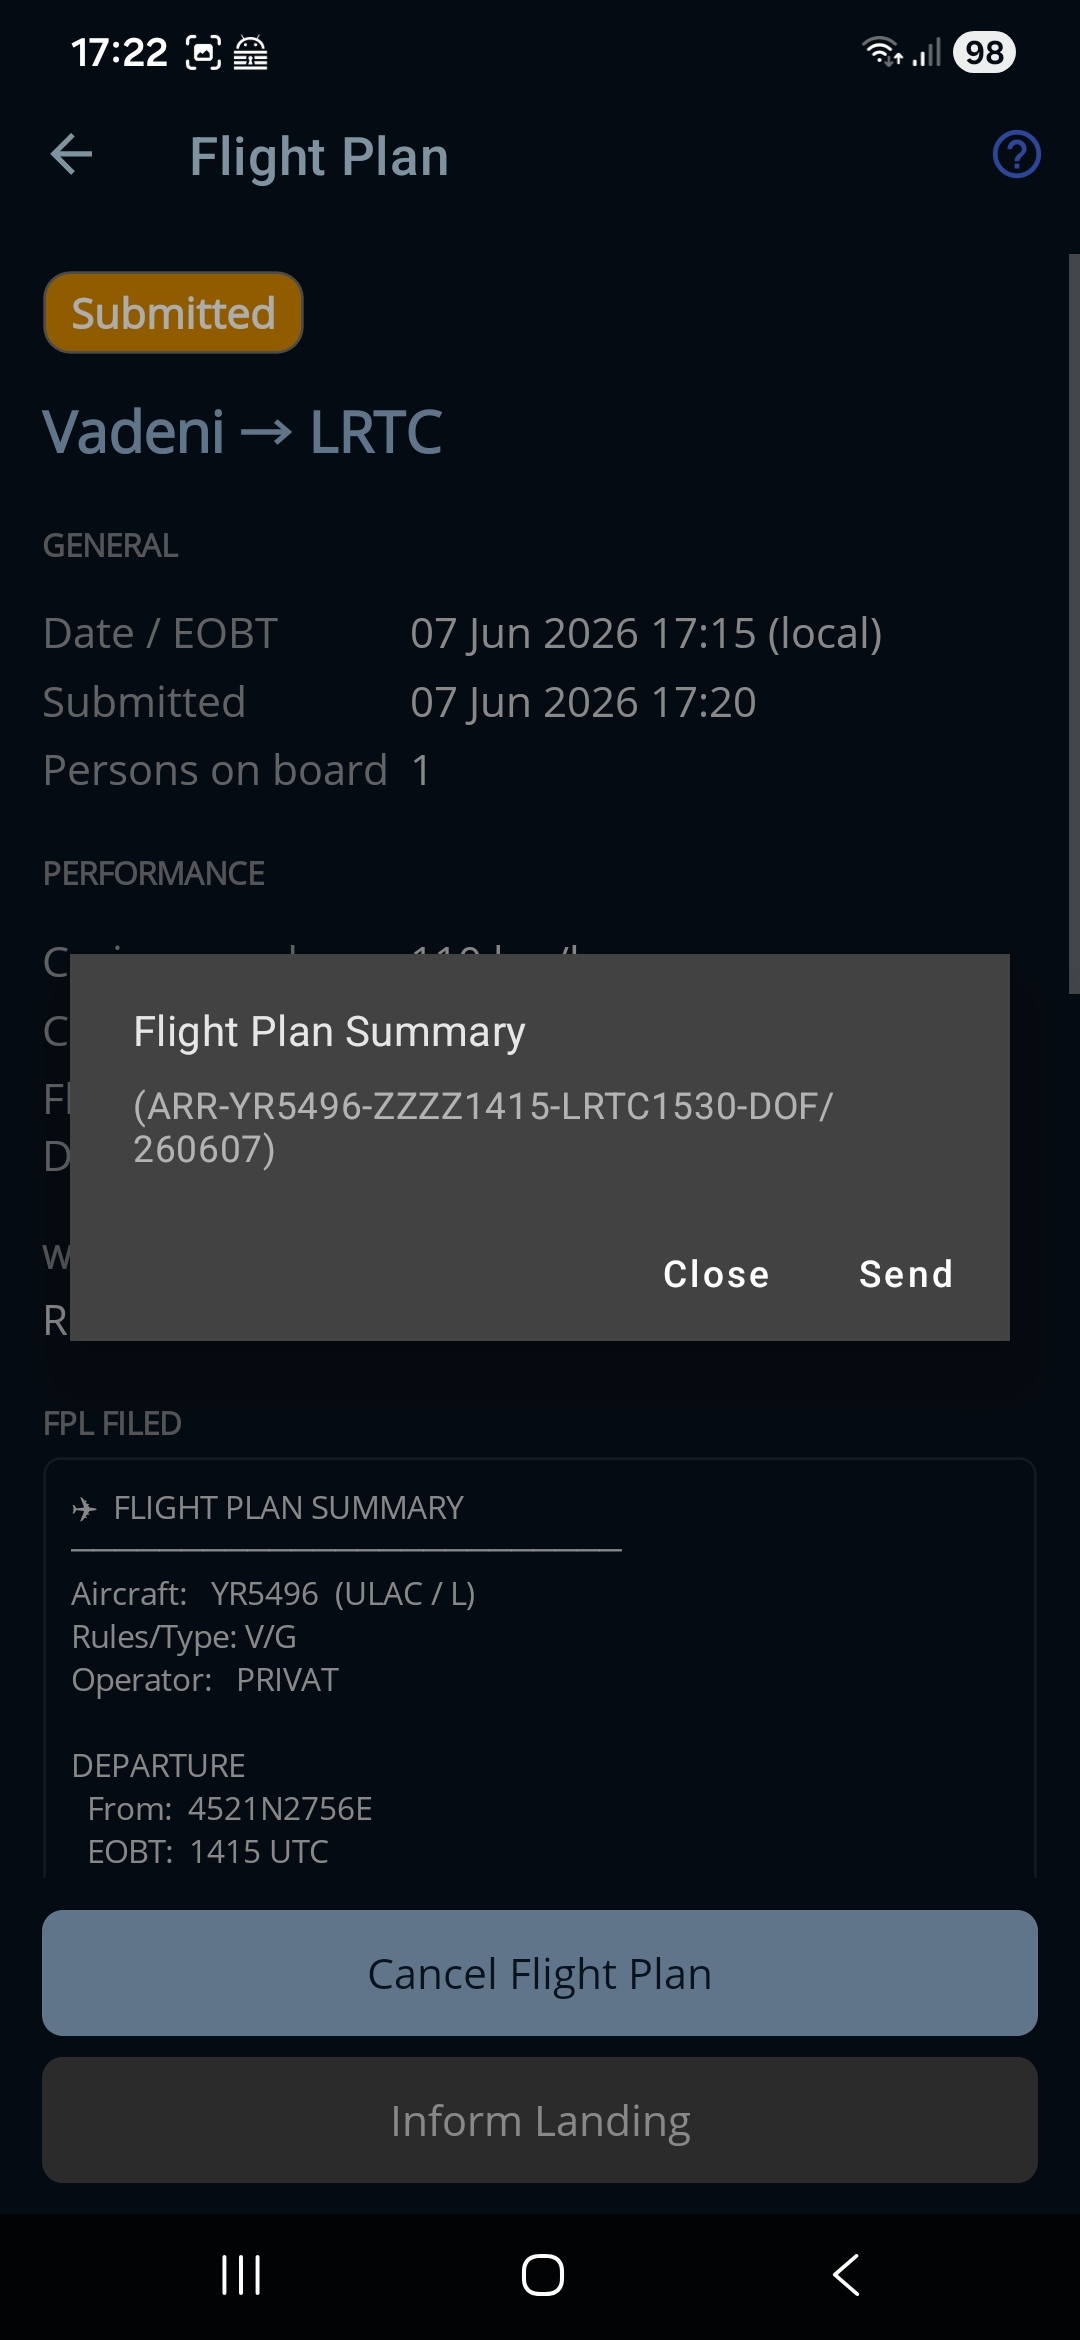
La un plan depus la AACR, fereastra Landing Details este sărită — un raport de aterizare pe vfr.caa.ro nu duce cu el niciun aerodrom — deci sunt două ferestre, nu trei.
Inform Landing apare doar după ce a trecut ora planificată de plecare: un zbor care nu a decolat nu a aterizat.
Dacă zborul nu mai are loc, deschide aceeași pagină de detalii și apasă Cancel Flight Plan — asta îl anulează la autoritatea la care ai depus (un mesaj CNL către ROMATSA sau o anulare pe vfr.caa.ro) și marchează planul ca Cancelled.
Vezi pagina Flight Plan Detail pentru detalii.
Ce urmează
Acesta este ciclul complet. Pentru o privire mai amănunțită asupra oricărui ecran — fiecare câmp, buton și opțiune — răsfoiește paginile fiecărui ecran, din pagina principală a manualului.