Route Map (adăugarea punctelor de rută)
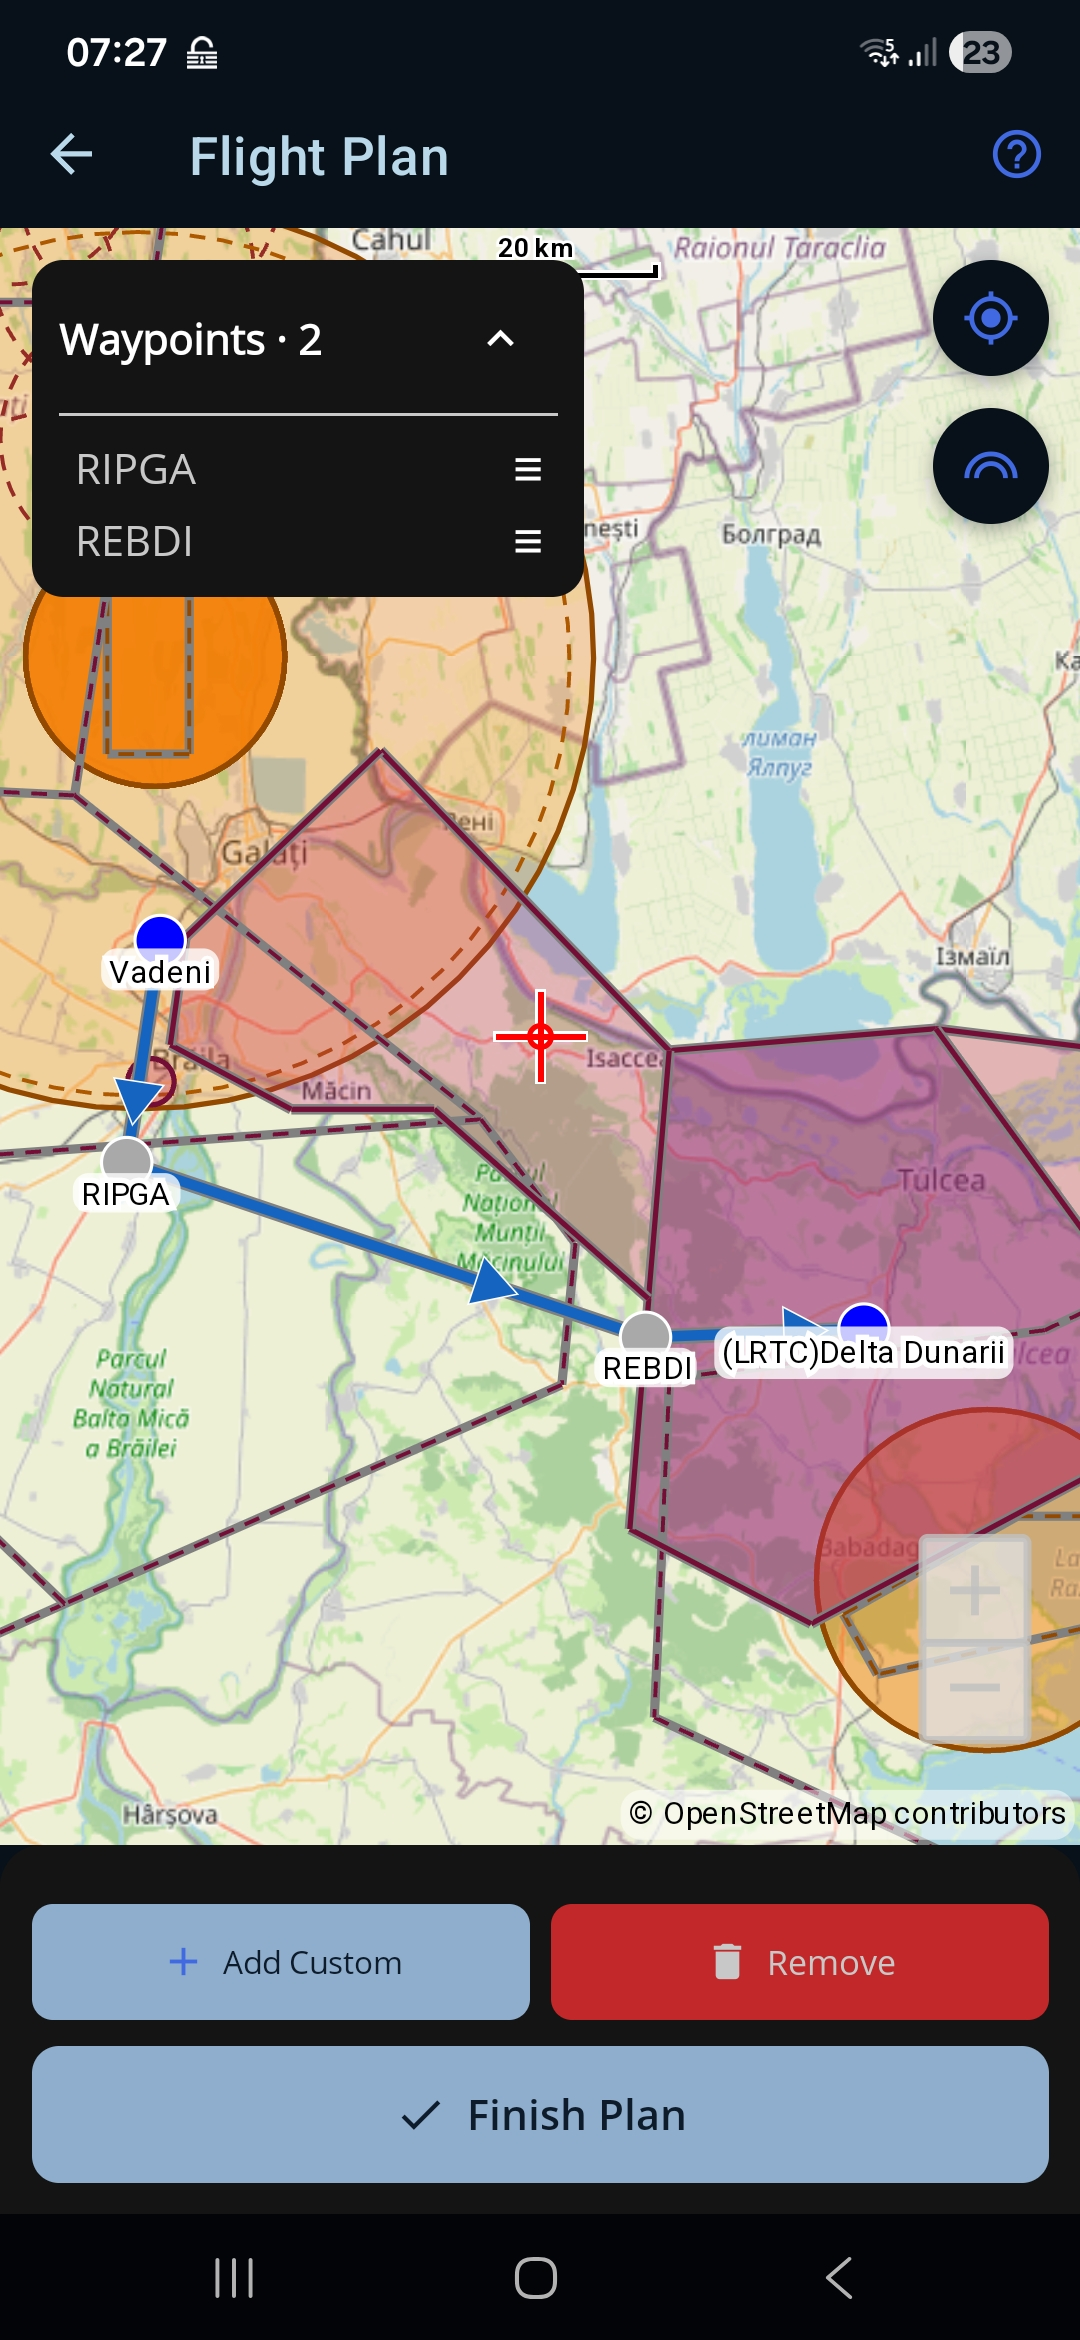
O hartă interactivă pe care îți construiești punctele rutei. Ajungi la ea din formularul planului de zbor, pui câte puncte îți trebuie și apoi te întorci în formular cu ele deja completate. Harta îți arată ruta ca o linie cu săgeți de direcție, ca să vezi forma zborului în timp ce îl construiești.
Cum ajungi aici: pe două căi, amândouă din Flight Plan Form — (1) în modul Waypoint, apeși + Map în secțiunea Intermediate Waypoints (trebuie să ai deja alese plecarea și destinația); sau (2) apeși Go To Map atunci când un aerodrom pe care l-ai pus pe Choose On Map încă are nevoie de o poziție.
Apasă iconița de ajutor (?) din bara de sus ca să arăți sau să ascunzi instrucțiunile de pe ecran.
Harta
- Harta. O hartă pe care o poți muta și mări, arătând plecarea, destinația și punctele pe care le-ai adăugat, unite printr-o linie de rută cu săgeți de direcție. Deasupra sunt desenate spațiul aerian de pe hartă și zonele NOTAM active — vezi Spațiul aerian și zonele NOTAM mai jos.
- Ținta din centru. Ținta roșie fixă din mijlocul ecranului arată exact locul unde va fi pus un punct nou.
- Butoanele din dreapta. Două butoane rotunde plutesc în dreapta sus: butonul de centrare readuce harta în centru, iar butonul de straturi, sub el, deschide și închide panoul Airspace.
- Lista de puncte. Un panou din stânga sus arată punctele rutei, cu numărul lor viu în antet (Waypoints · N). Apasă săgeata ca să îl strângi până la antet și trage de mânerul unui rând (≡) ca să schimbi ordinea — asta schimbă ordinea rutei.
- Scara și creditul hărții. O bară de scară stă în capul hărții, iar © OpenStreetMap contributors în colțul din stânga-jos — harta de bază este OpenStreetMap, iar creditul este o condiție a folosirii ei. Apasă creditul ca să deschizi pagina de drepturi de autor OpenStreetMap.
Construirea rutei
Cardul din josul ecranului ține comenzile:
- Apasă un punct de pe hartă ca să îl selectezi; apasă într-un loc gol ca să îl deselectezi.
- Add Waypoint / Add Custom. Butonul din stânga. Cu un punct selectat scrie Add Waypoint și adaugă acel punct la rută. Cu nimic selectat scrie Add Custom și pune un punct nou în dreptul țintei din centru. Folosește-l de câte ori ai nevoie.
- Remove. Șterge ultimul punct adăugat.
- Finish Plan. Te întoarce în formularul planului de zbor, cu toate punctele pe care le-ai pus deja completate în rută.
Spațiul aerian și zonele NOTAM
Harta desenează spațiul aerian special al României, așa cum este el pe hartă, plus zonele NOTAM active în acel moment, ca să vezi dintr-o privire dacă ruta ta trece prin locuri care cer atenție. Fiecare zonă este hașurată și conturată, cu o etichetă care îi arată numele și limitele pe verticală (de exemplu LRTRA66 TRA GND – FL200).
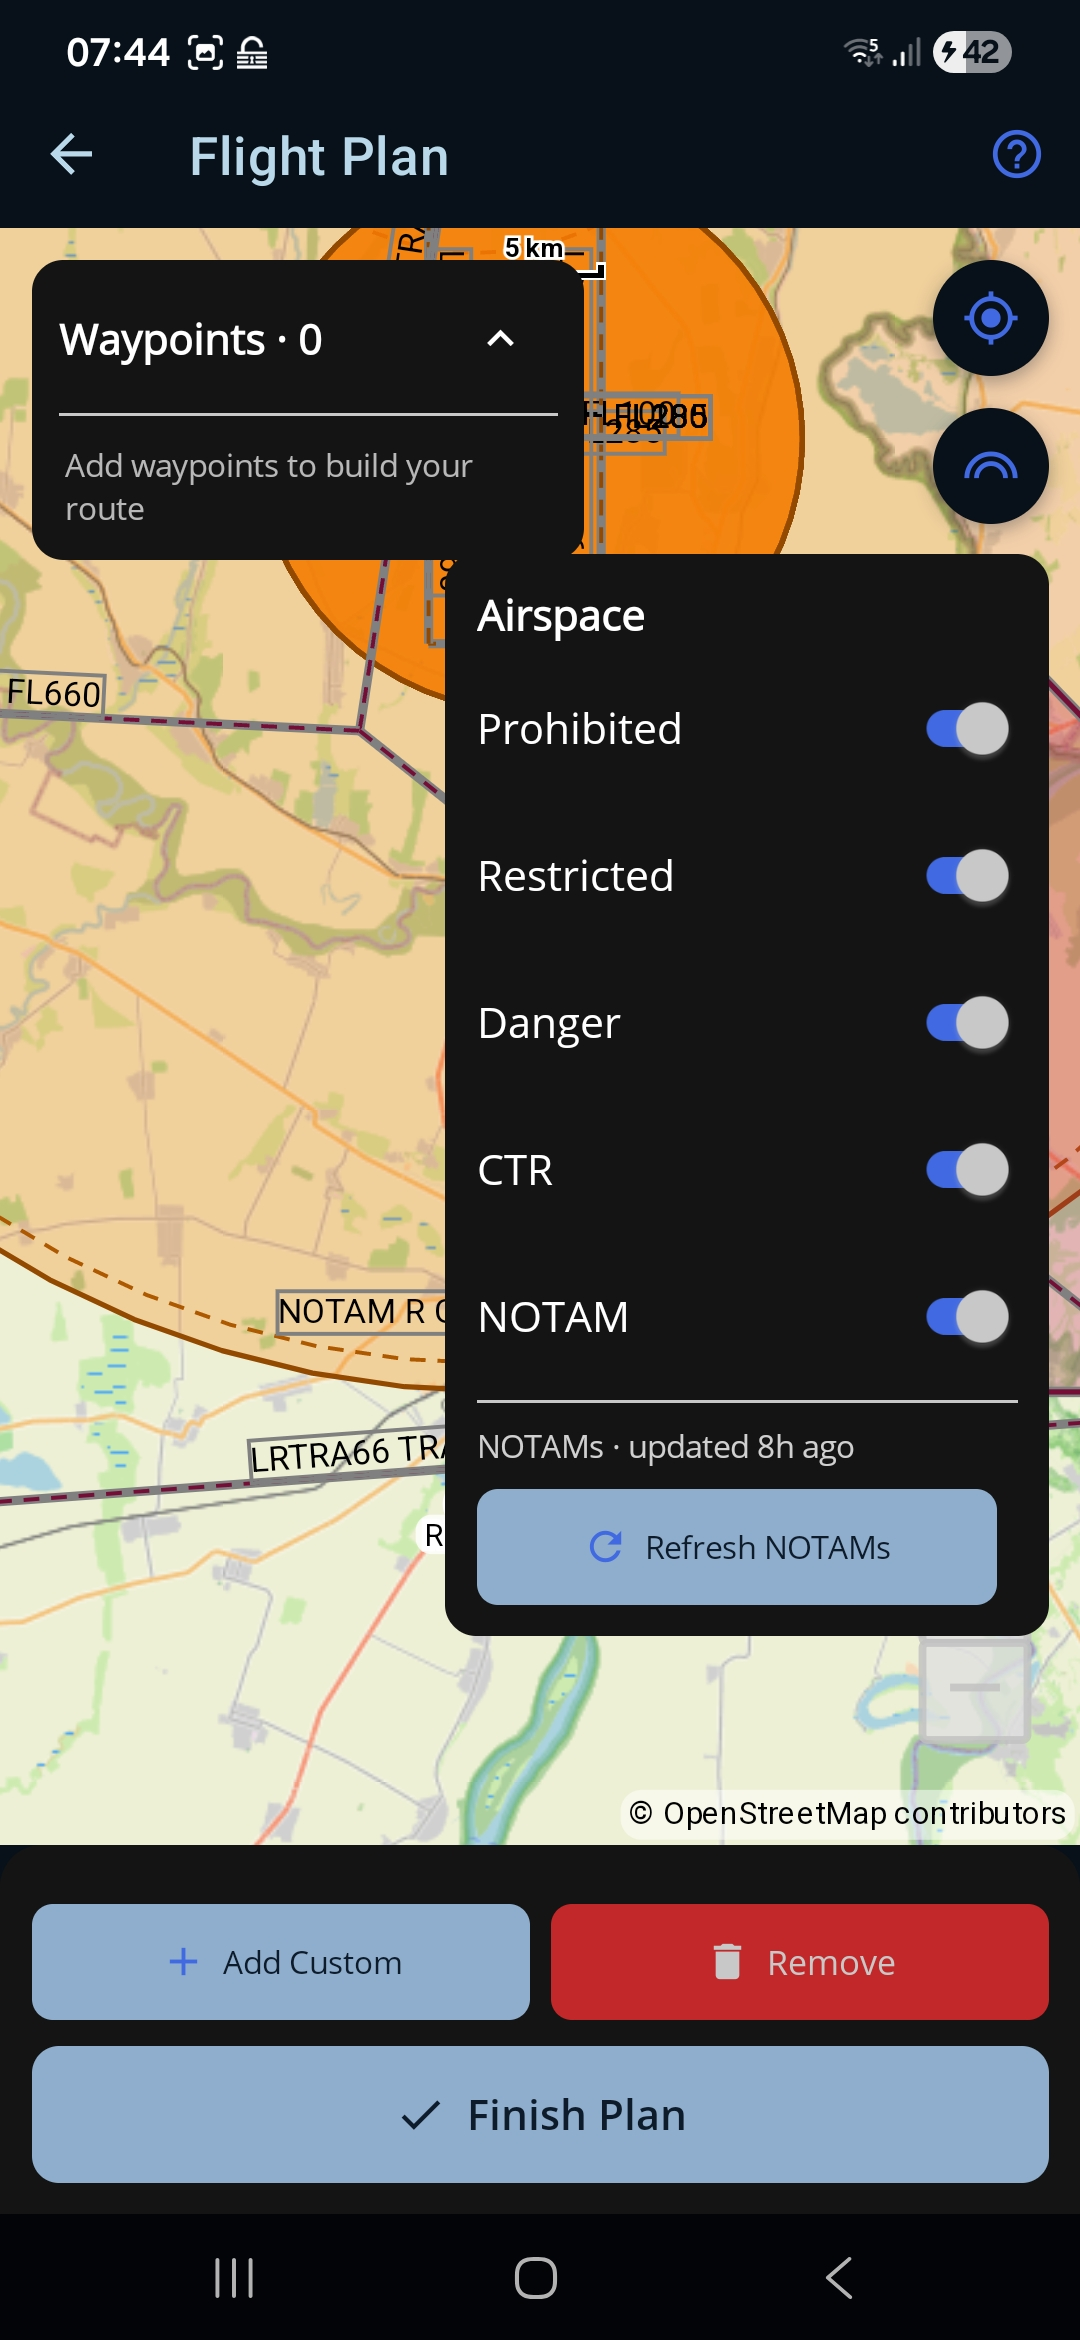
Apasă butonul de straturi (dreapta sus, sub butonul de centrare) ca să deschizi panoul Airspace, de unde alegi ce feluri de zone se văd:
- Prohibited. Zone interzise — zborul nu este permis.
- Restricted. Zone restricționate — zborul este supus unor condiții.
- Danger. Zone periculoase — activități care pot fi primejdioase pentru zbor.
- CTR. Zone de control din jurul aerodromurilor controlate.
- NOTAM. Zone declarate active de NOTAM-urile în vigoare (de exemplu spațiu aerian rezervat sau restricționat temporar).
Pornește sau oprește fiecare comutator ca să degajezi harta până la categoriile care te interesează. Sub comutatoare, un rând arată cât de proaspete sunt datele NOTAM (de exemplu NOTAMs · updated 8h ago), iar Refresh NOTAMs aduce cele mai noi NOTAM-uri și redesenează zonele active.
Filtrul de altitudine (înălțimea care te interesează)
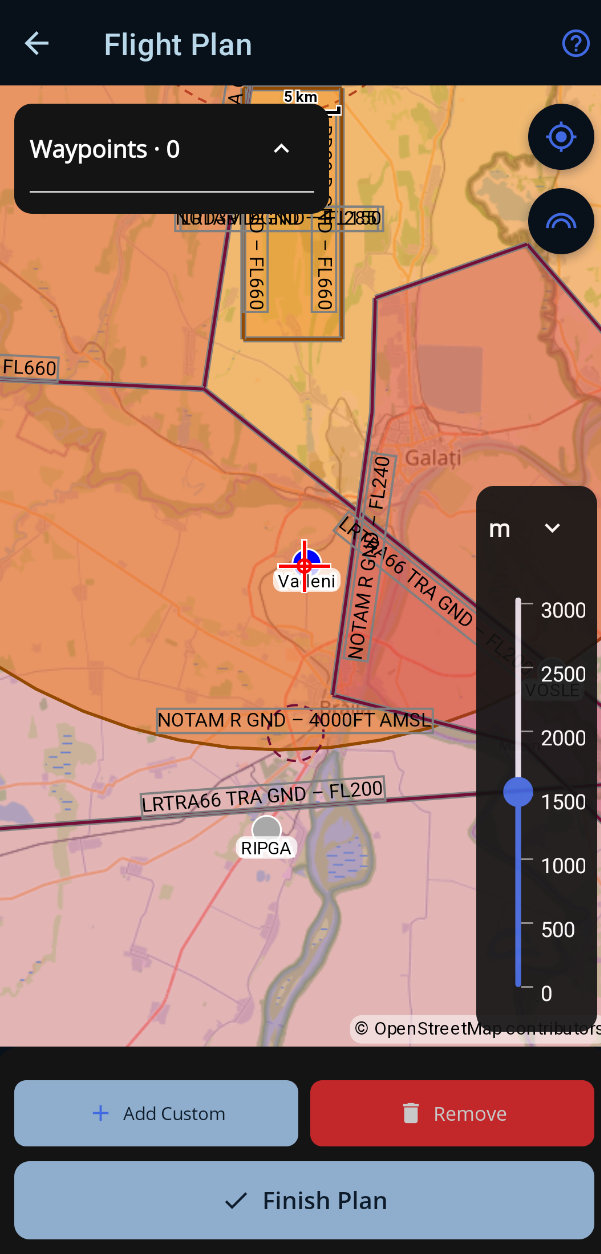
Un cursor pliabil, în dreapta jos a hărții, stabilește o înălțime de interes. Zonele de spațiu aerian și zonele NOTAM a căror bandă pe verticală conține acea înălțime sunt desenate ca active (pline); zonele care nu ajung până acolo sunt estompate. Trage cursorul la nivelul la care ai de gând să zbori și harta se rehașurează, ca să arate ce te privește cu adevărat acolo. Apasă pastila cu valoarea ca să strângi cursorul înapoi într-o pastilă mică; setarea este ținută minte între sesiuni, iar unitatea (m / ft) se schimbă din capul cursorului.
Cum te uiți la o zonă (apăsare lungă)
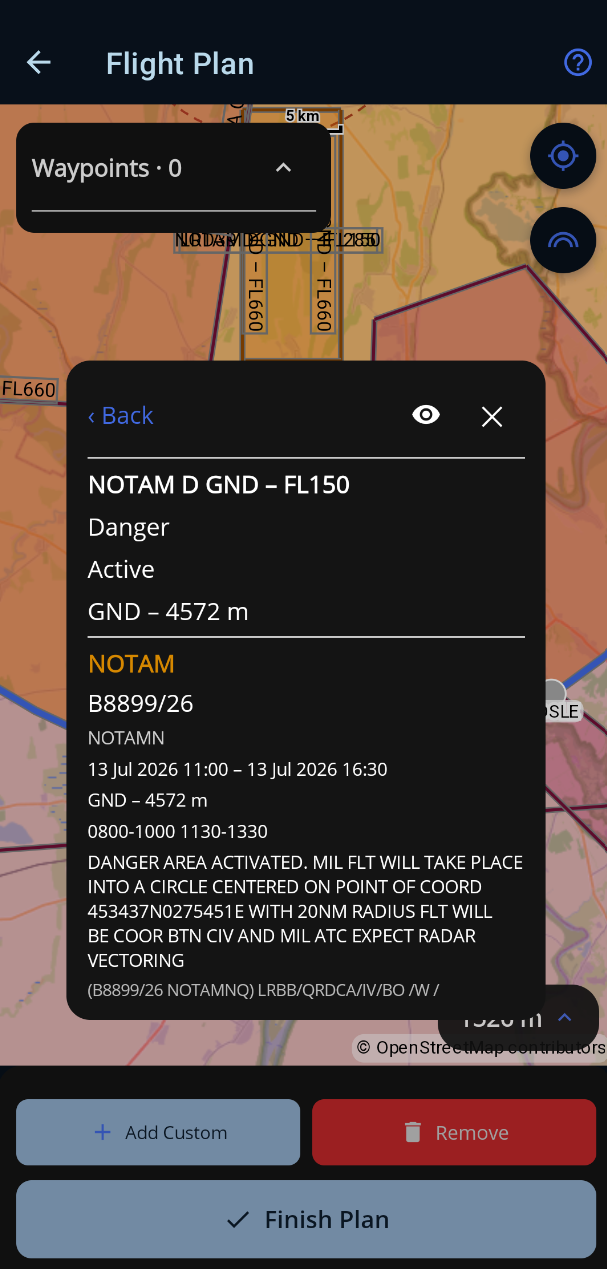
Apasă lung oriunde pe hartă ca să vezi tot ce se află stivuit sub acel punct. Un panou „Airspace here” îți arată fiecare zonă, de la cea cu plafonul inferior cel mai jos în sus, fiecare cu un punct colorat (activă sau inactivă la filtrul de înălțime de acum) și cu eticheta NOTAM pe orice zonă pe care a activat-o un NOTAM.
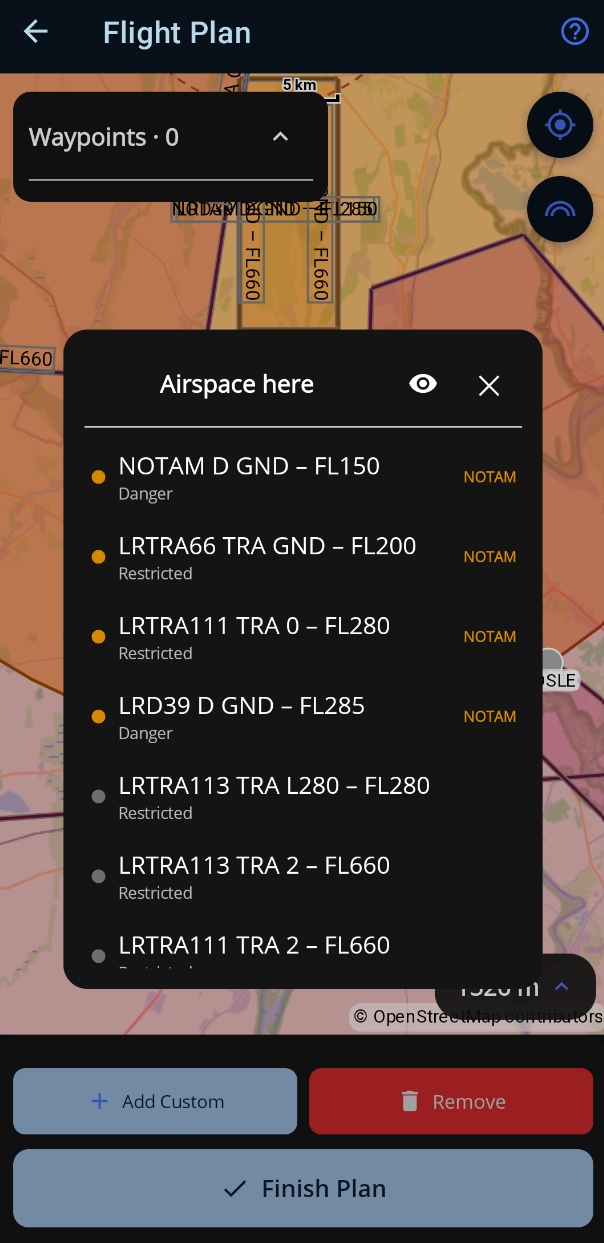
Apasă orice rând ca să îi deschizi detaliile: categoria, limitele pe verticală, intervalul activ în acel moment și — pentru o zonă NOTAM — NOTAM-ul întreg (numărul, tipul, datele de valabilitate, programul zilnic, limitele pe verticală și textul brut). Folosește butonul cu ochi ca să estompezi cardul și să vezi zona evidențiată pe hartă, apoi ‹ Back ca să te întorci la listă sau × ca să închizi.
Cum pui pe hartă un aerodrom „Choose On Map”
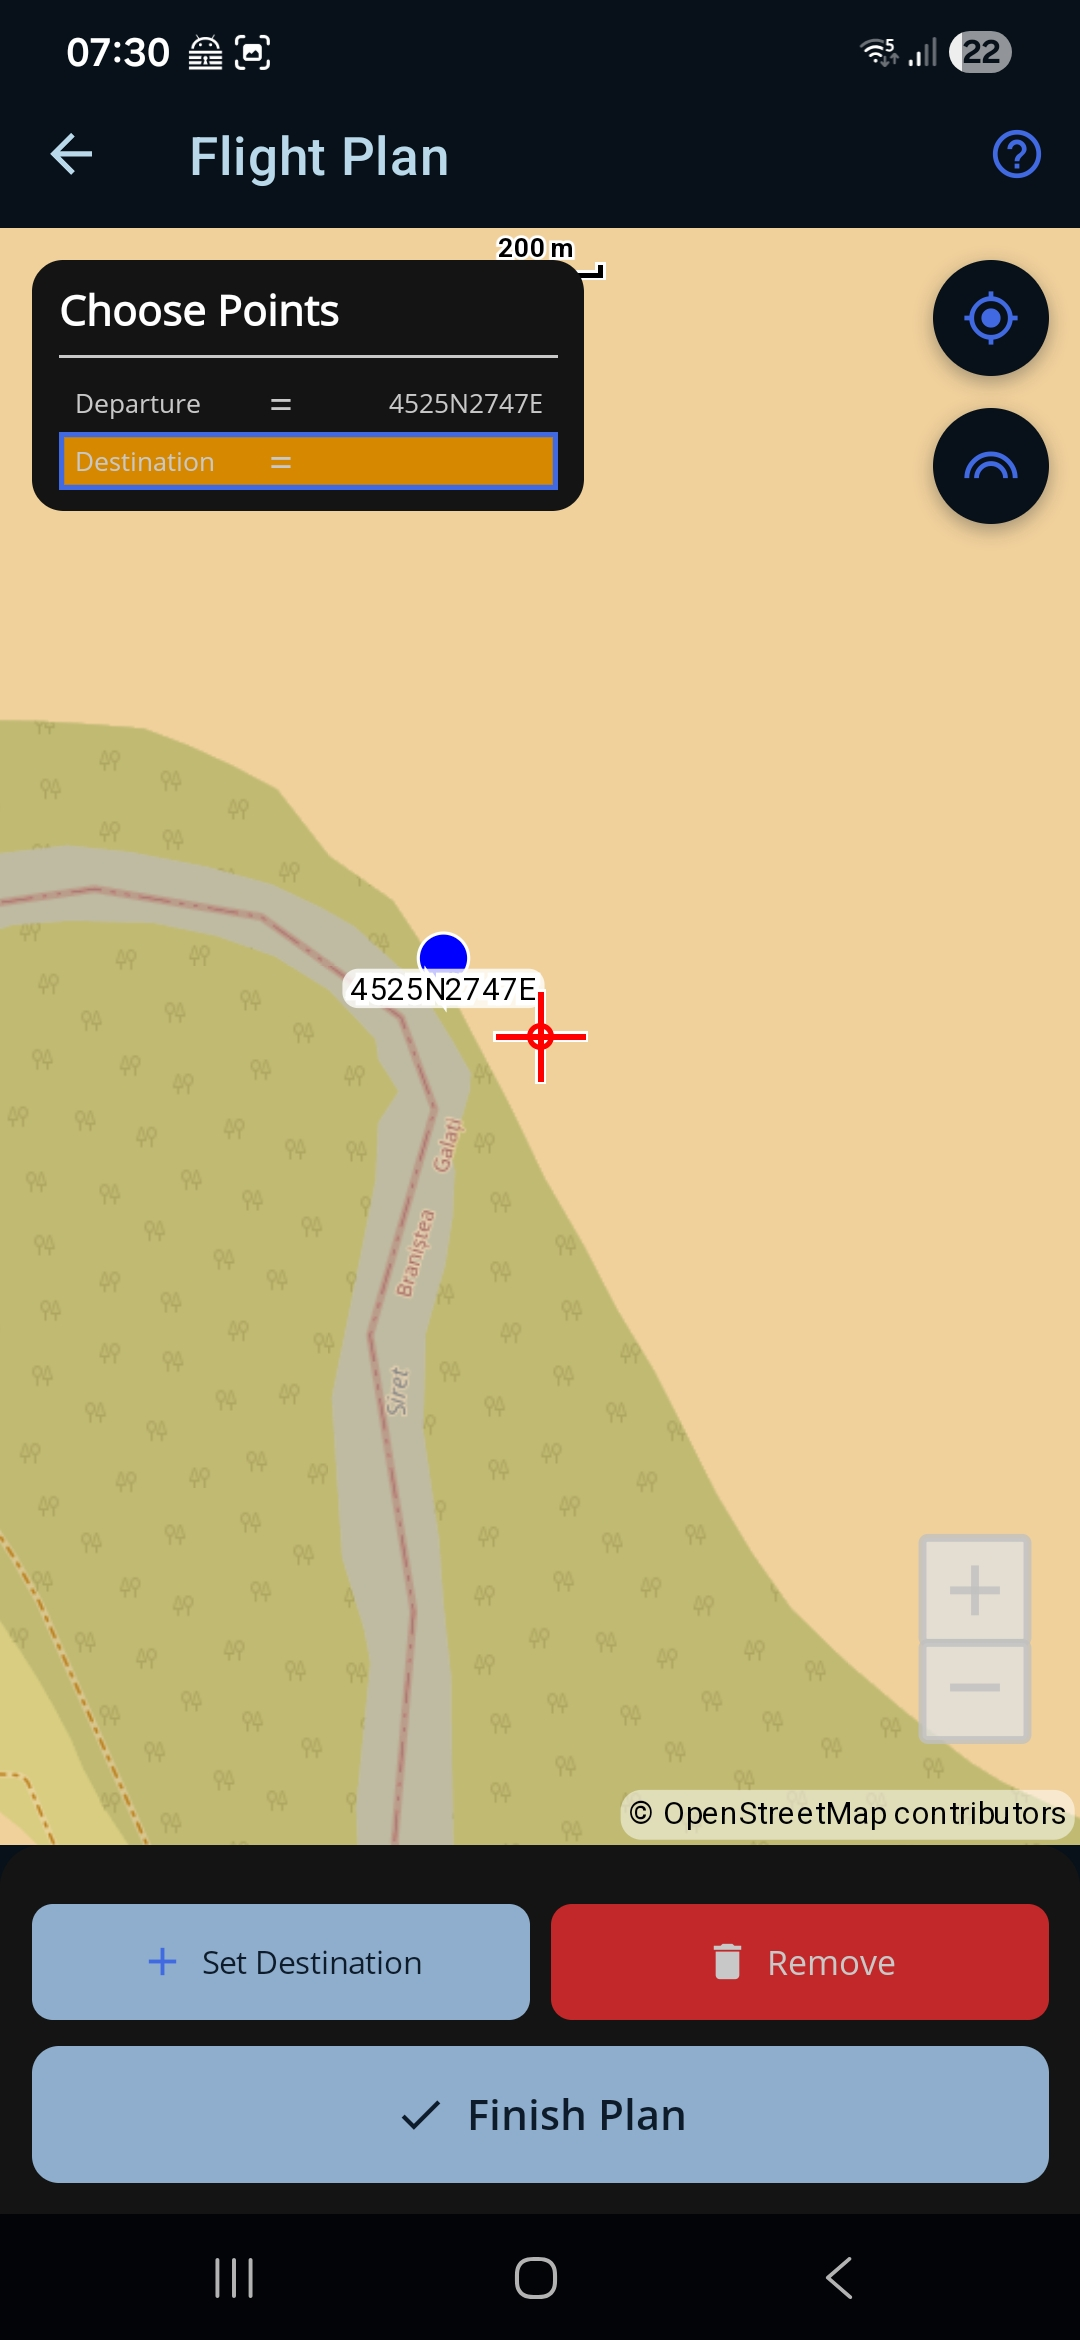
Dacă ai ajuns pe hartă apăsând Go To Map (fiindcă o plecare, o destinație sau un aerodrom de rezervă a fost pus pe Choose On Map), apare în stânga sus un panou Choose Points, cu aerodromurile care încă au nevoie de o poziție, cel curent fiind evidențiat. Pentru fiecare: mută harta astfel încât ținta din centru să stea peste locul potrivit, apoi pune-l cu butonul din stânga (scrie, de exemplu, Set Departure). Treci prin toată lista, apoi apasă Finish Plan ca să te întorci în formular.
← Înapoi la manual · Urmează: Flight Plan Detail →