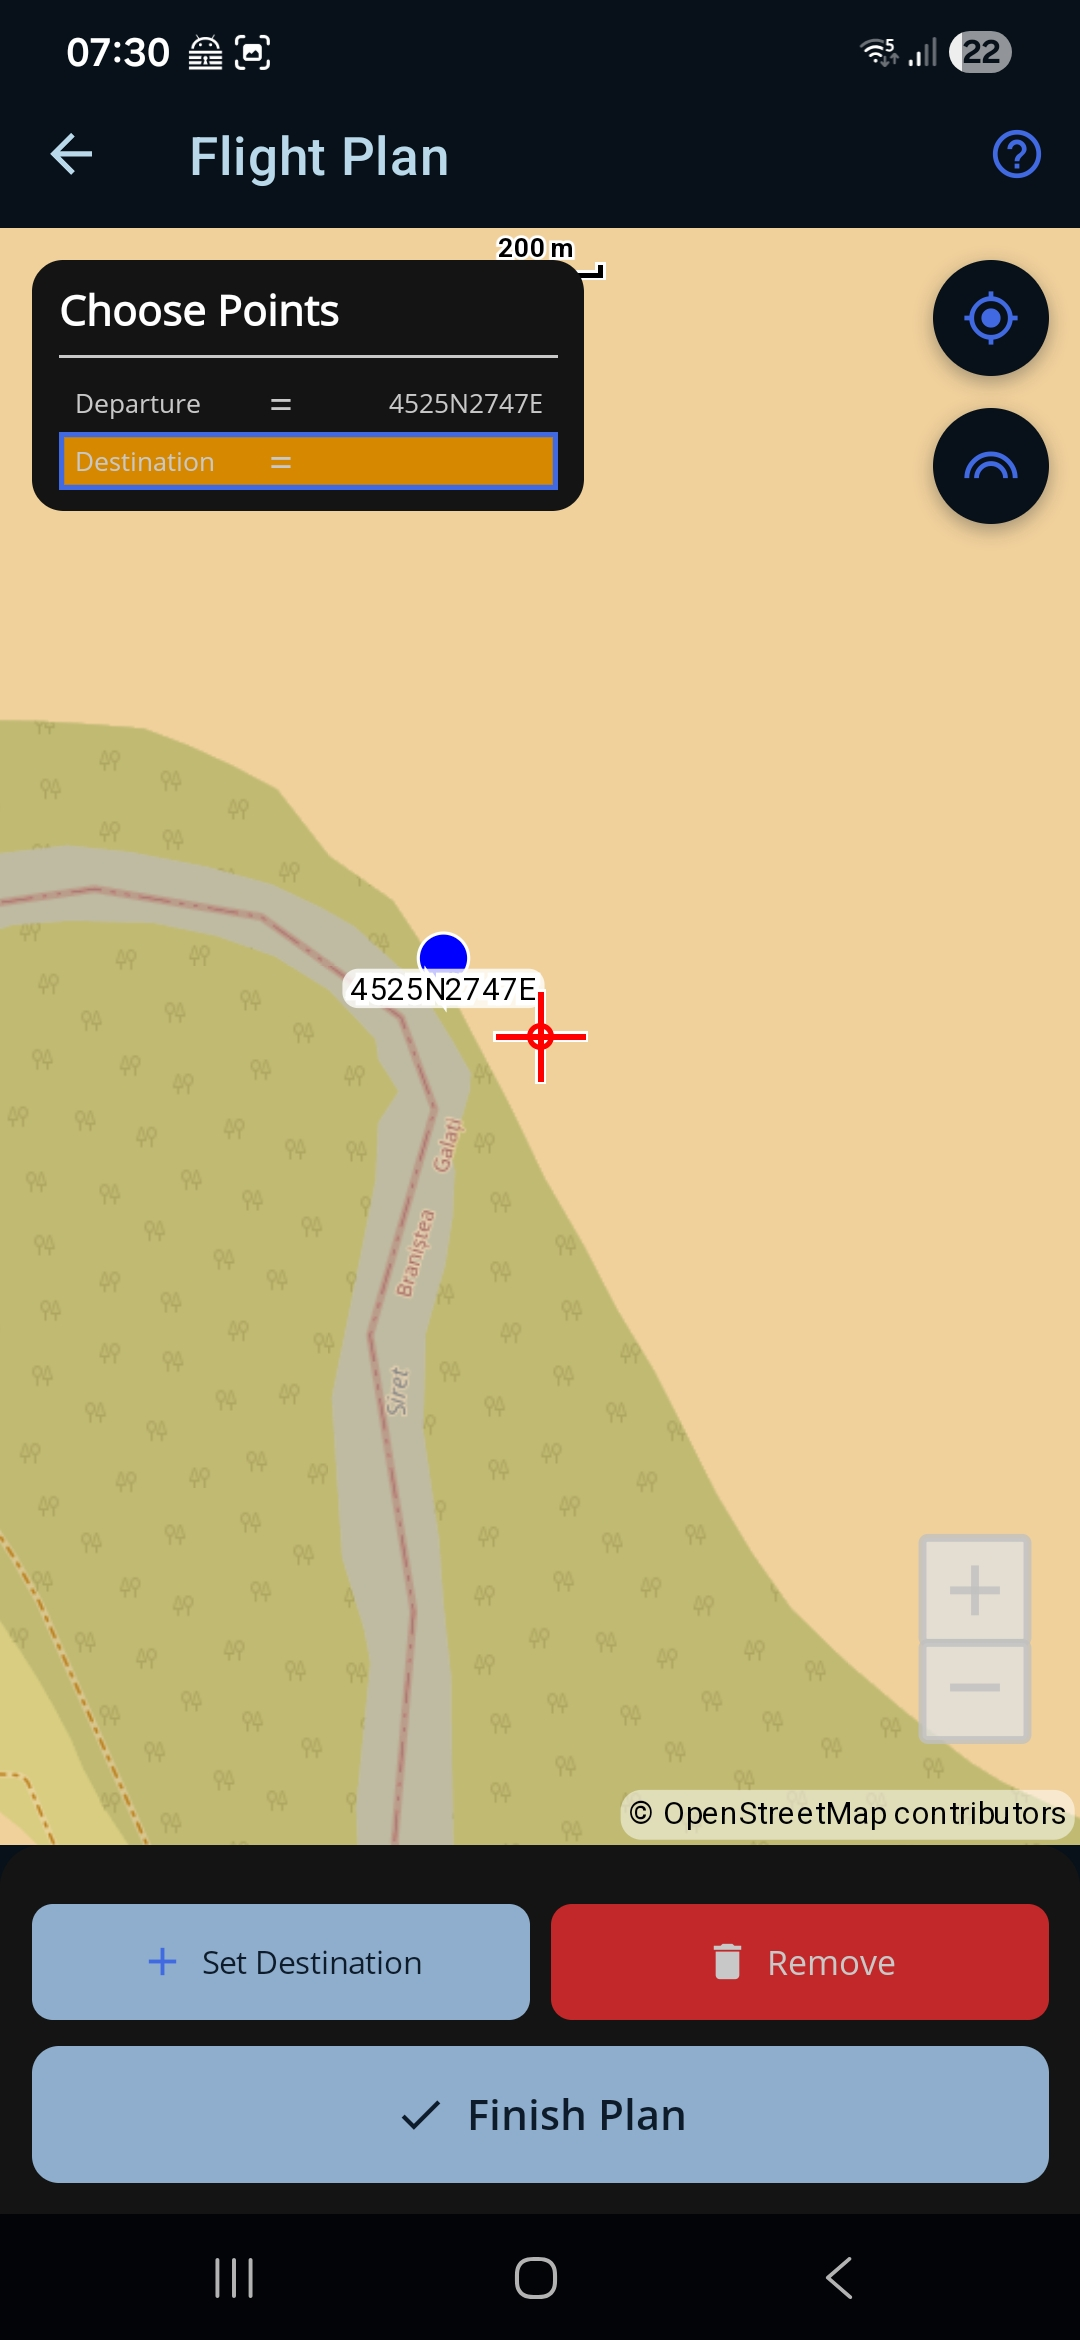
Route Map (adding waypoints)
An interactive map for building the waypoints of your route. You reach it from the flight plan form, place as many points as you need, and then return to the form with them filled in. The map shows your route as a line with direction arrows so you can see the shape of the flight as you build it.
How to get here: two ways, both from the Flight Plan Form — (1) in Waypoint mode, tap + Map in the Intermediate Waypoints section (you must have a departure and destination chosen first); or (2) tap Go To Map when an aerodrome you set to Choose On Map still needs a location.
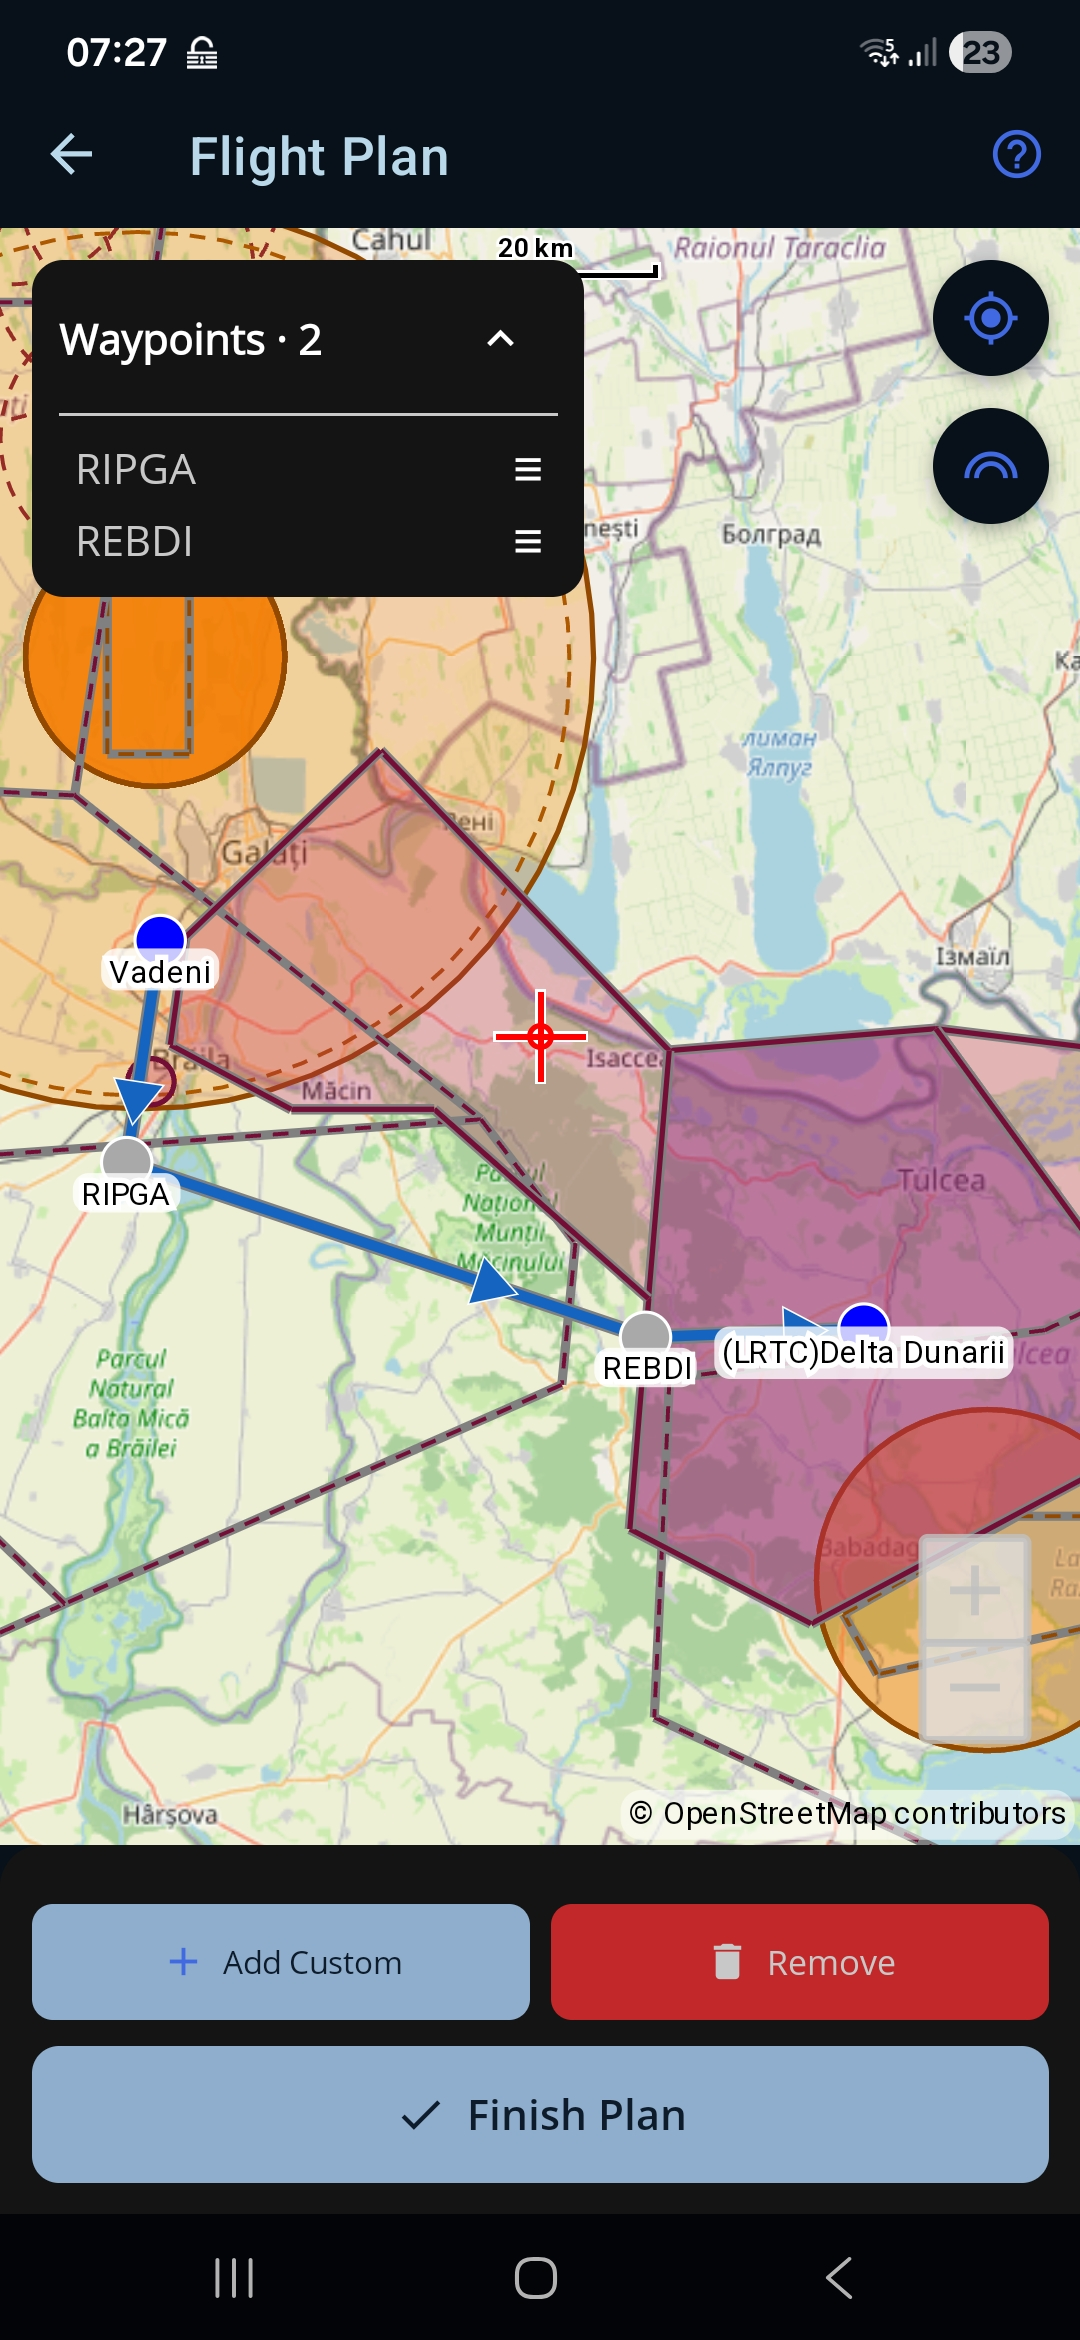
Tap the help (?) icon in the top bar to show or hide the on-screen instructions.
The map
- Map. A pan-and-zoom map showing your departure, destination, and the waypoints you've added, joined by a route line with direction arrows. Charted airspace and active NOTAM areas are drawn on top — see Airspace & NOTAM areas below.
- Centre crosshair. The fixed red cross in the middle of the screen marks the exact spot a new custom waypoint will be dropped.
- Right-side buttons. Two round buttons float in the top-right: the centre-map button re-centres the map, and the layers button below it opens and closes the Airspace panel.
- Waypoints list. A panel in the top-left lists the route's waypoints with a live count in its header (Waypoints · N). Tap the chevron to collapse it down to just the header, and drag a row's handle (≡) to reorder — that reorders the route.
- Scale bar and map credit. A scale bar sits at the top of the map, and © OpenStreetMap contributors in the bottom-left corner — the base map is OpenStreetMap, and the credit is a condition of using it. Tap the credit to open the OpenStreetMap copyright page.
Building the route
The card at the bottom of the screen holds the controls:
- Tap a waypoint on the map to select it; tap an empty spot to deselect.
- Add Waypoint / Add Custom. The left button. With a waypoint selected it reads Add Waypoint and adds that point to the route. With nothing selected it reads Add Custom and drops a new custom waypoint at the crosshair. Use it as many times as you need.
- Remove. Removes the last waypoint added.
- Finish Plan. Returns to the flight plan form with all the waypoints you placed filled into the route.
Airspace & NOTAM areas
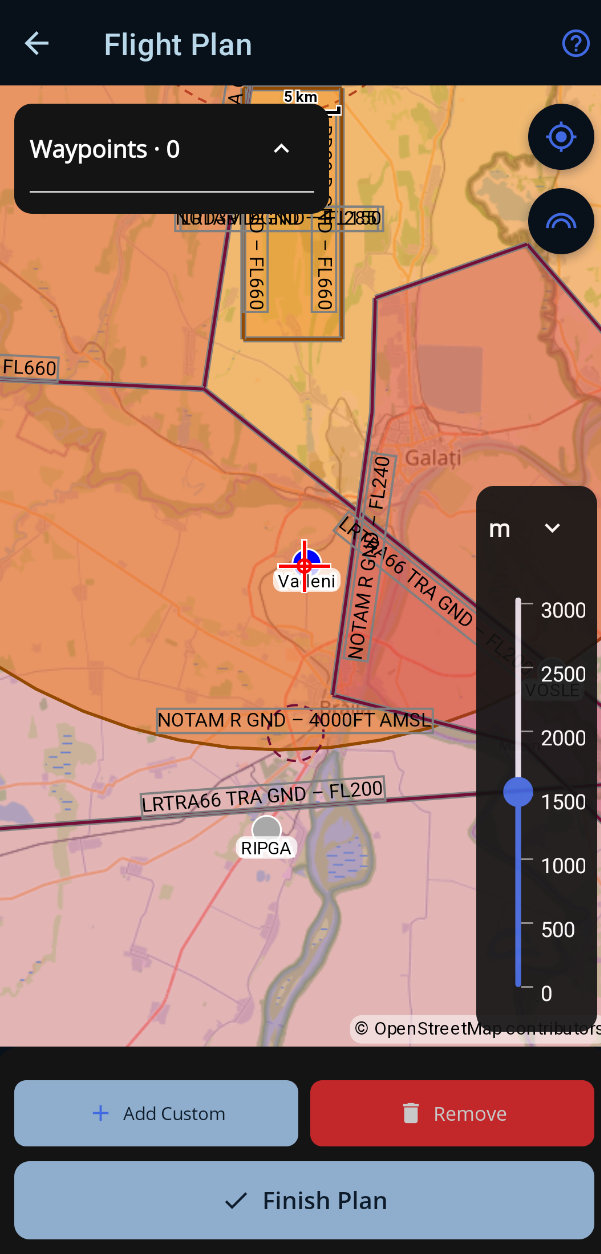
The map draws Romania's charted special-use airspace and any currently active NOTAM areas, so you can see at a glance whether your route runs through somewhere that needs attention. Each area is shaded and outlined, with a label showing its name and vertical limits (for example LRTRA66 TRA GND – FL200).
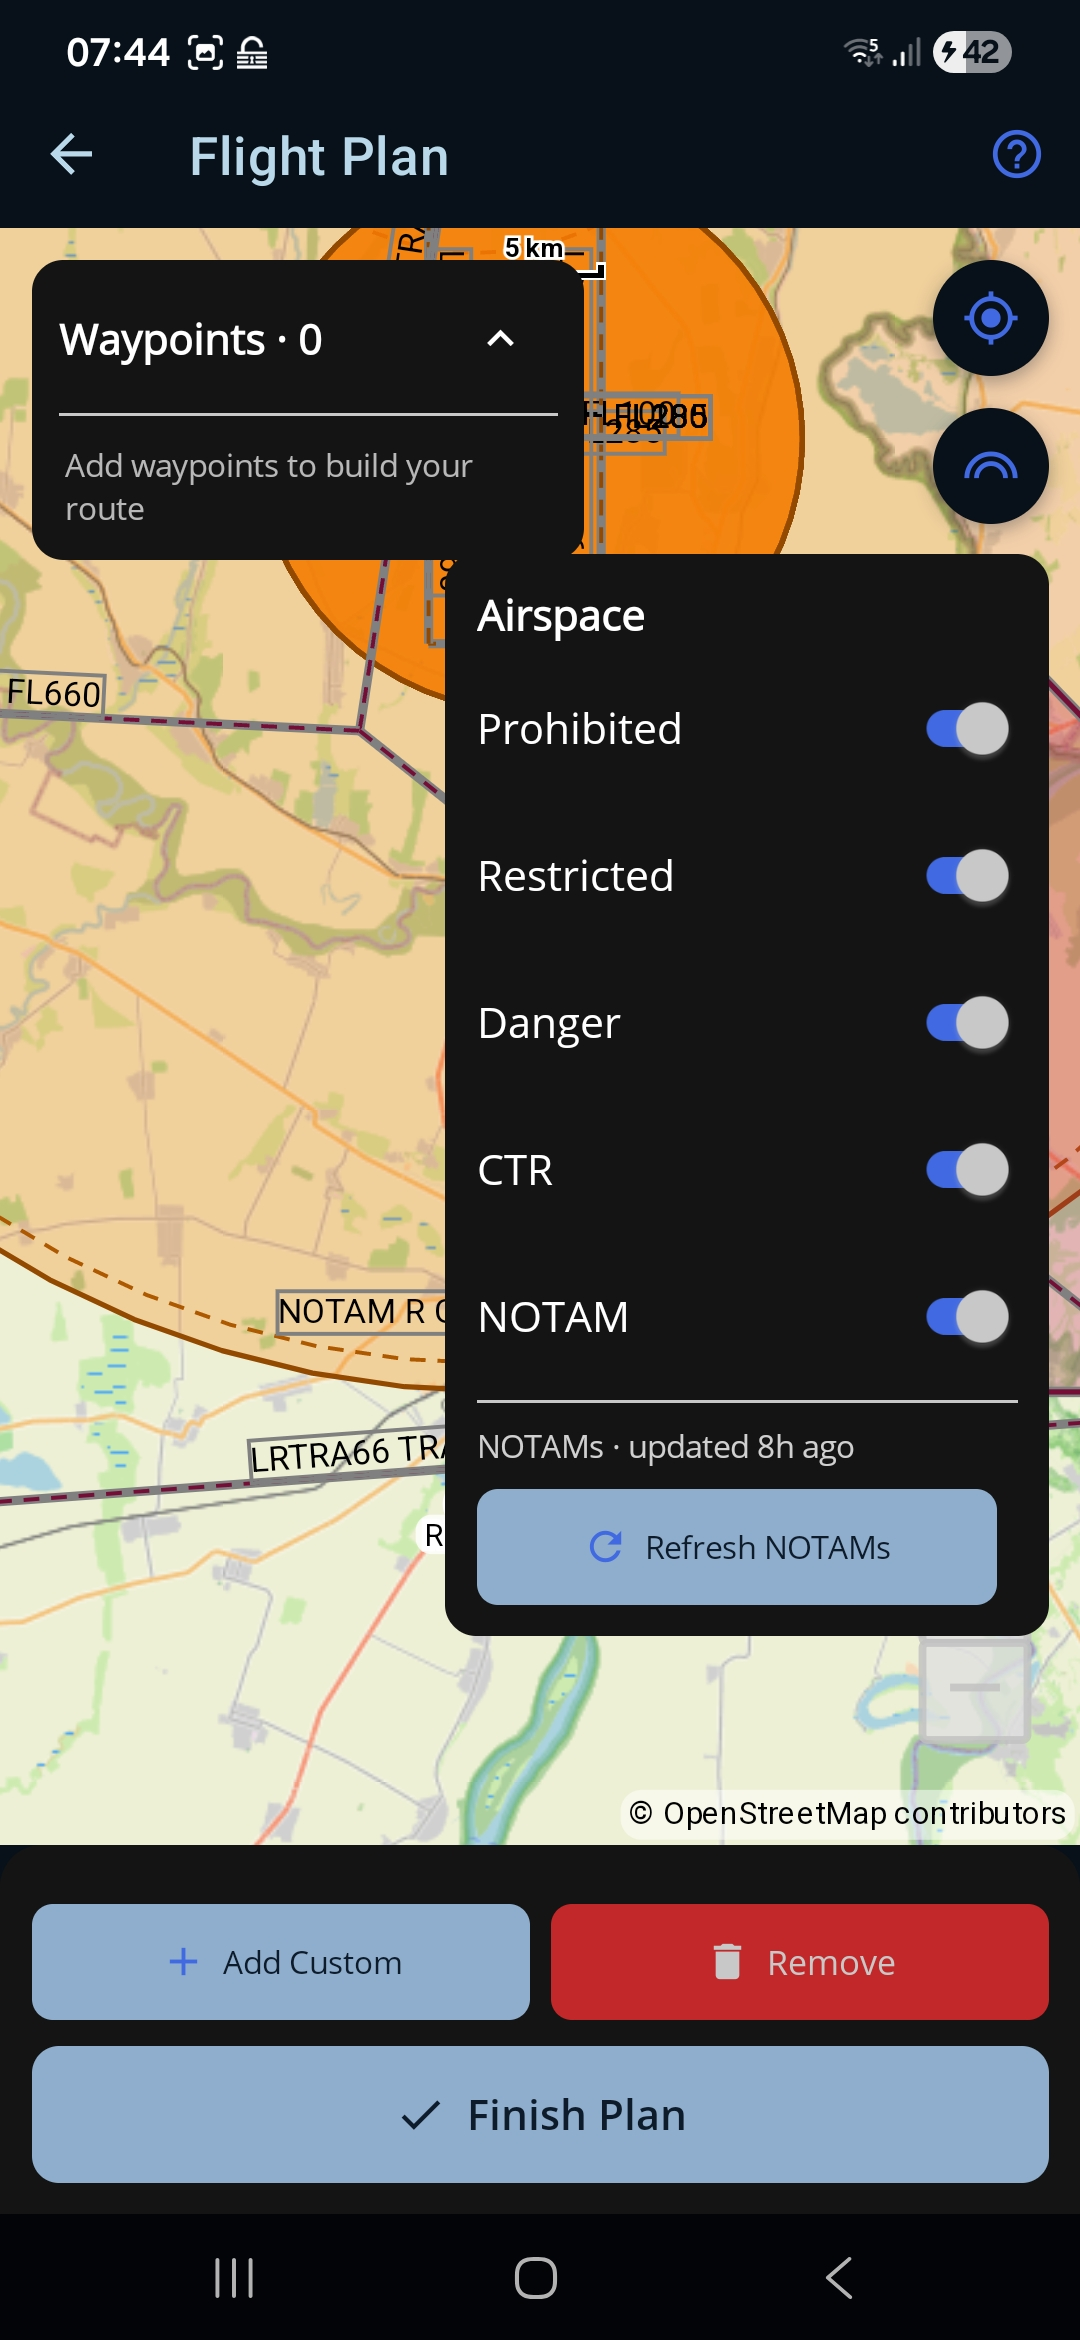
Tap the layers button (top-right, below the centre-map button) to open the Airspace panel, where you choose which kinds of area are shown:
- Prohibited. Prohibited areas — flight is not permitted.
- Restricted. Restricted areas — flight is subject to conditions.
- Danger. Danger areas — activities that may be hazardous to flight.
- CTR. Control zones around controlled aerodromes.
- NOTAM. Areas published as active by current NOTAMs (for example temporary reserved/restricted airspace).
Turn each switch on or off to declutter the map to just the categories you care about. Below the switches a line shows how fresh the NOTAM data is (for example NOTAMs · updated 8h ago), and Refresh NOTAMs fetches the latest NOTAMs and redraws the active areas.
Altitude (height of interest) filter
A collapsible slider at the bottom-right of the map sets a height of interest. Airspace and NOTAM areas whose vertical band contains that height are drawn as active (solid); areas that don't reach it are dimmed. Drag the slider to the level you plan to fly and the map re-shades to show what actually affects you there. Tap the value pill to collapse the slider back to a compact chip; the setting is remembered between sessions, and you can switch its unit (m / ft) at the top of the slider.
Inspecting an area (long-press)
Long-press anywhere on the map to see everything stacked under that point. An “Airspace here” panel lists each area from the lowest floor upward, each with a coloured dot (active vs. inactive at the current height filter) and a NOTAM tag on any area that a NOTAM has brought to life.
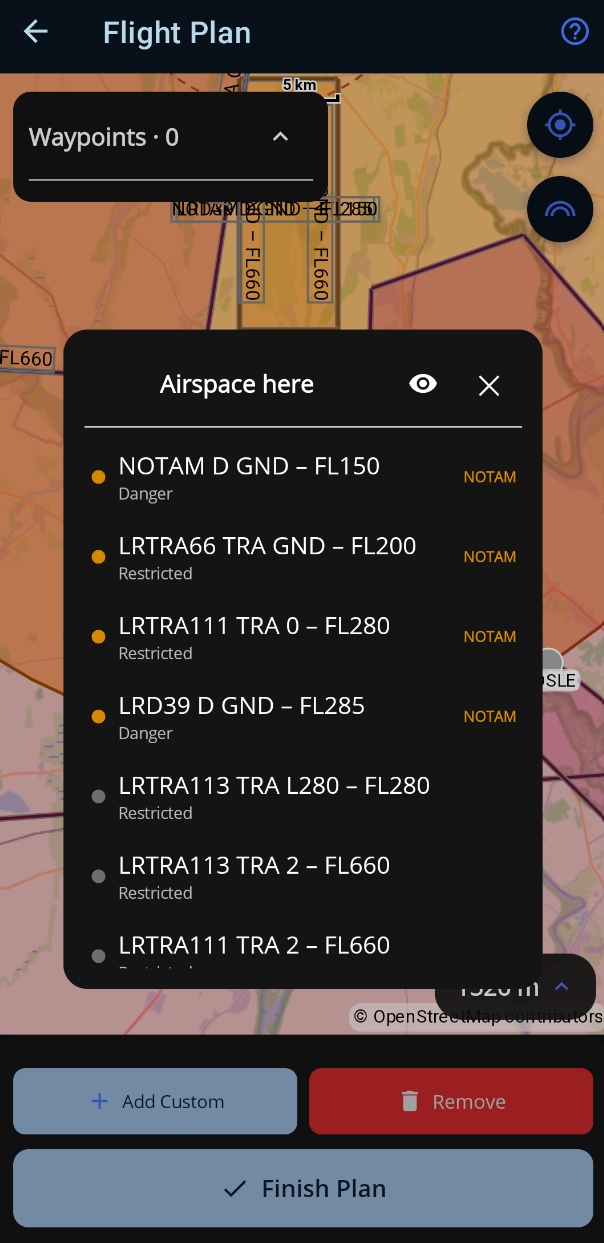
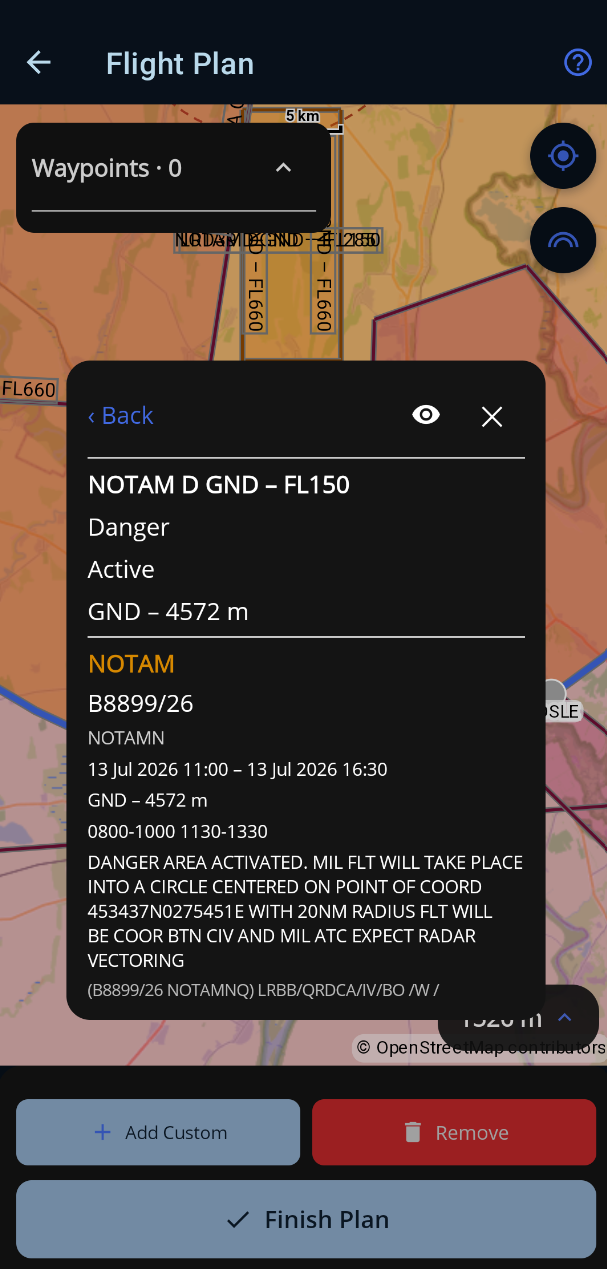
Tap any row to open its detail: the category, the vertical limits, the currently active range, and — for a NOTAM area — the full NOTAM (its id, type, validity dates, daily schedule, vertical limits, and the raw NOTAM text). Use the eye (peek) button to fade the card and reveal the highlighted area on the map, then ‹ Back to return to the list or × to close.
Positioning a “Choose On Map” aerodrome
If you reached the map by tapping Go To Map (because a departure, destination, or alternate was set to Choose On Map), a Choose Points panel appears in the top-left listing the aerodromes that still need a location, with the current one highlighted. For each one: pan so the centre crosshair sits over the right spot, then place it with the left button (it reads e.g. Set Departure). Work through the list, then tap Finish Plan to return to the form.