Getting Started: file a flight plan from start to finish
One complete example — from creating your account to flying the route and confirming your landing.
This walkthrough follows a single flight: a trip planned as a route from Vadeni to Tulcea with two intermediate waypoints in between, flown in VFR. Follow the nine steps in order. Each step links to the detailed reference page for that screen if you want more detail.
Prefer to watch?
The same ground is covered by the full video tutorial — one chaptered video, about 27 minutes, from setting up your profiles to closing the plan after you land. Chapters that match the steps below: Pilot, aircraft & your portal logins, Filing your flight plan, and Cancelling & informing your landing.
Step 1 — Create your Ro Flight account (on this website)
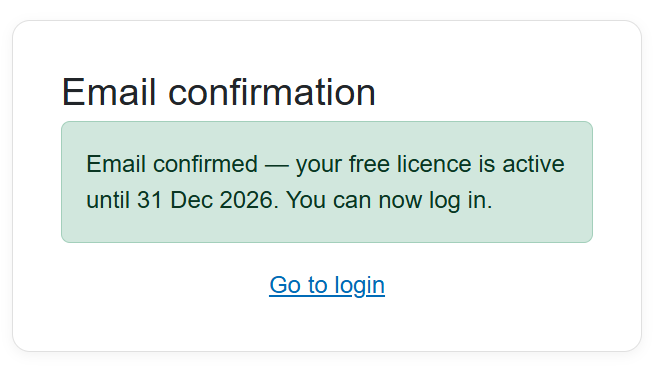
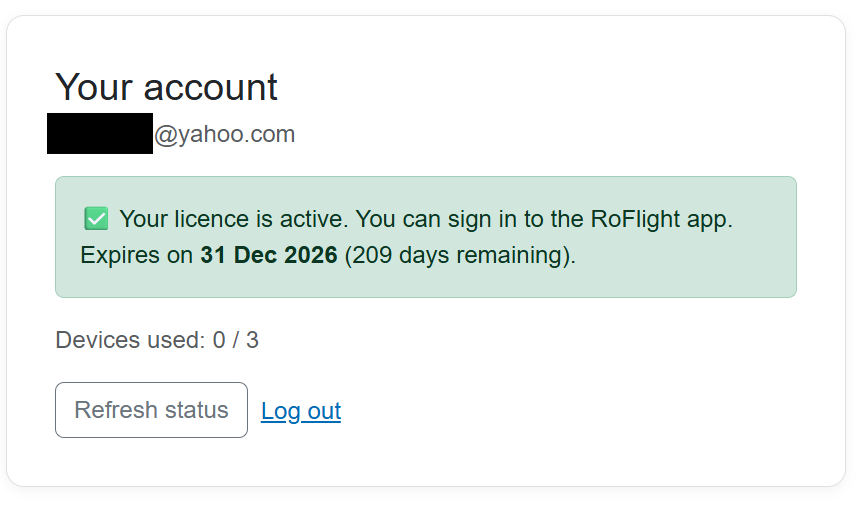
Ro Flight needs a licence, which is tied to an account you create here on the website. During Early Access you can claim the free licence that lasts until the end of this year: 31/12/2026.
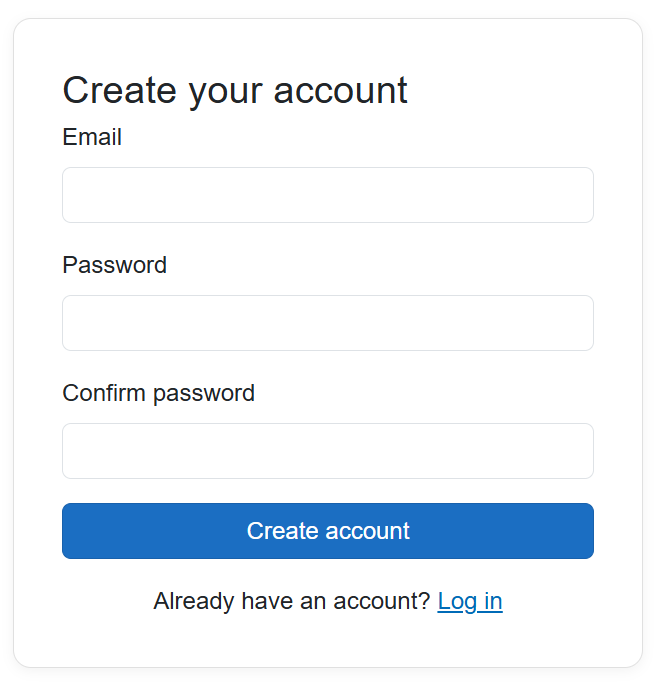
- Open the Create account page.
- Enter your email, a password, and confirm the password, then tap Create account.
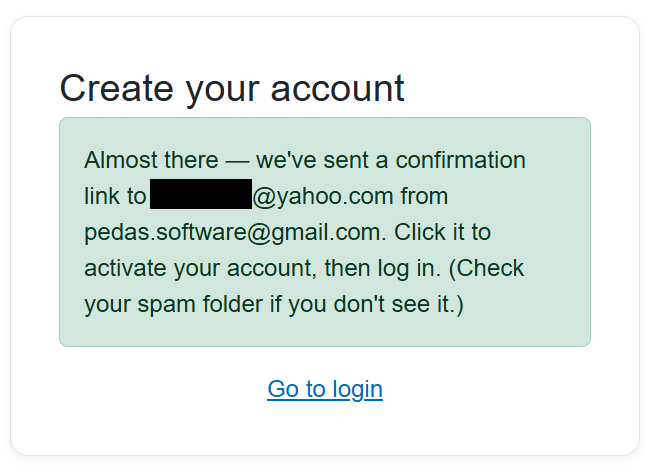
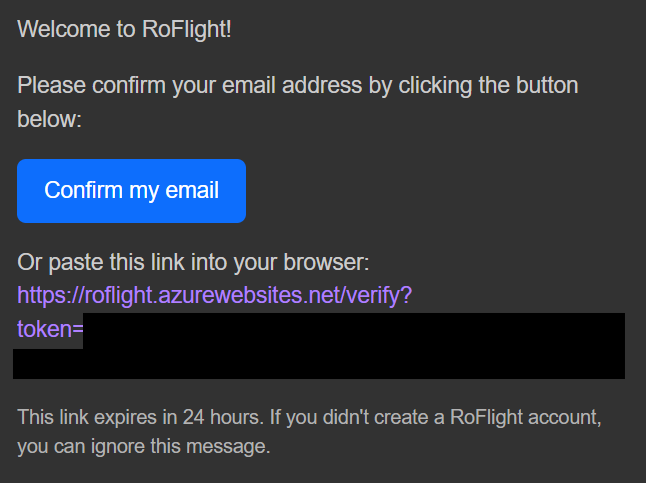
- We email a confirmation link from pedas.software@gmail.com (check your spam folder if it doesn't arrive). Click the link — it opens the email confirmation page and activates your free licence.
- Return to the login page and sign in once to confirm your account works.
Step 2 — Install the app and sign in
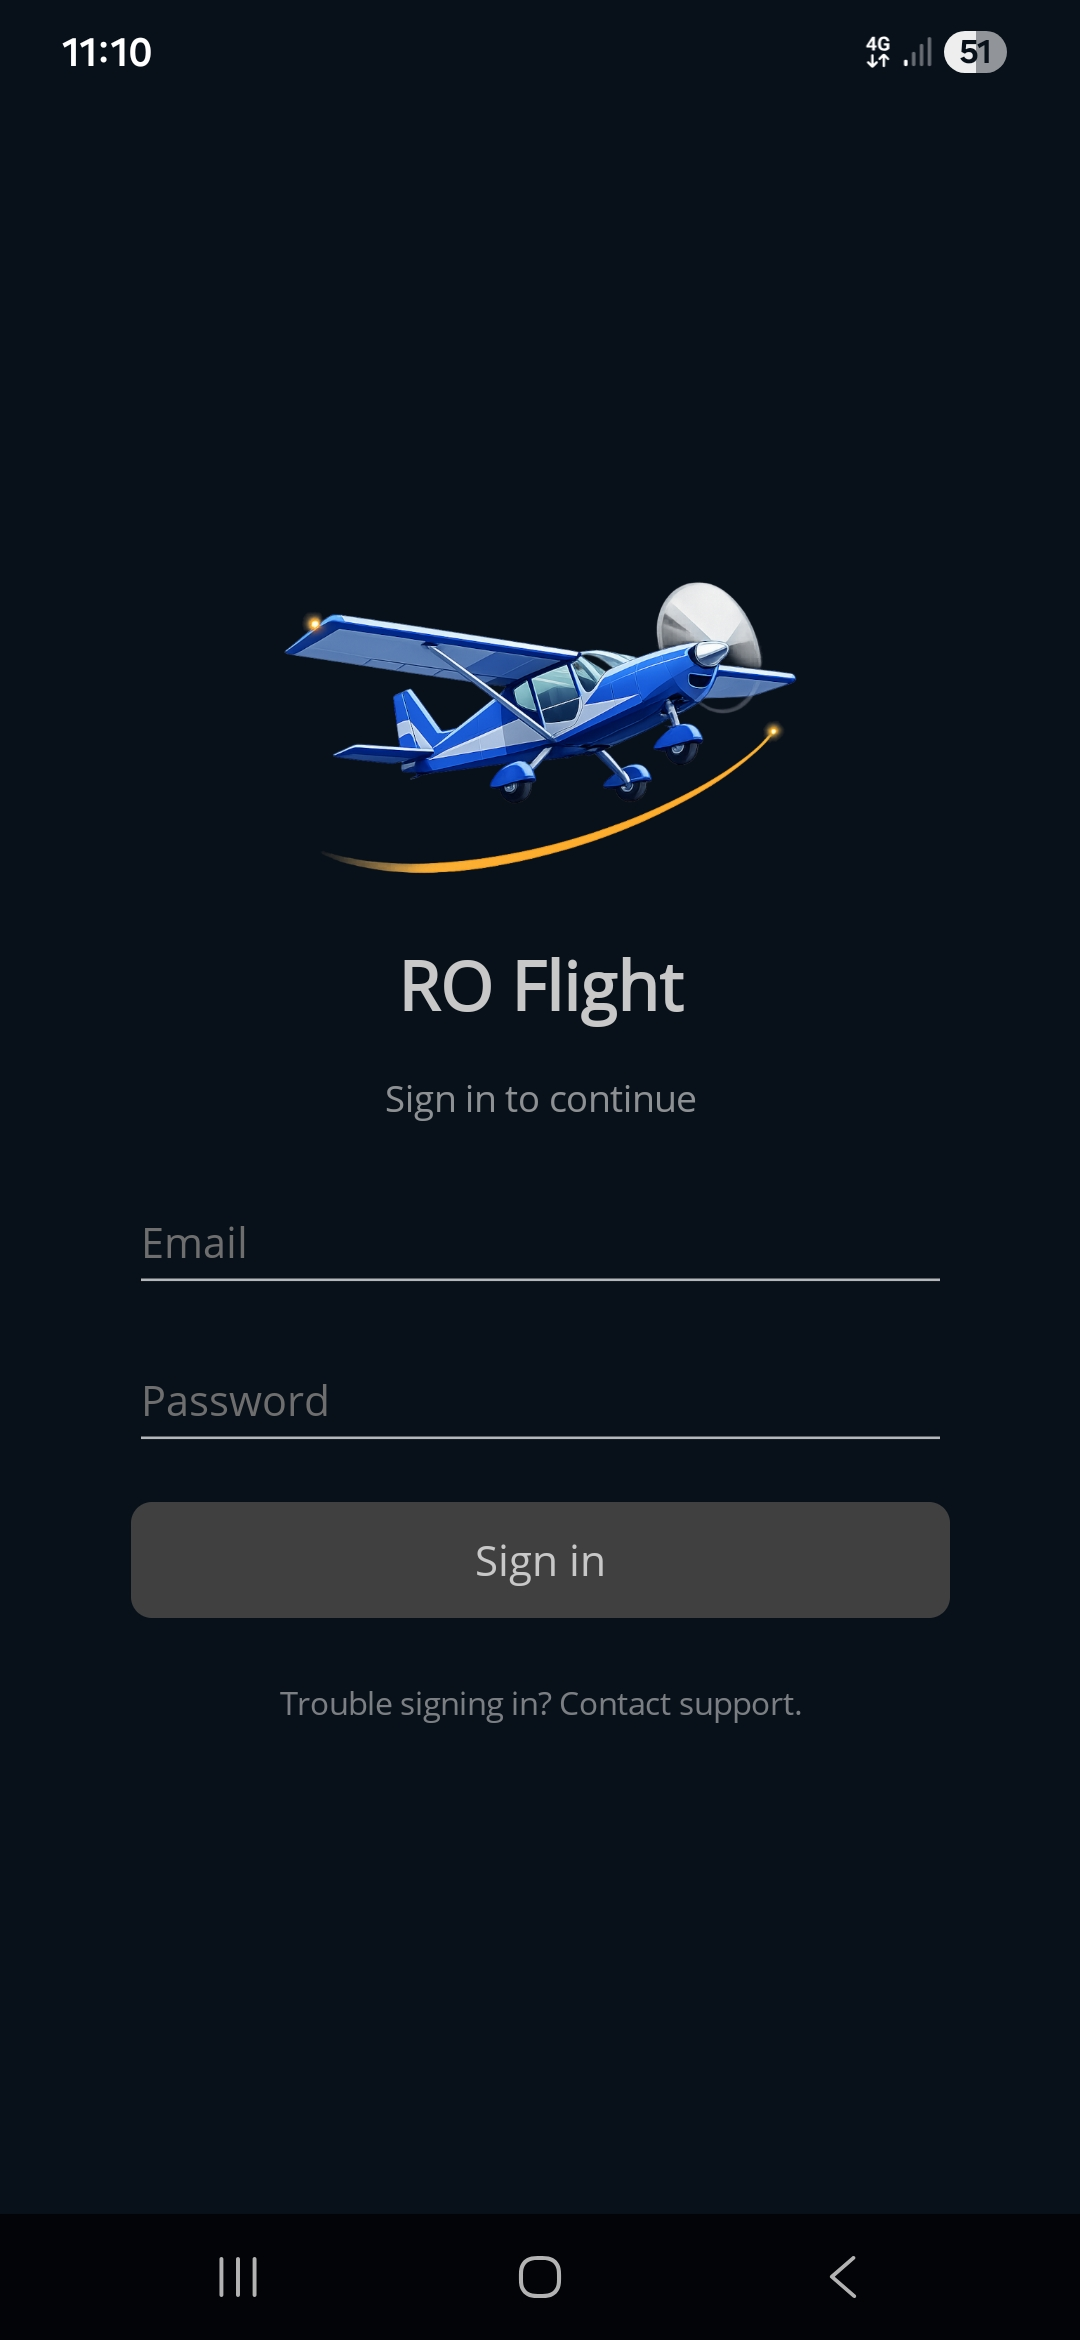
Install Ro Flight on your phone and open it. On the Sign In screen, enter the same email and password you used on the website, then tap Sign in. Once your licence is verified, the app opens to your Flight Plans.
Get it on Google Play Download on the App Store
See the Sign In reference page for details.
Step 3 — Fill in your Pilot Profile and verify your authority login
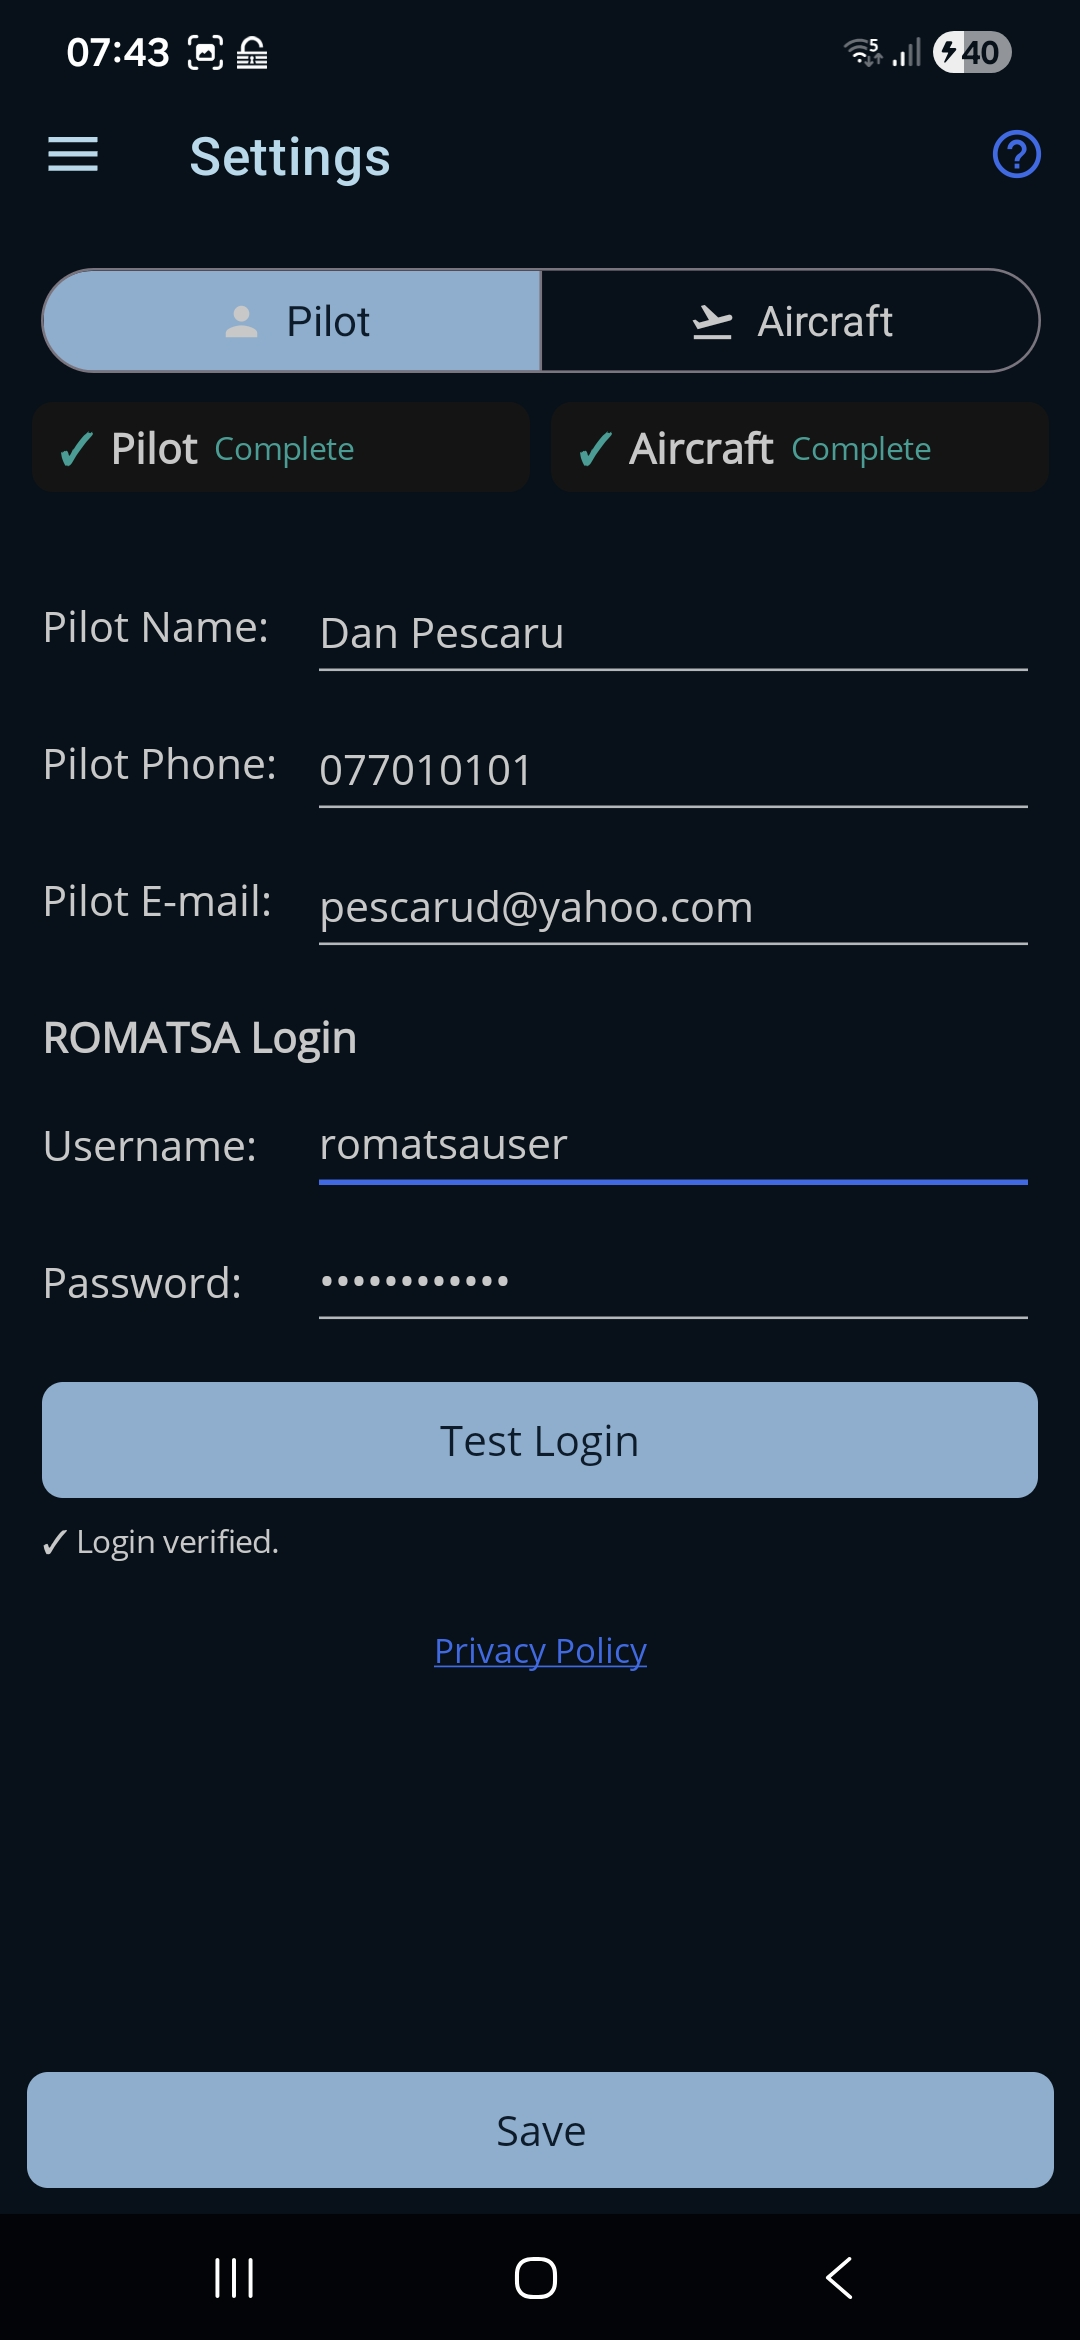
Open Settings → Pilot. This is also where your flight-authority logins live — there are two, and you only need the one you plan to file with.
- Enter your Pilot Name, Pilot Phone, and Pilot E-mail.
- Under ROMATSA Login, enter your ROMATSA Username and Password.
- Tap that section's Test Login and wait for the green ✓. Each authority needs its own Test Login before you can submit to it.
- If you also file Class-G VFR notifications, fill in AACR Login — vfr.caa.ro (e-mail and password) and tap its Test Login too. Skip this if you don't use that channel — the ✓ Complete chip doesn't wait for it.
- Tap Save (one button, and it saves the Aircraft section too).
See the Pilot Profile reference page for details.
Step 4 — Set up your Aircraft Profile
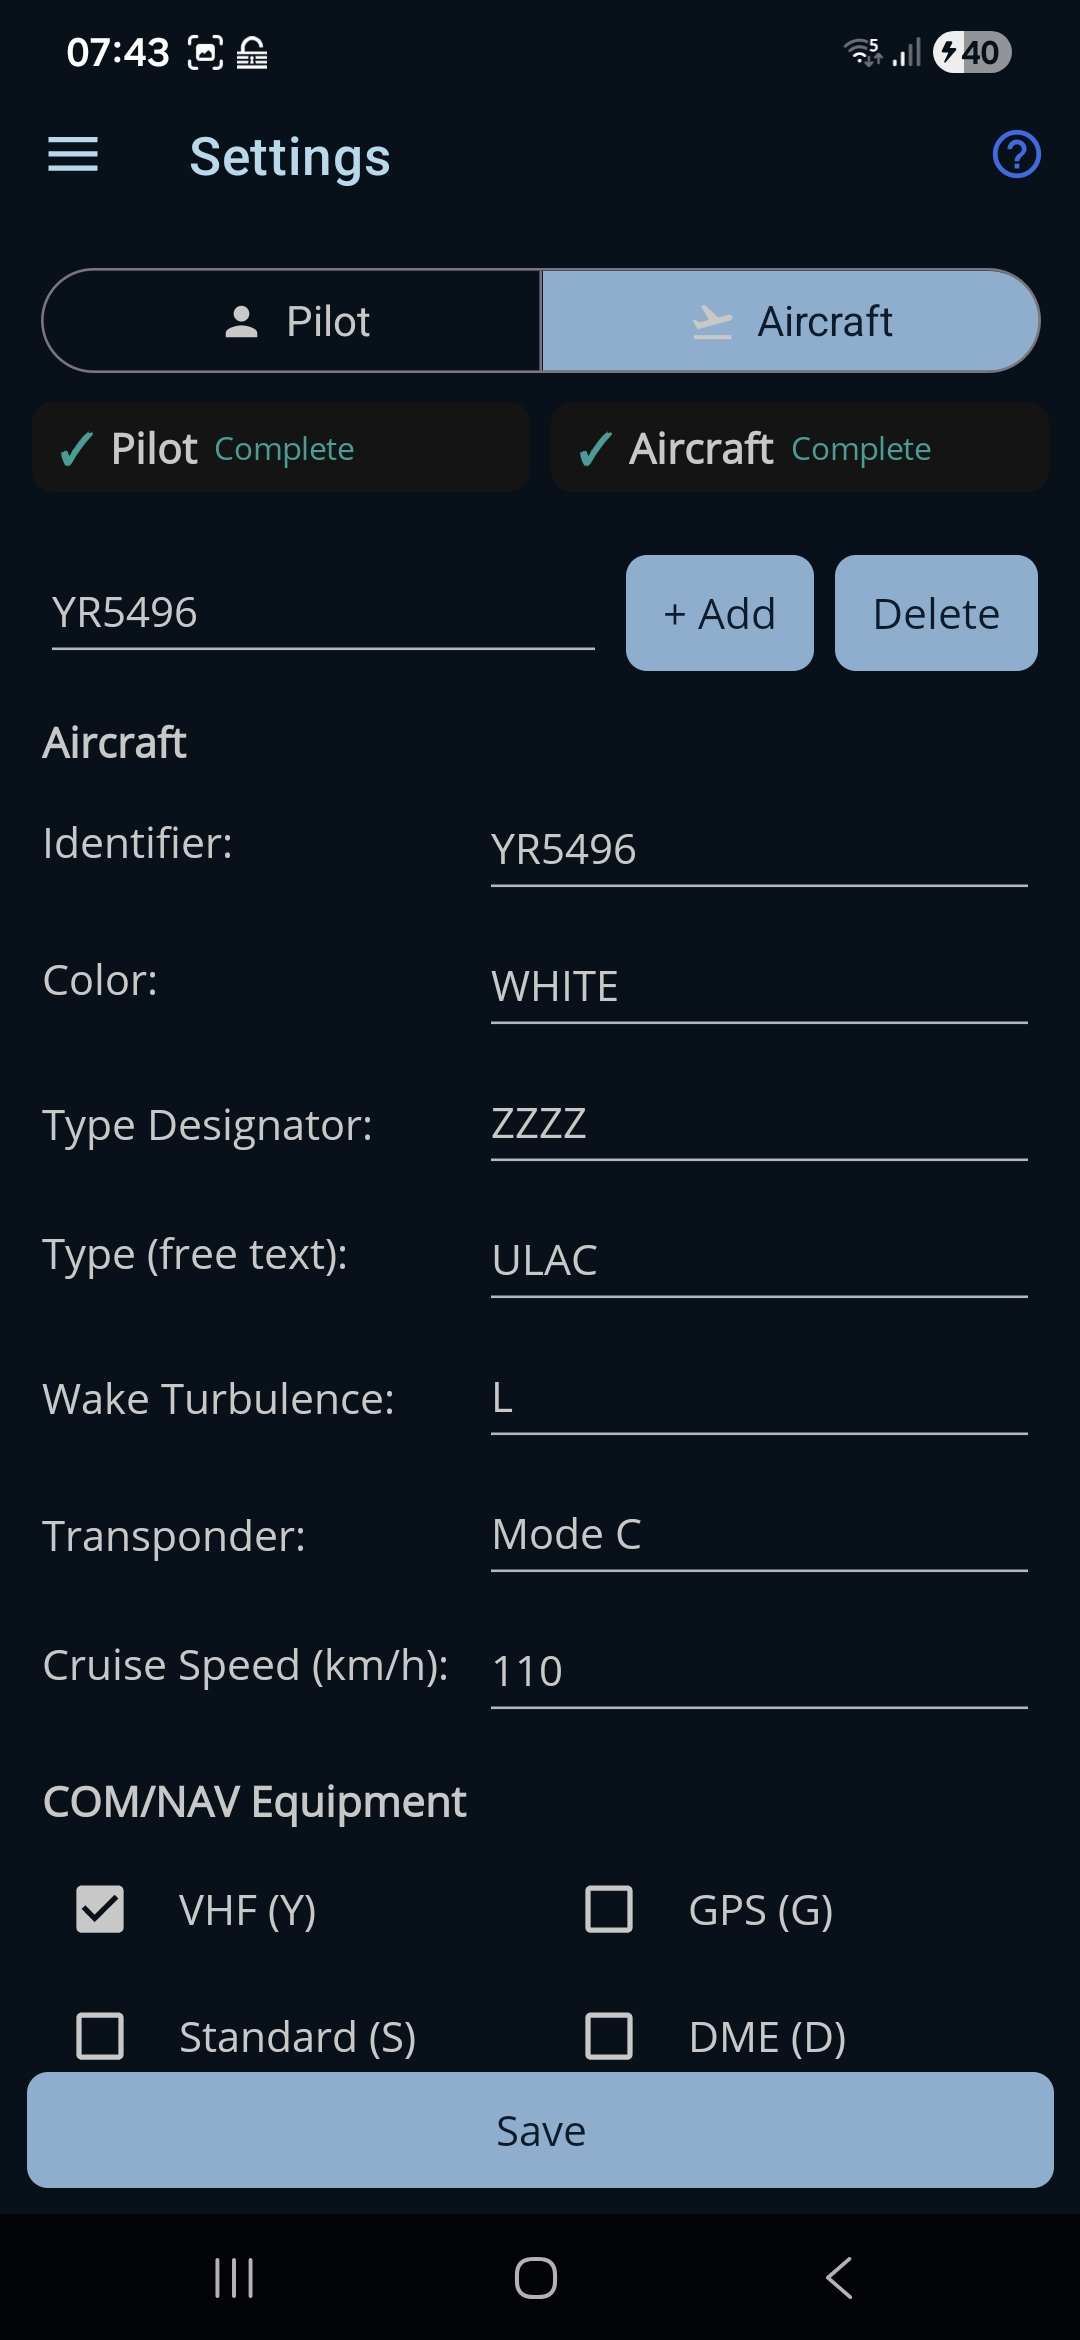
Open Settings → Aircraft Profile. The selected aircraft is used on every flight plan you file.
- Tap + Add to create a profile.
- Fill in the Aircraft Identifier (registration number ex:YR5496), Color, aircraft Type, and Cruise Speed.
- For the Type Designator, enter ZZZZ, then enter ULAC (Ultra Light Aircraft) in Type (free text).
- In the Transponder field, specify the type of transponder you carry.
- Tick the radios and navigation equipment you actually carry under COM/NAV Equipment (at least one is required), plus any emergency/survival gear that applies.
- Tap Save. The aircraft you have selected at the top becomes the active aircraft.
If your aircraft has an ICAO type designator per ICAO Doc 8643, you can enter that as the Type Designator instead of ZZZZ, in which case Type (free text) is not needed. If you carry no transponder, leave the Transponder field set to none.
See the Aircraft Profile reference page for details.
Step 5 — Create the flight plan (Vadeni → Tulcea)
Go to Flight Plans (the home screen) and tap the + button in the bottom-right corner. The flight plan form opens.
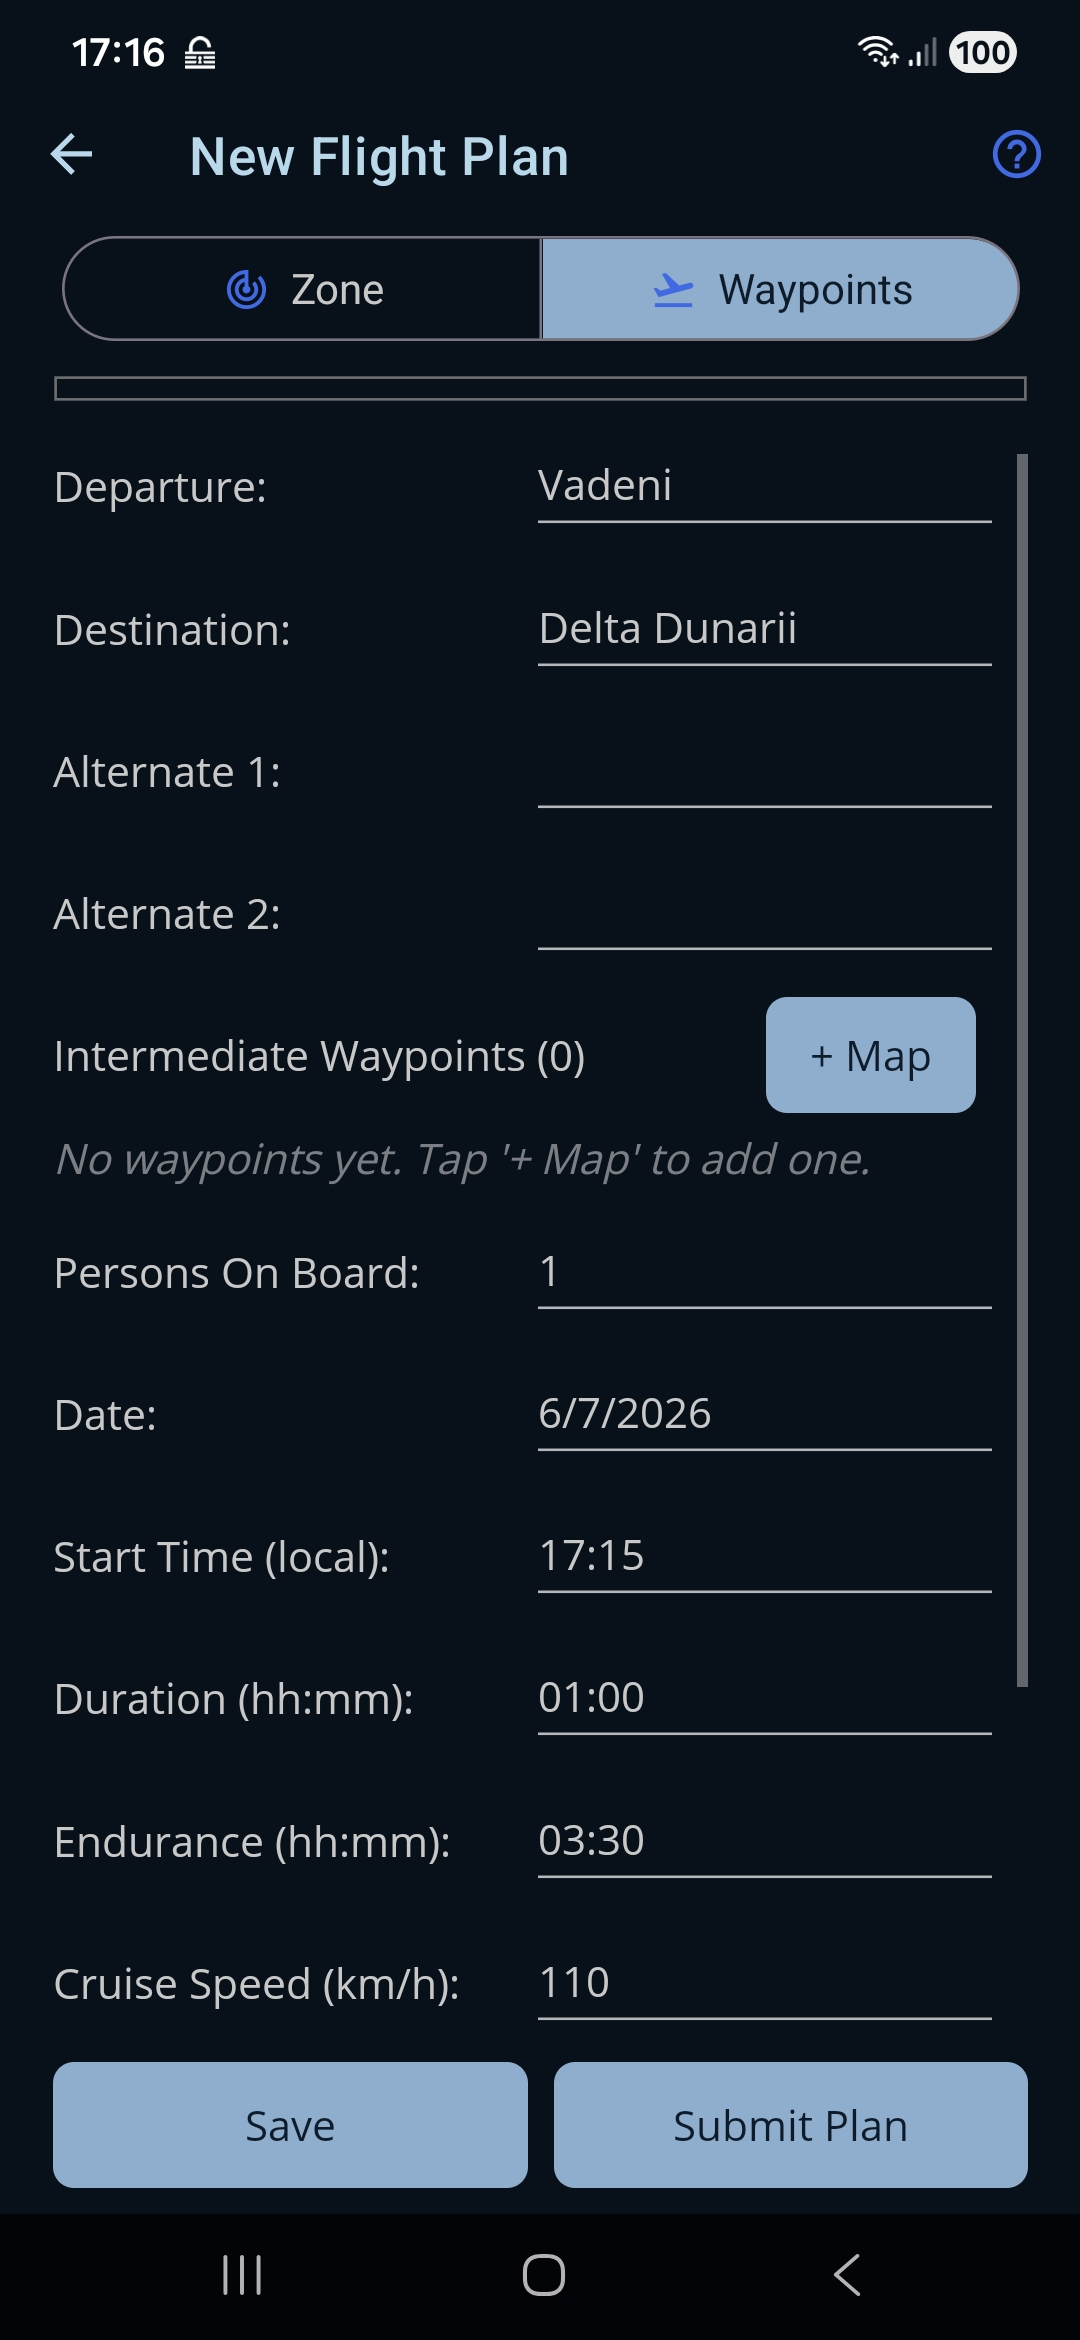
- At the top, choose Waypoint mode.
- Set Departure to Vadeni. For Destination, the aerodrome serving Tulcea is listed under its own name — select Delta Dunării.
- Fill in Persons On Board, the Date, Start Time, planned Duration, fuel Endurance, and Cruise Speed.
- Leave VFR on, and enter the Altitude you plan to fly. The two are separate settings: VFR governs how the level appears on an ICAO flight plan, while the altitude is what a vfr.caa.ro notification requires — so filling it in costs nothing and keeps both channels open to you.
If an aerodrome isn't in the list, pick Choose On Map and you'll place it on the map. Turning VFR off files a specific level on the ICAO flight plan instead, and lets each waypoint carry its own level and speed.
Flying as a formation? Turn on Formation flight and set how many aircraft there are and their types — see the Flight Plan Form page.
See the Flight Plan Form reference page for every field.
Step 6 — Add the two intermediate waypoints on the map
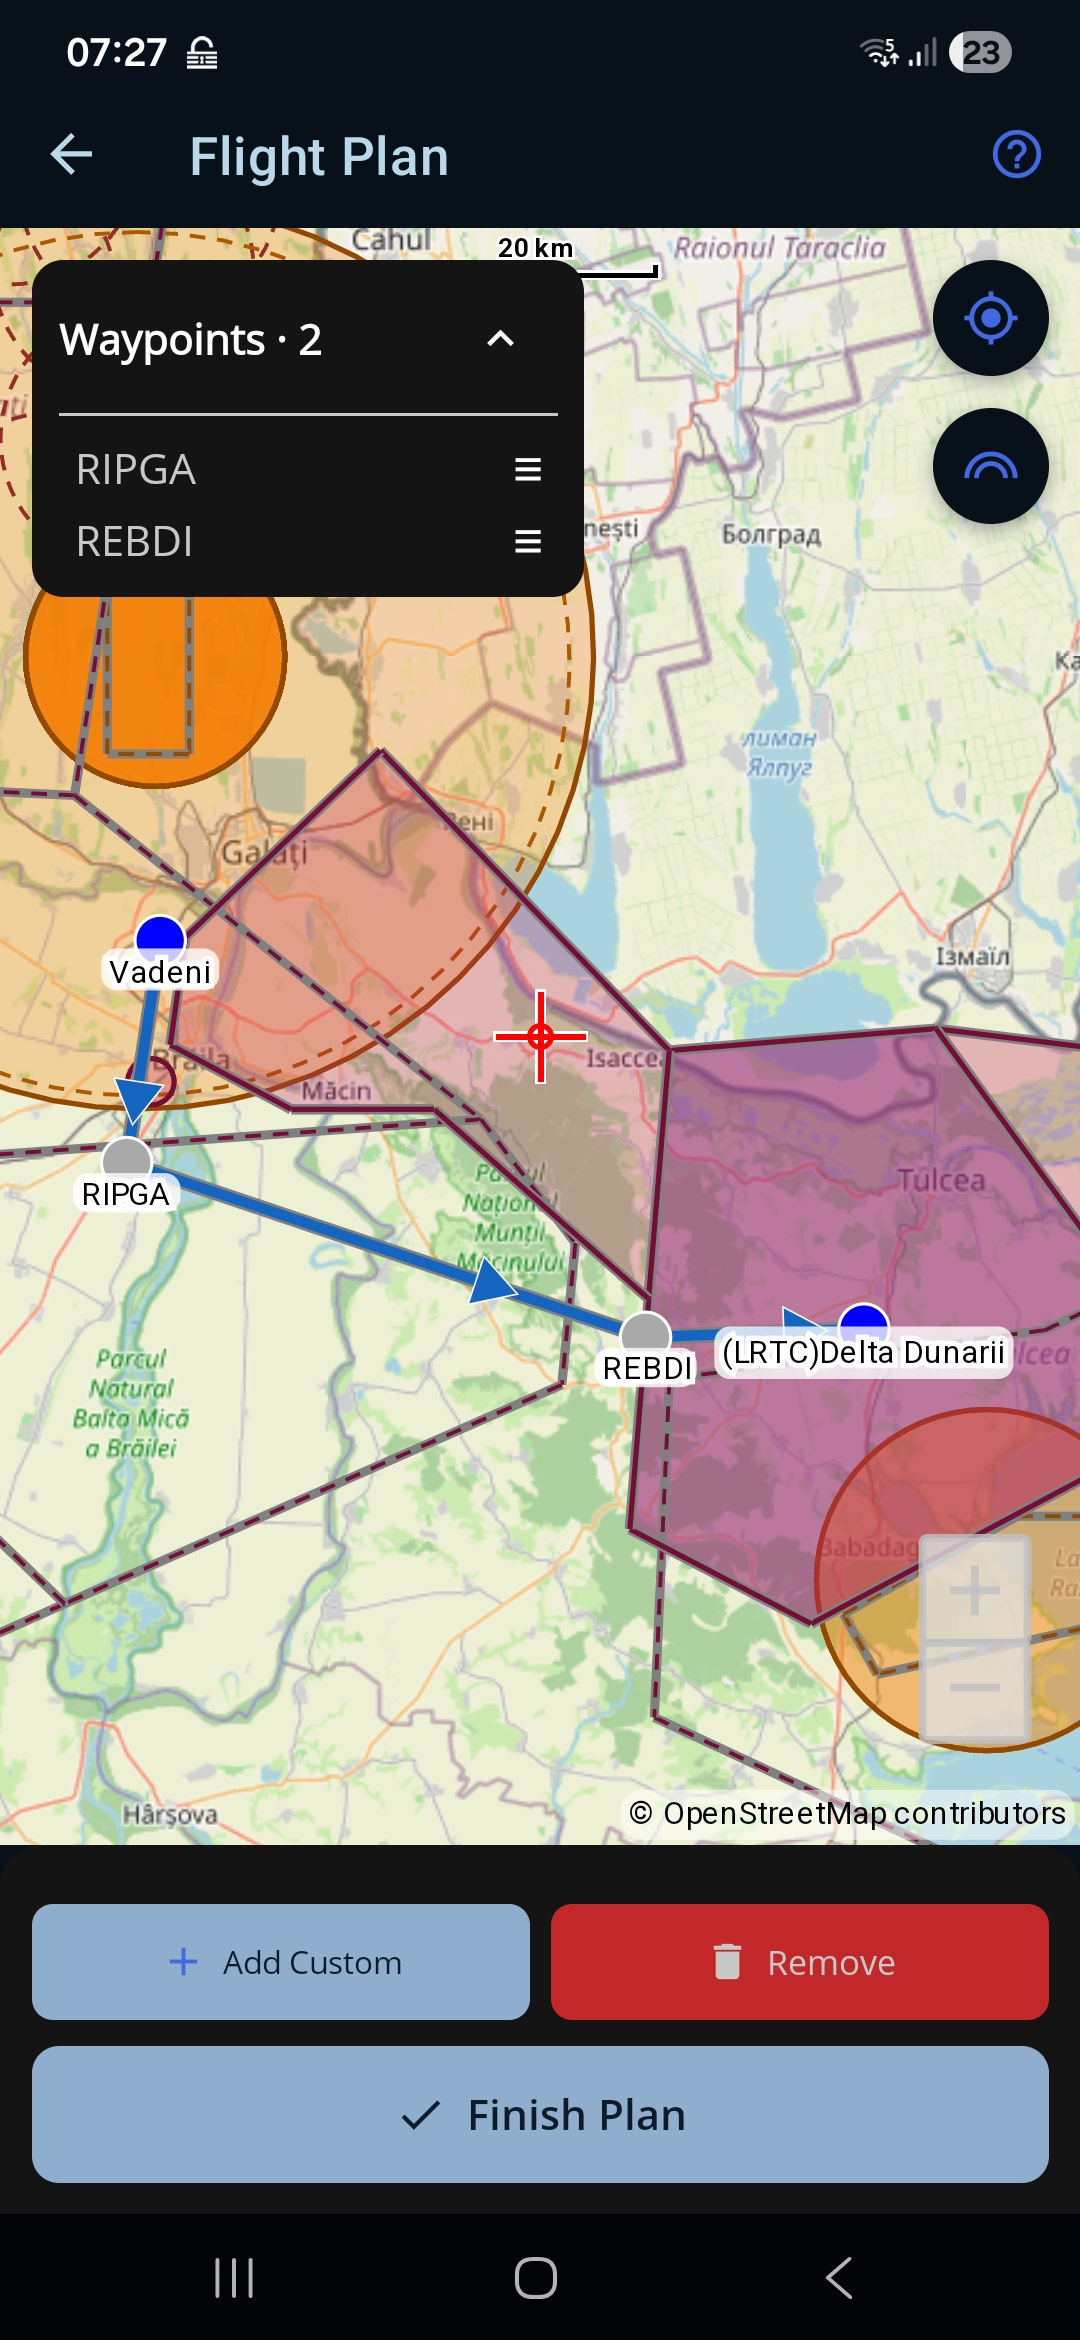
In the Intermediate Waypoints section, tap + Map. This opens the map route builder (not a dialog), where you place the waypoints of your route. For this flight you'll add the two named waypoints RIPGA and REBDI.
- Tap the RIPGA waypoint on the map to select it, then tap Add Waypoint.
- Tap the REBDI waypoint on the map to select it, then tap Add Waypoint.
- Tap Finish Plan to return to the form with the two waypoints filled in.
Both waypoints now show in the top-left list, in the order you added them. If you need to fix a mistake, drag the handle (≡) to reorder them, or tap Remove to delete the last one you added and try again.
To drop a waypoint somewhere that isn't a named point, make sure no waypoint is selected (tap an empty spot on the map to deselect), aim the centre crosshair where you want it, and tap Add Custom instead of Add Waypoint.
Back on the form, the two waypoints now appear in the list, in the order you'll fly them. You can Edit or Remove any of them before submitting.
Step 7 — Save and submit the plan
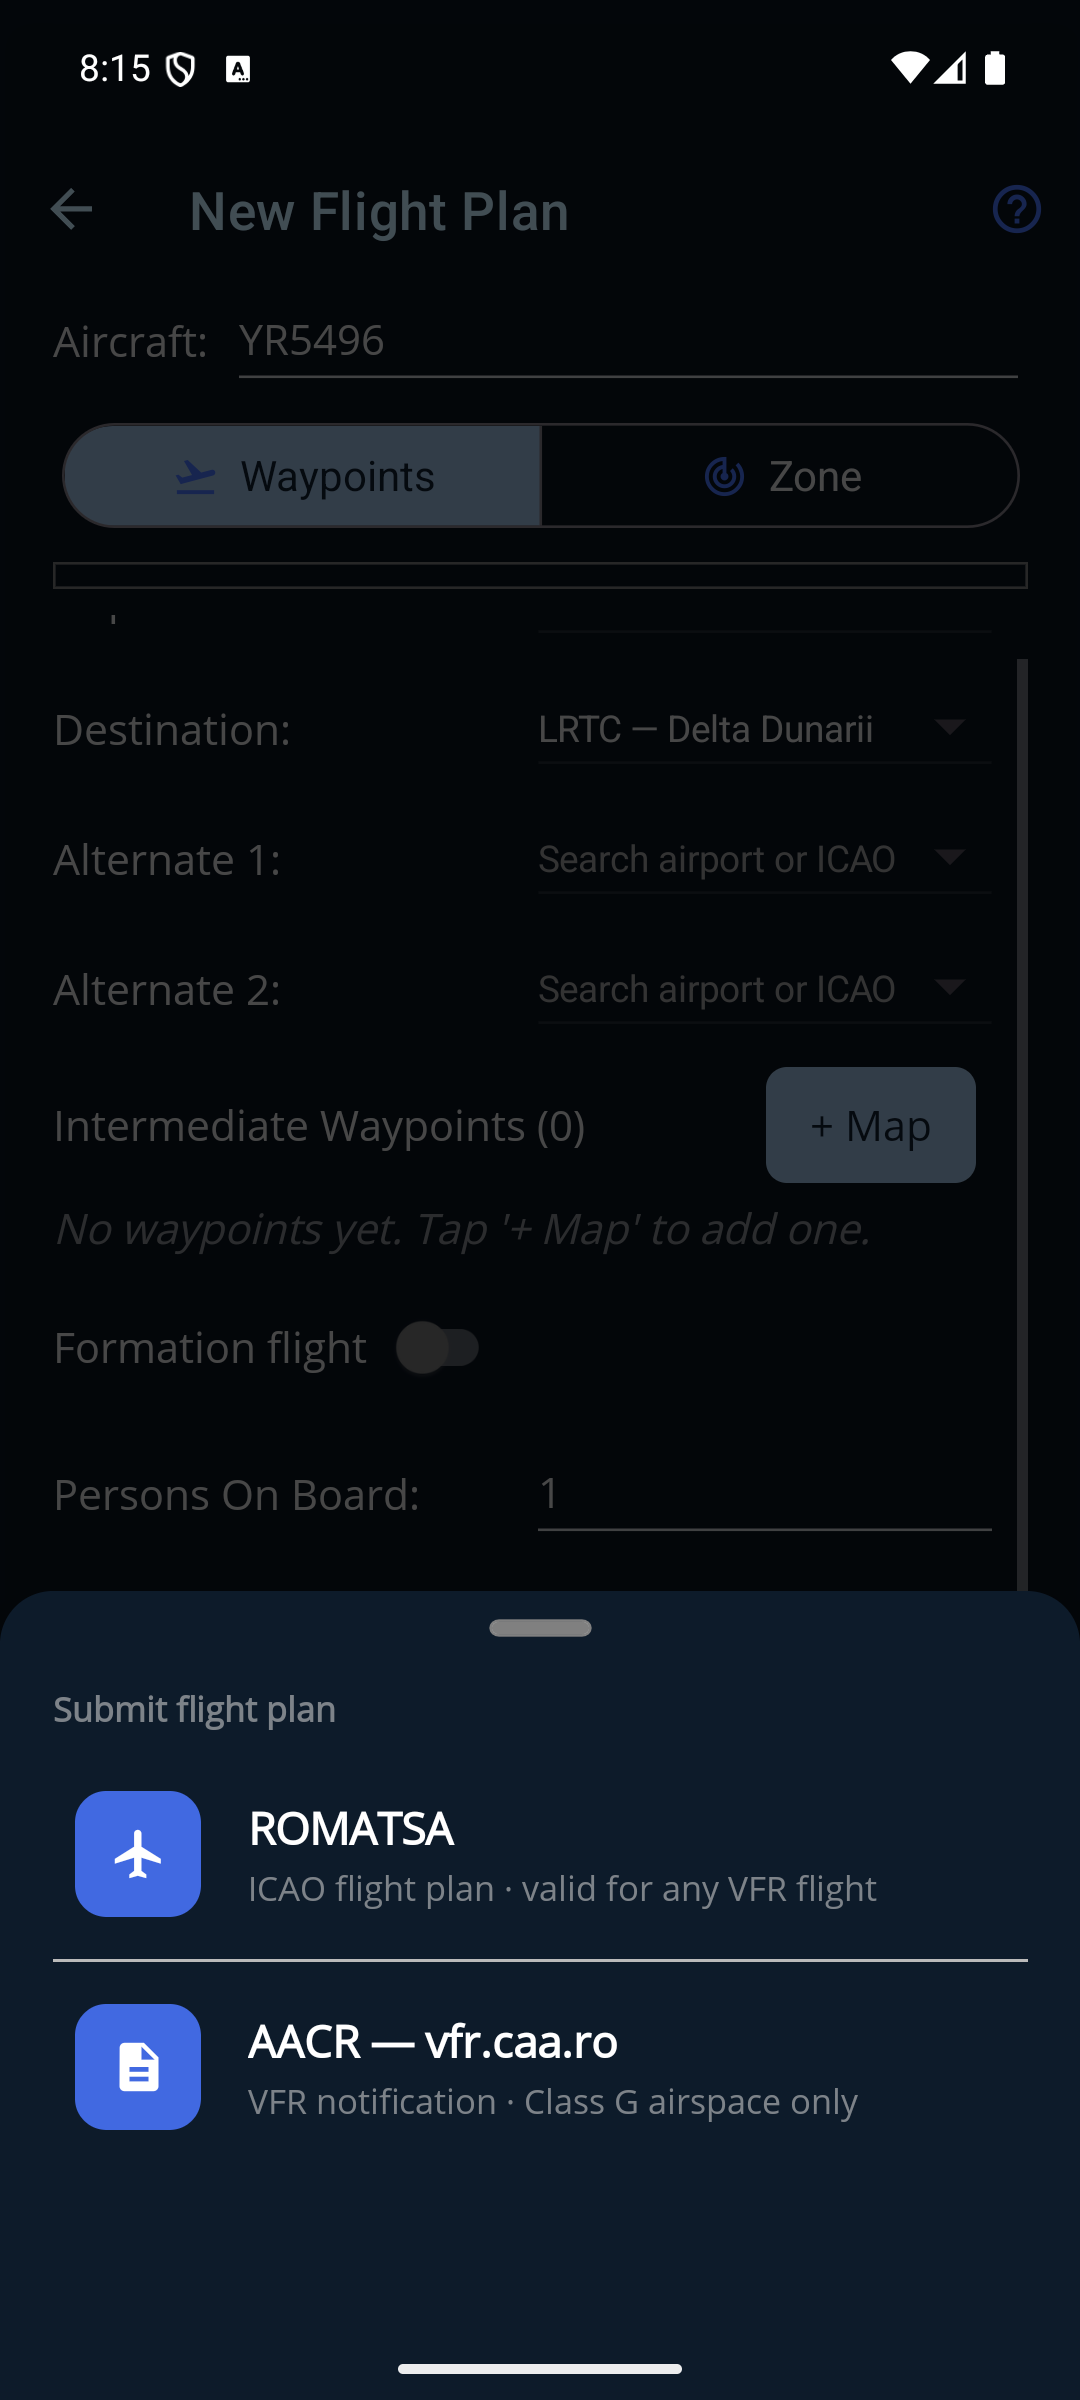
When the form is complete, tap Submit Plan at the bottom. A “Submit flight plan” sheet slides up asking where to file:
- Pick ROMATSA for an ICAO flight plan, valid for any VFR flight — that's what this walkthrough uses. Pick AACR — vfr.caa.ro only if the whole flight stays in Class G airspace.
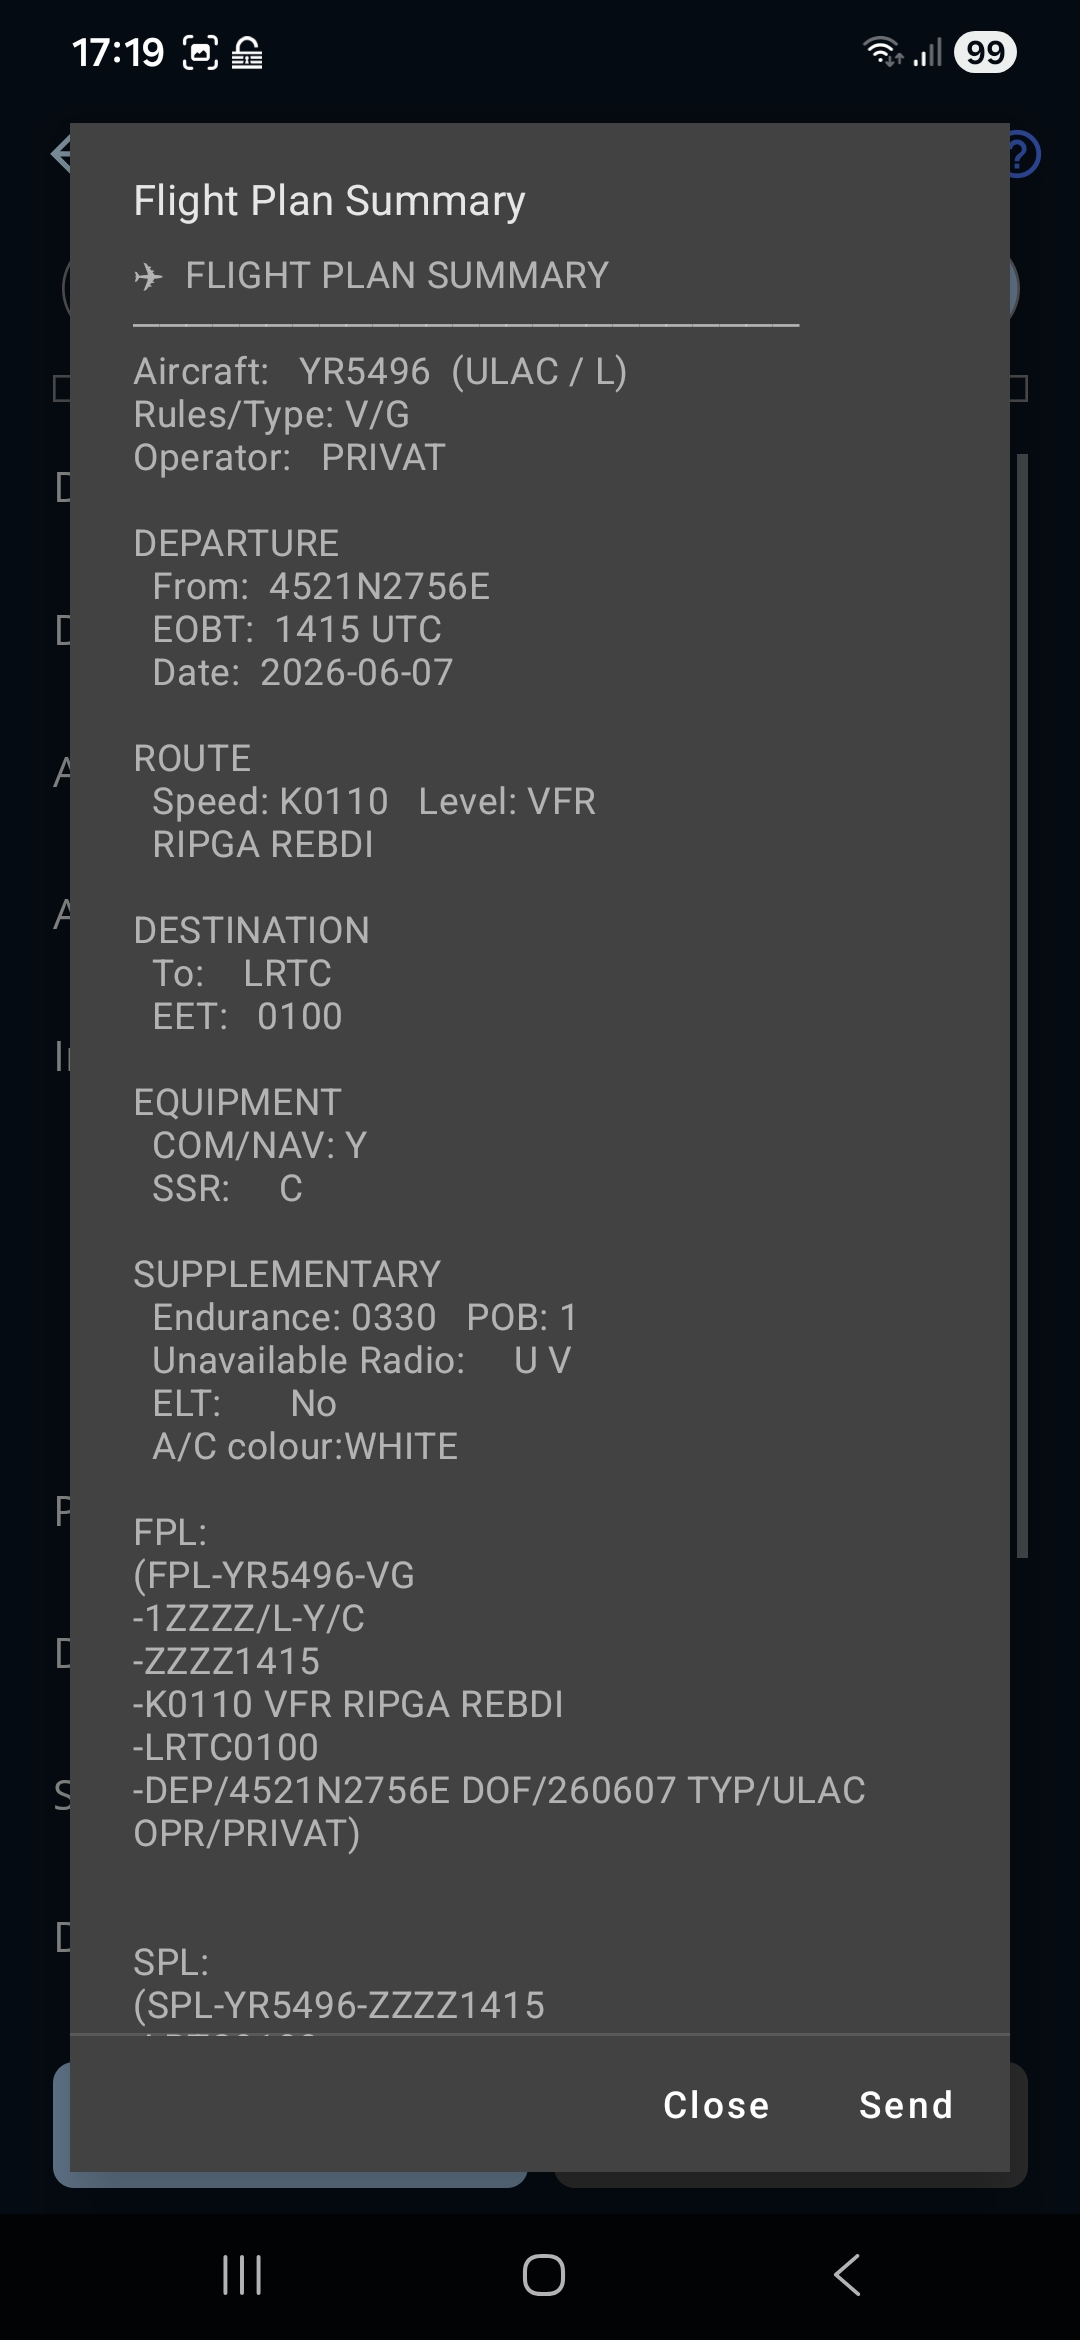
- Review the summary that authority shows you and tap Send.
- Read the notice that comes back. ✓ CONFIRMED BY … means the app found the plan on the authority's own system; anything else means you should confirm it yourself before you fly. ROMATSA always asks you to confirm, because it publishes no status the app can read.
On success the plan's status changes to Submitted.
Not ready to file yet? Tap Save instead to keep the plan as a draft you can come back to later.
A channel you haven't run Test Login for is dimmed on the sheet and says so — go back to Step 3 to set it up.
If you used Choose On Map for any aerodrome and haven't placed it yet, this button first reads Go To Map — position the point, tap Finish Plan, and it becomes Submit Plan.
See the Flight Plan Form and Flight Plan Detail reference pages for details.
Step 8 — Fly it with Go Fly
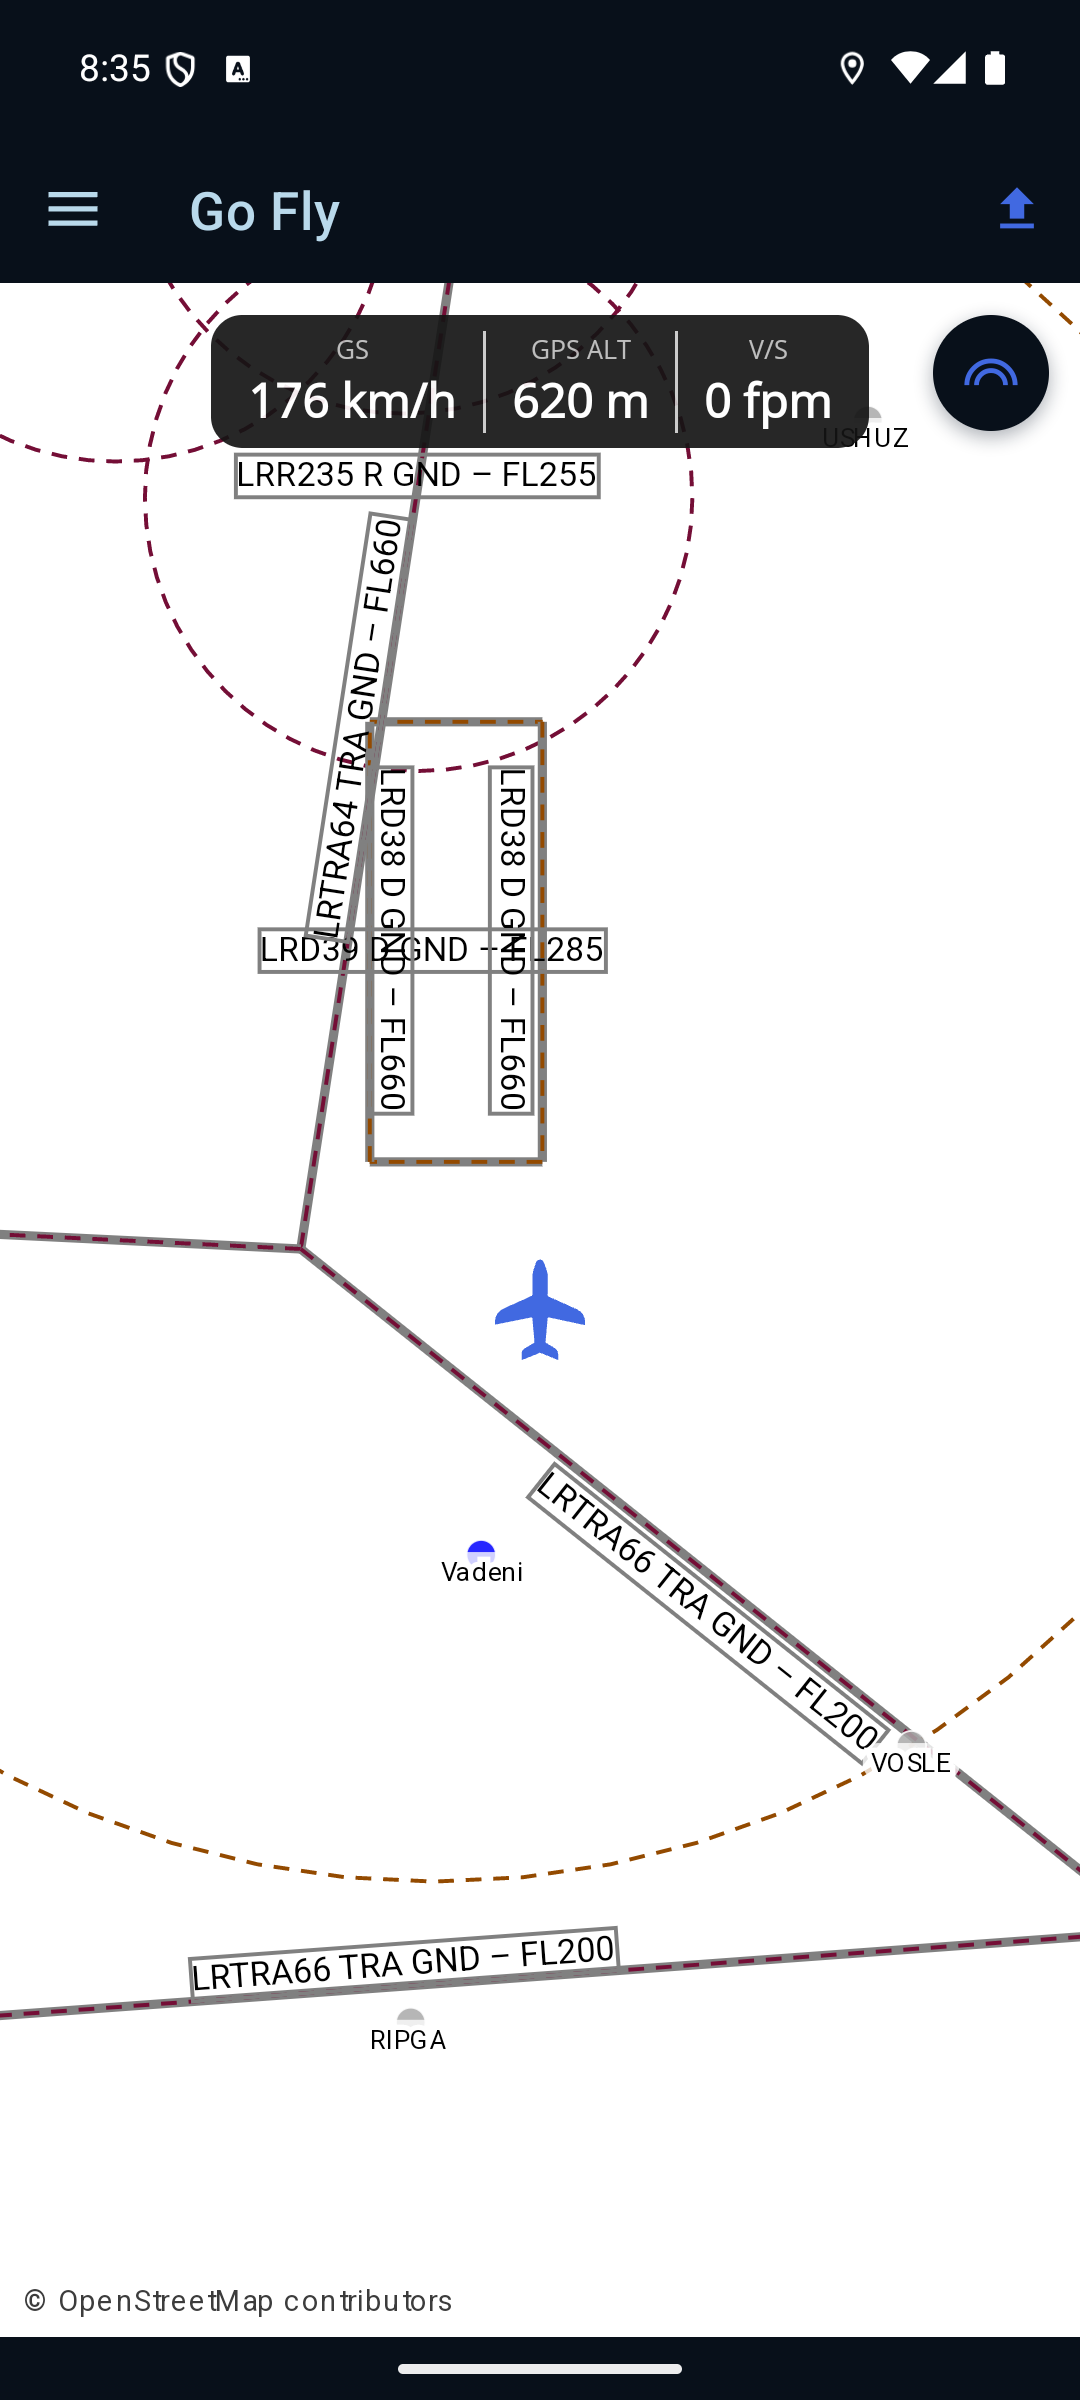
Open Go Fly from the flyout menu — or tap the Go Fly button at the top of the plan's detail page — to follow the flight on the moving map. Your aircraft appears as a symbol pointing the way you're travelling, the map follows you, and the strip along the top reads out GS (ground speed), GPS ALT and V/S (climb or descent rate) in your chosen units.
The first time, allow location while using the app. The GPS runs only while this screen is open and the display is kept awake, so expect the battery to go down faster than usual. GPS ALT is a GNSS height, not an altimeter reading — fly the aircraft on your certified instruments and use the map for awareness.
See the Go Fly reference page for details.
Step 9 — After you land, confirm the landing
Do this step only after the flight is over and you are back on the ground. A landing confirmation tells the authority you filed with that the flight is complete. It goes back to that authority automatically — there is nothing to pick.
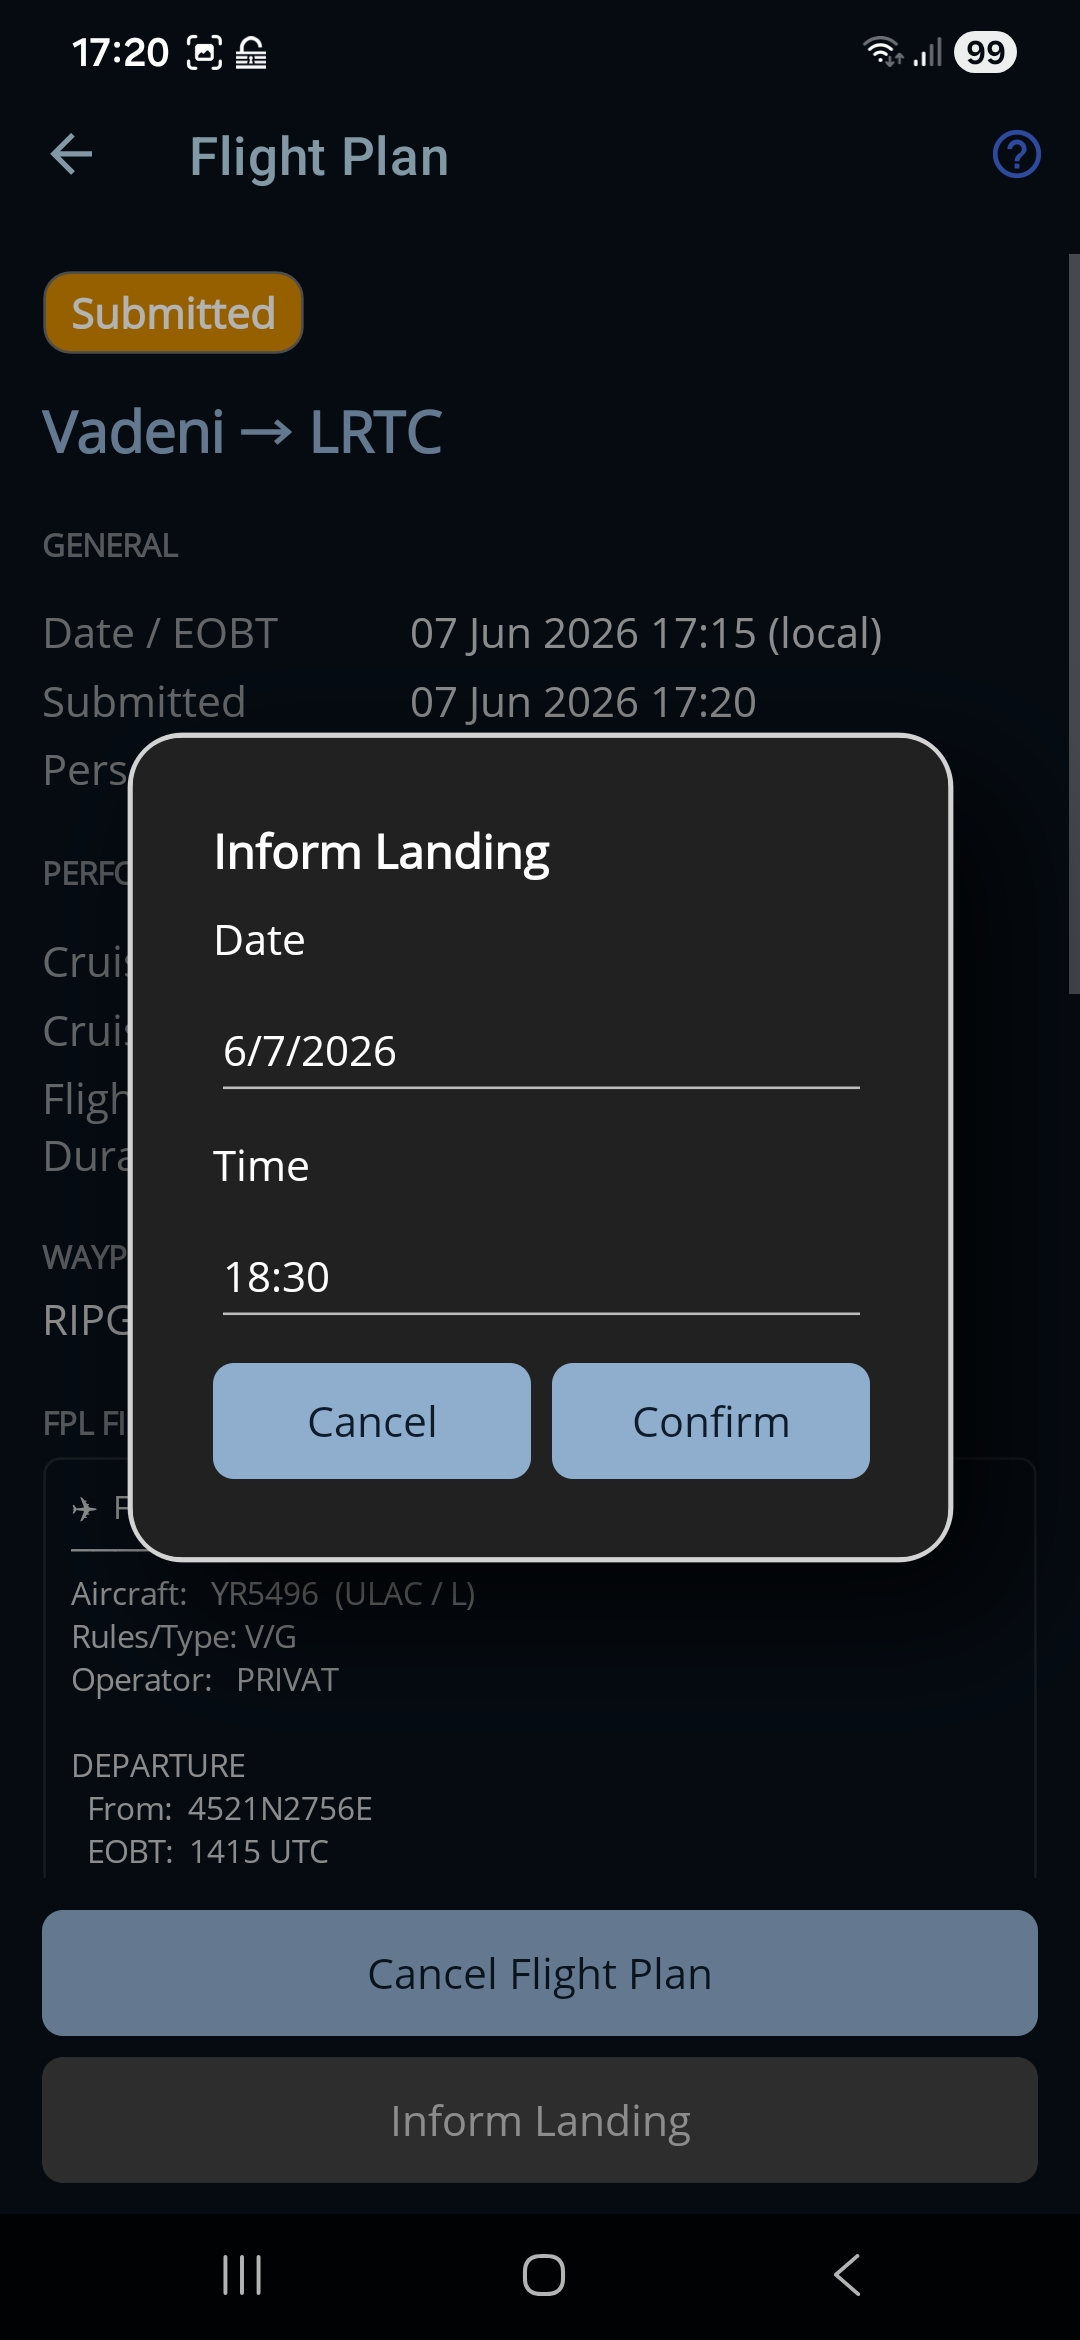
- Open the plan from the Flight Plans list to reach its detail page, then tap Inform Landing.
- Enter the actual landing date and time, then tap Confirm.
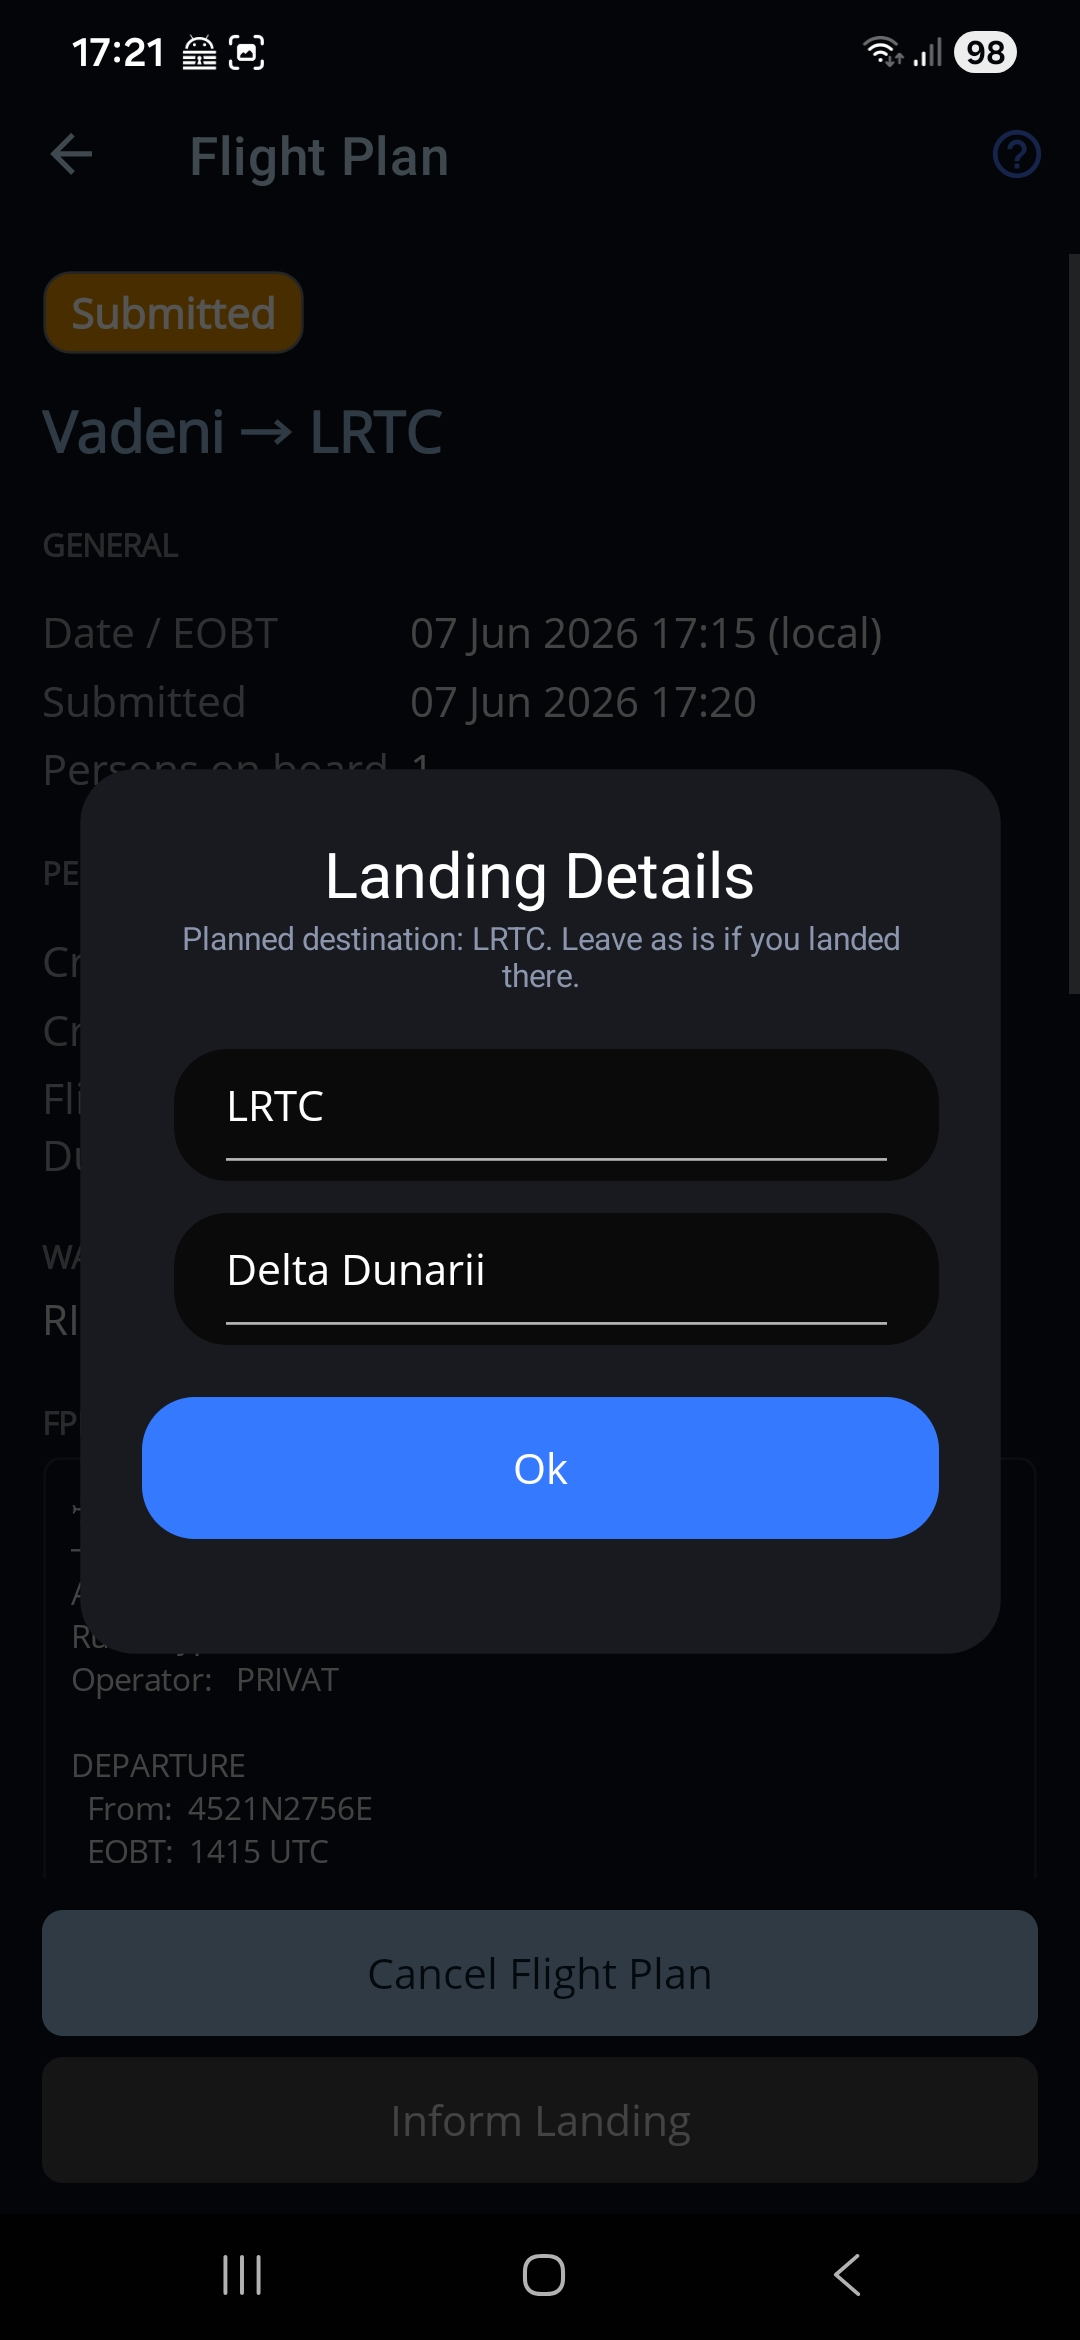
- The Landing Details dialog shows your planned destination (Delta Dunării / LRTC). Leave it as it is and tap Ok.
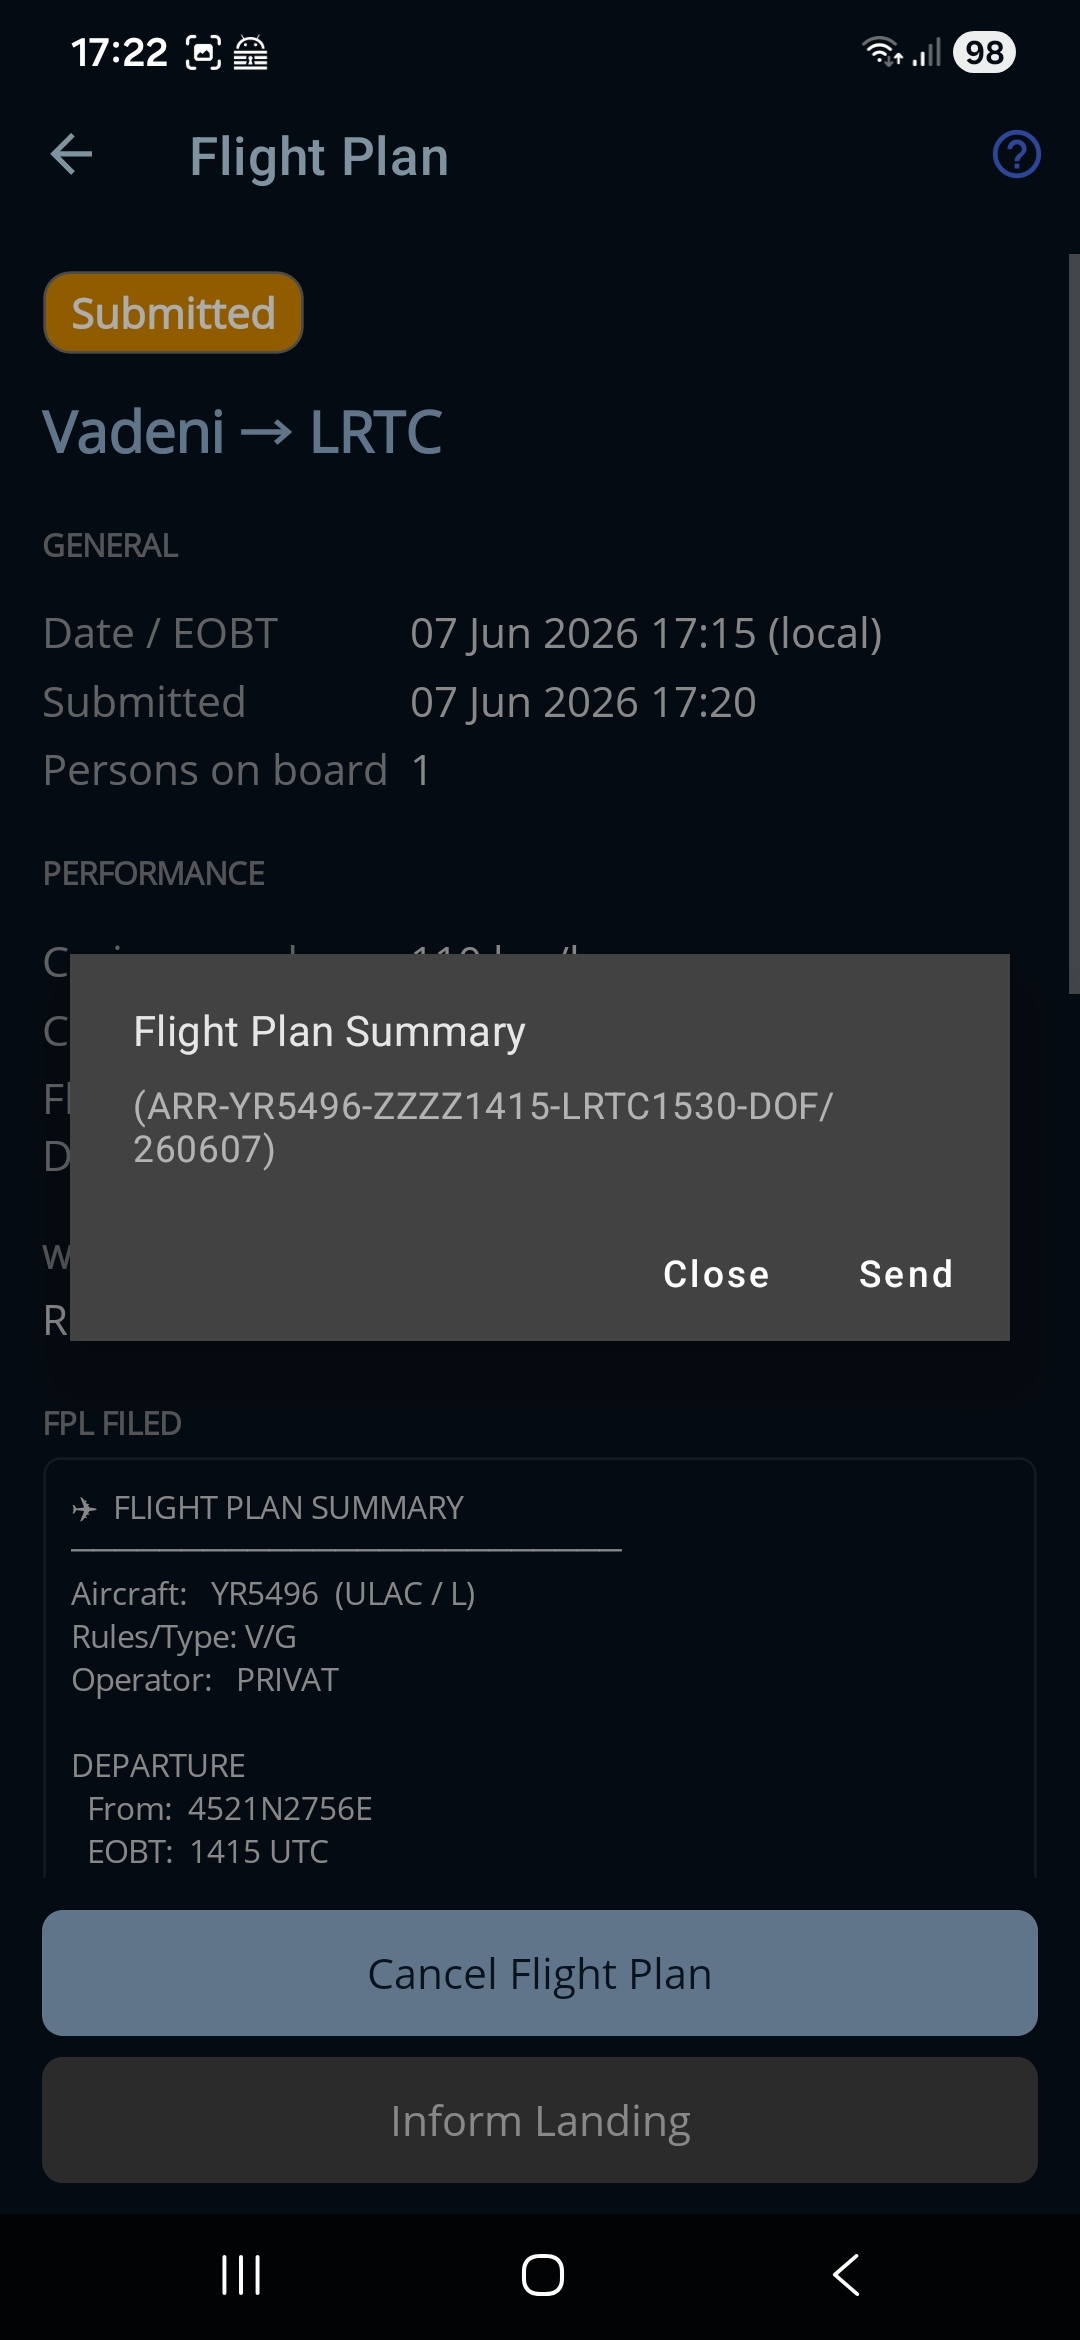
- Review the assembled ARR (arrival) message and tap Send. The plan's status changes to Landed.
On a plan filed with AACR the Landing Details dialog is skipped — a vfr.caa.ro landing report carries no aerodrome — so it is two dialogs instead of three.
Inform Landing only appears once the planned off-block time has passed: a flight that hasn't departed hasn't landed.
If the flight never departs, open the same detail page and tap Cancel Flight Plan instead — that cancels it with the authority you filed with (a CNL message to ROMATSA, or a cancellation on vfr.caa.ro) and marks the plan Cancelled.
See the Flight Plan Detail reference page for details.
What next
That's the full cycle. For a deeper look at any single screen — every field, button, and option — browse the per-screen pages from the manual home.